Tormented Souls 2 brings back classic survival horror puzzle-solving and along with it a lot of head-scratching moments. If you’ve found yourself stuck on one of the game’s many puzzles, this complete guide will help you through every step. Below you’ll find all puzzle solutions in Tormented Souls 2, including the required items, where to find them, and screenshots showing each puzzle.
Need extra help or want to share your own discoveries? Join our Discord community, where players share hints, theories, and screenshots in real time.
Also if you would like a video walkthrough that is time stamped for every puzzle please check our the series below.

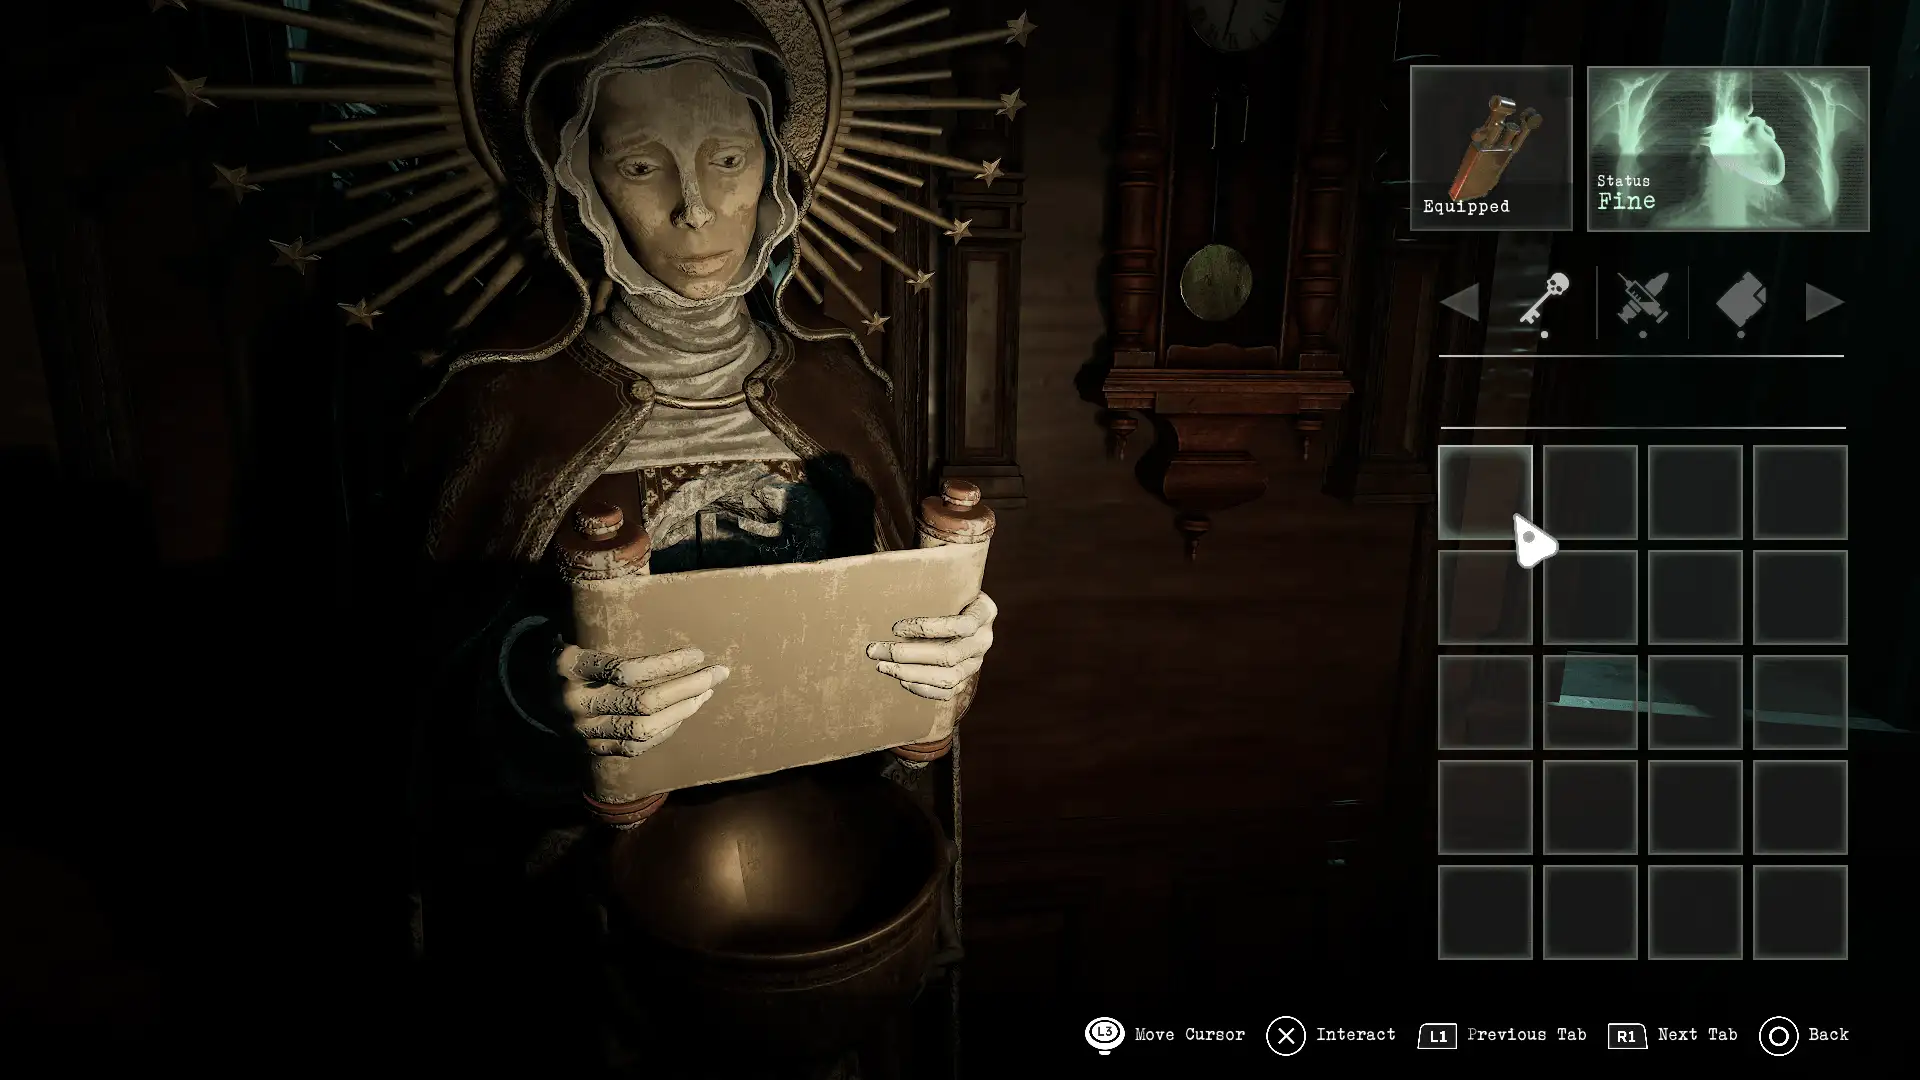
Flower lock
Location: Convent – Infirmary
Items needed: Christ book, Thumbtack
Solution: Combine the thumb tack with the Christ book
Notes: The thumb tack can be found on the cork board, the Christ book is found next to the stretcher nearest the lock
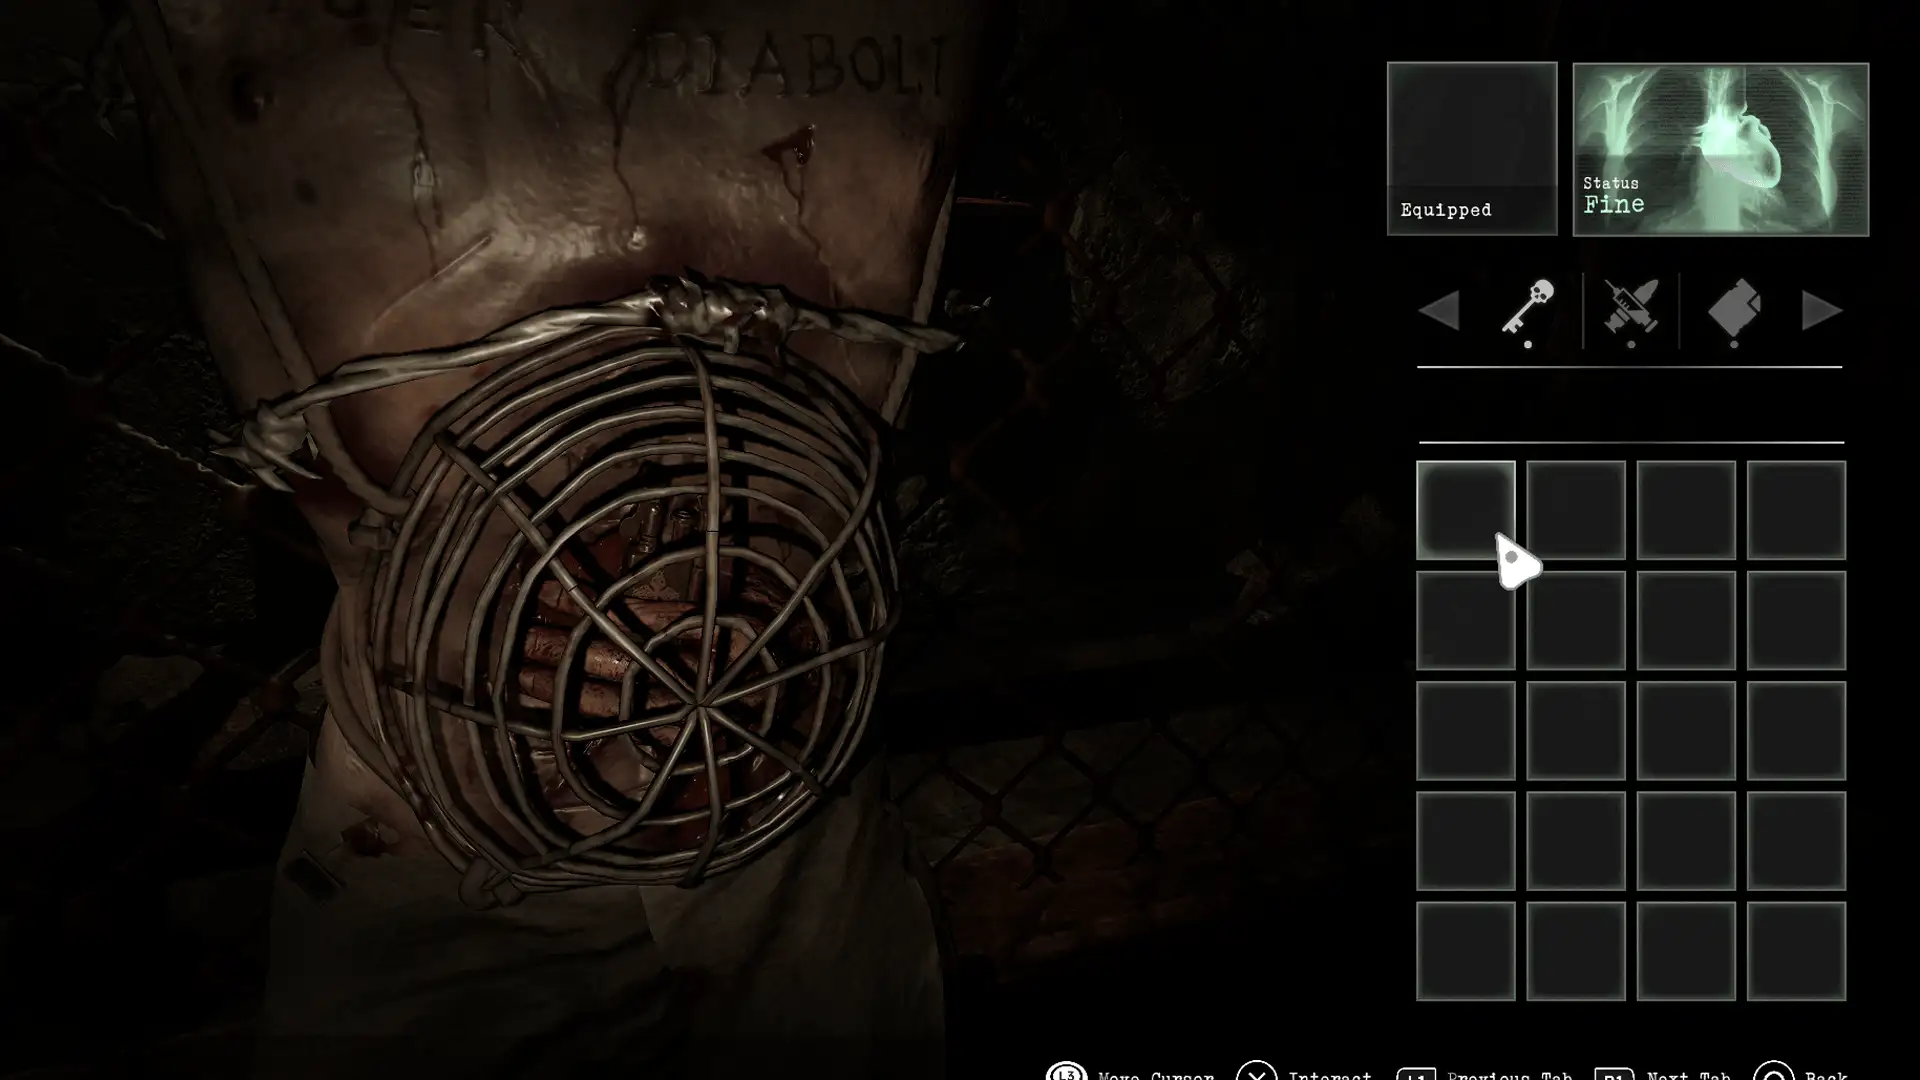
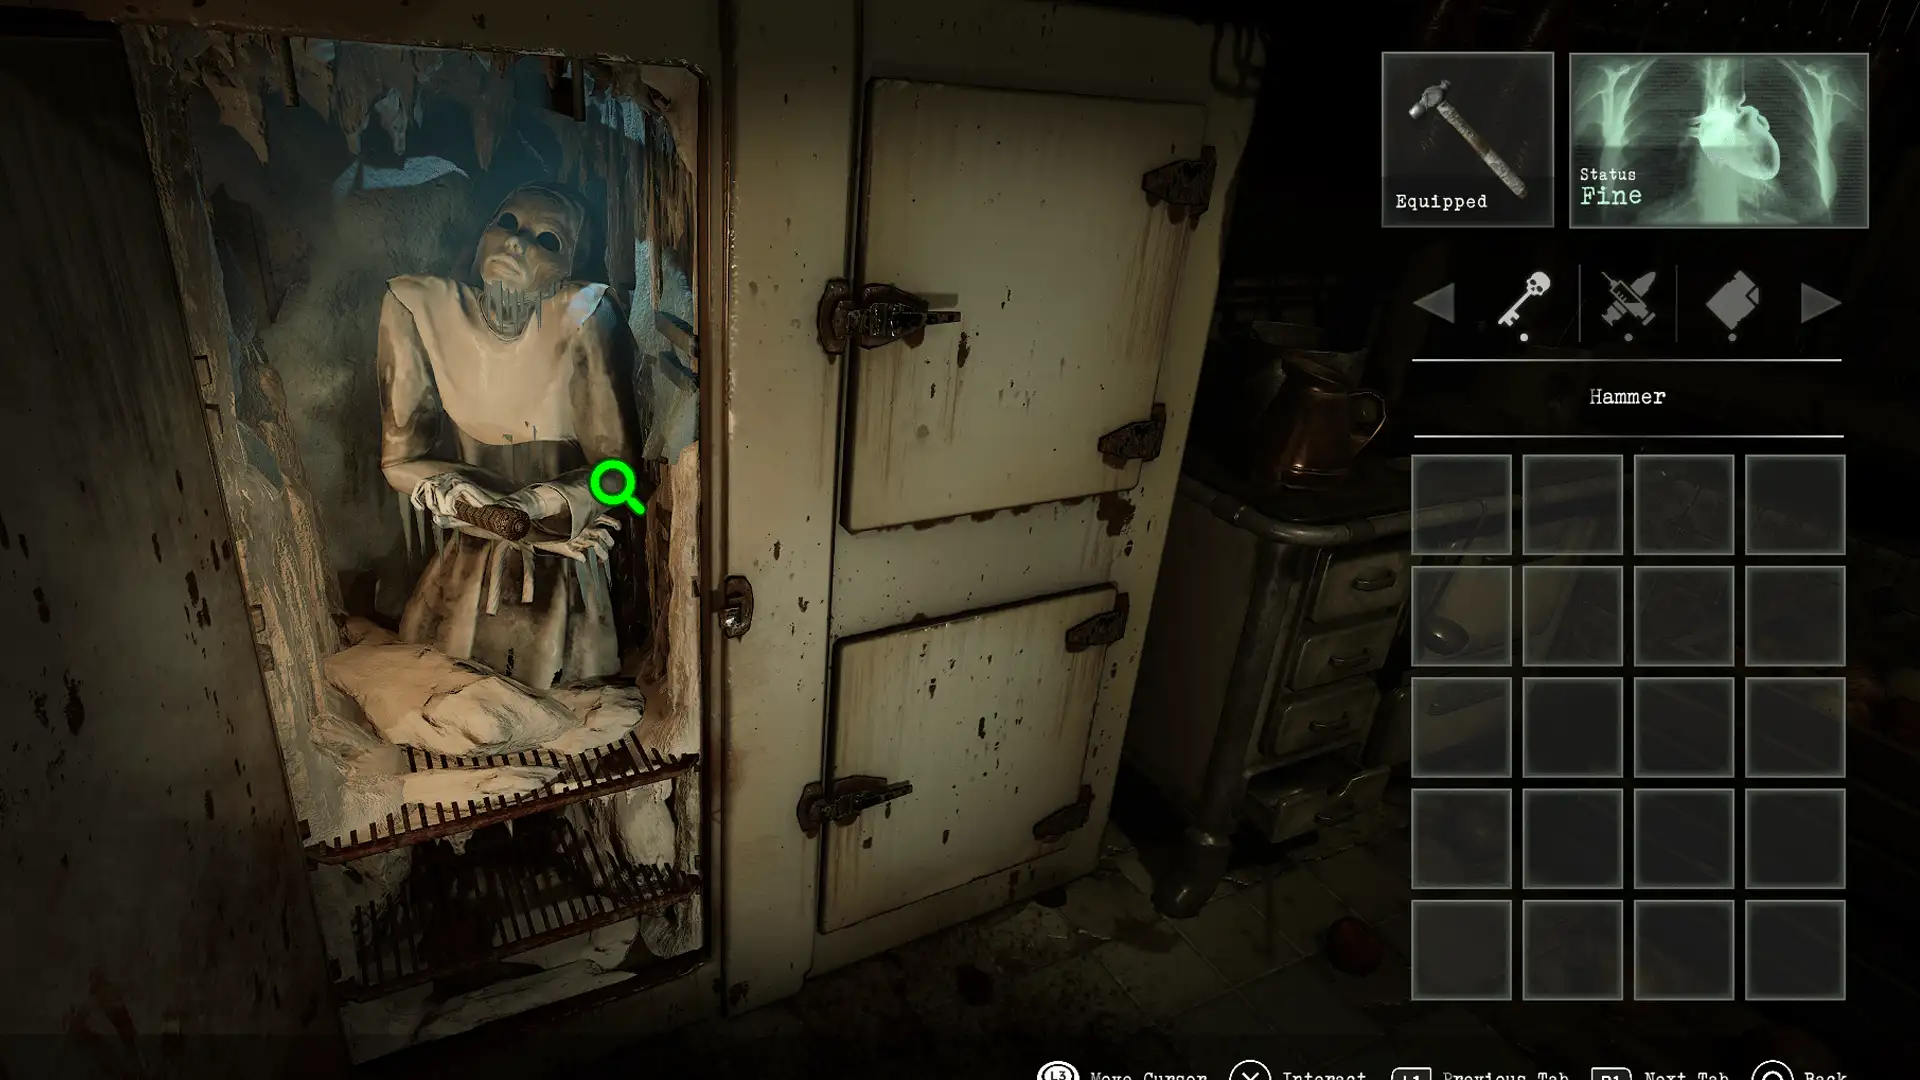
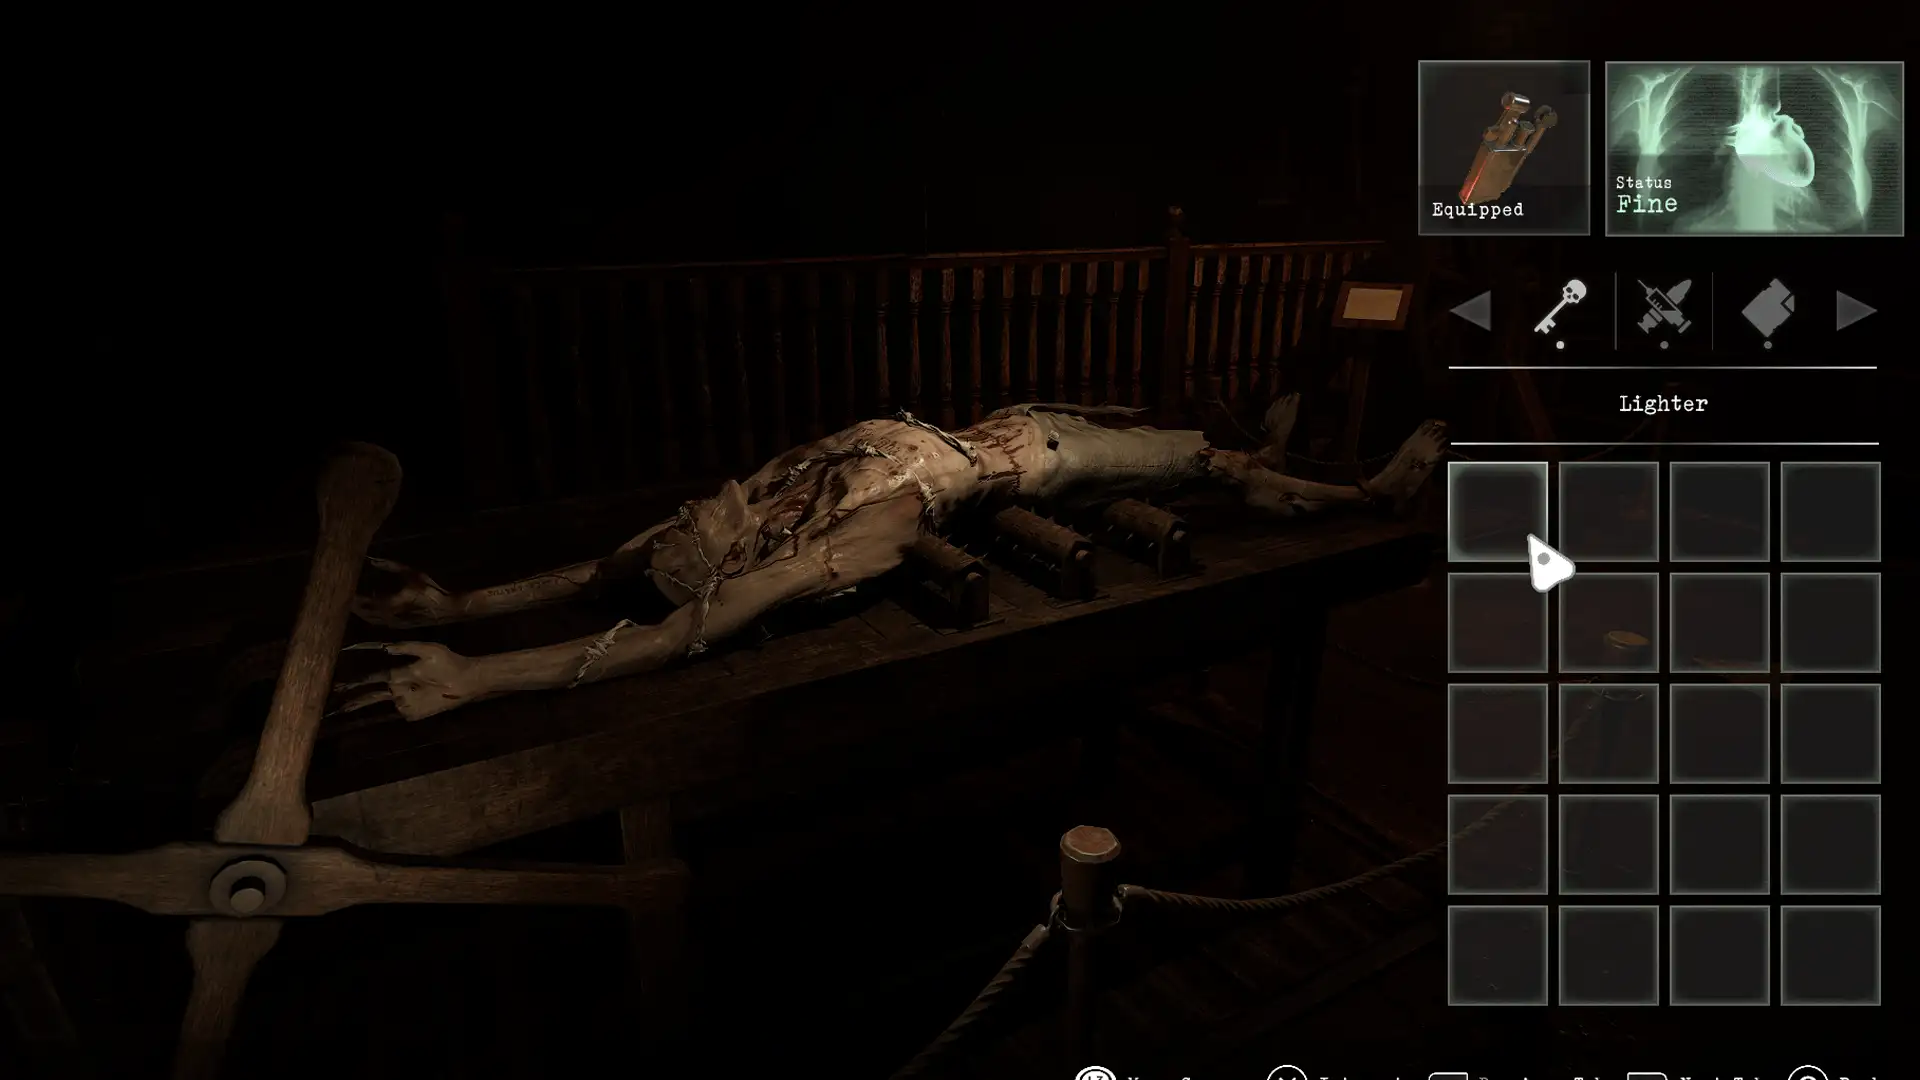
Lighter in corpse
Location: Convent – Bell Tower (bottom)
Items needed: Pliers
Solution: Use the pliers on the cage of the corpse to obtain the lighter
Notes: Pliers can be found in the Staff Room on F1

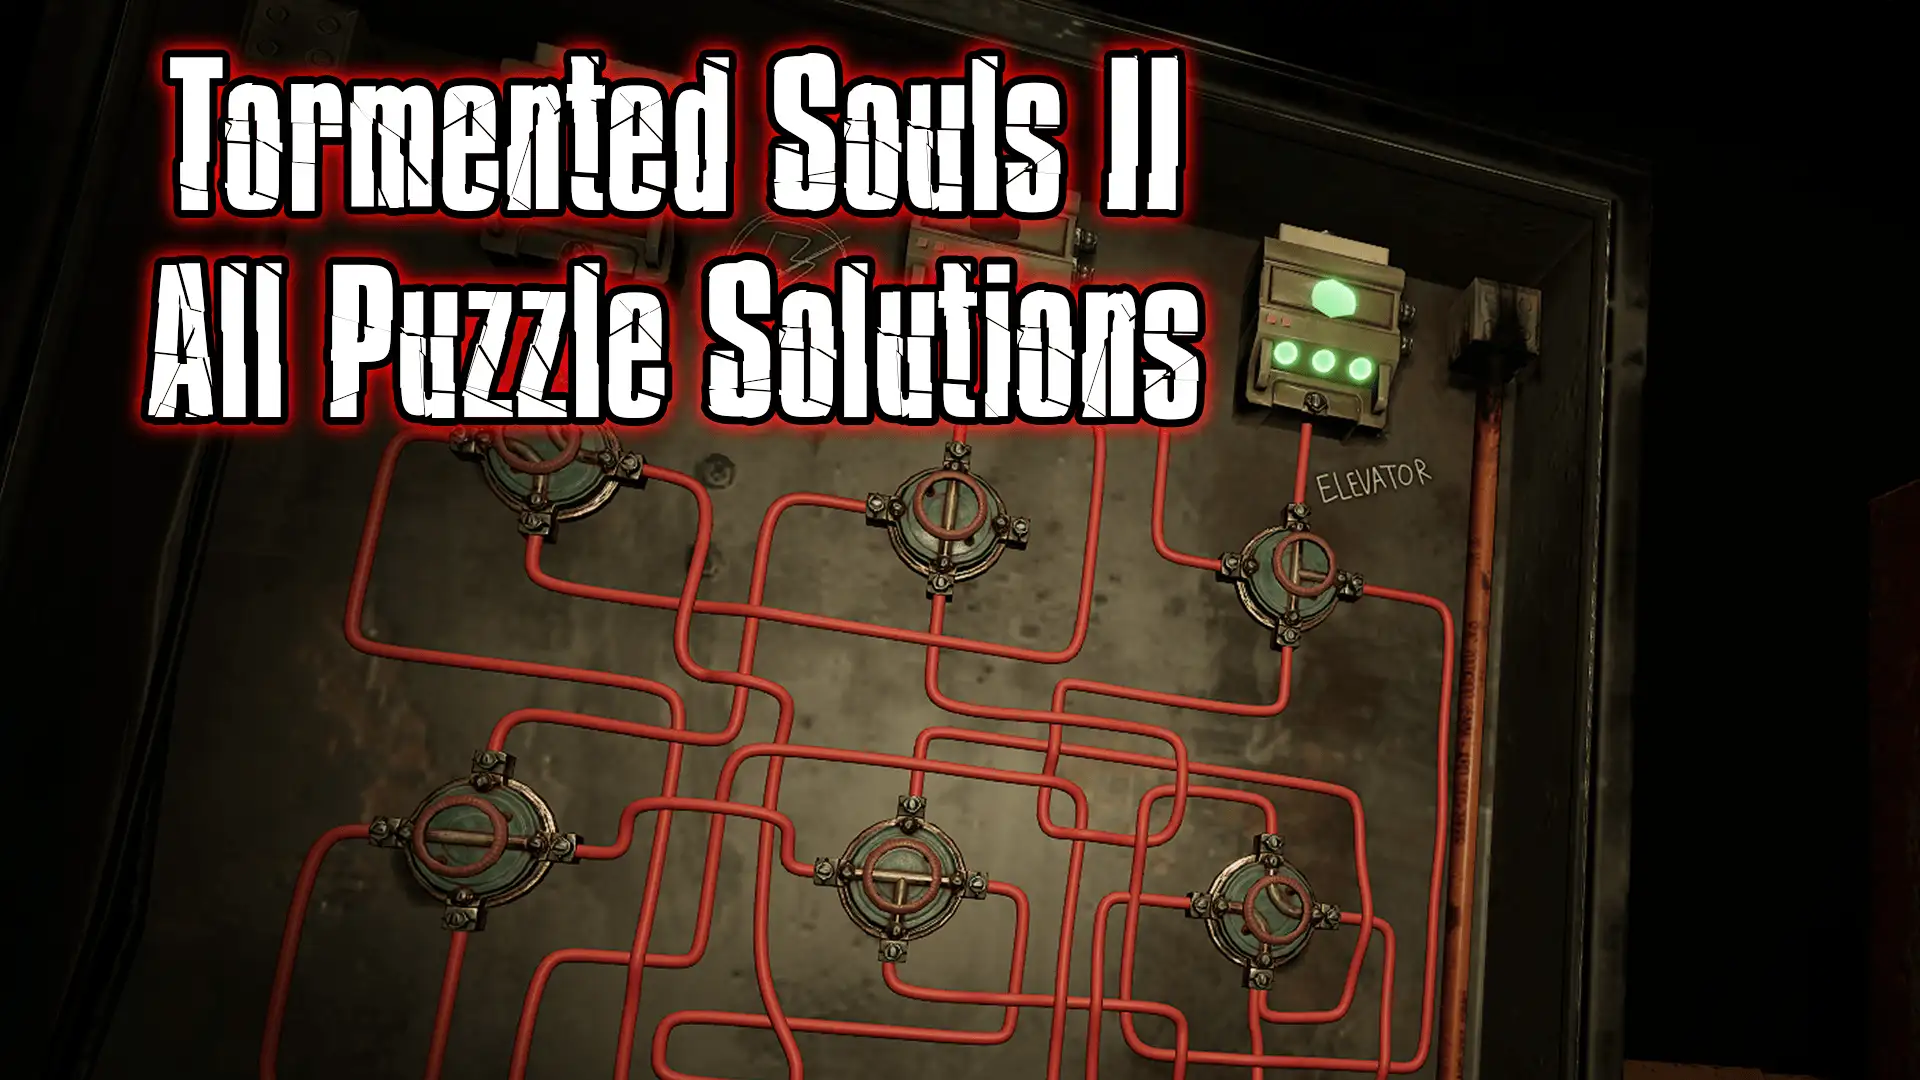
Elevator power
Location: Convent – North Corridor
Items needed: Test item1, test item 2
Solution: Find the power box opposite the door to the Lady Chapel
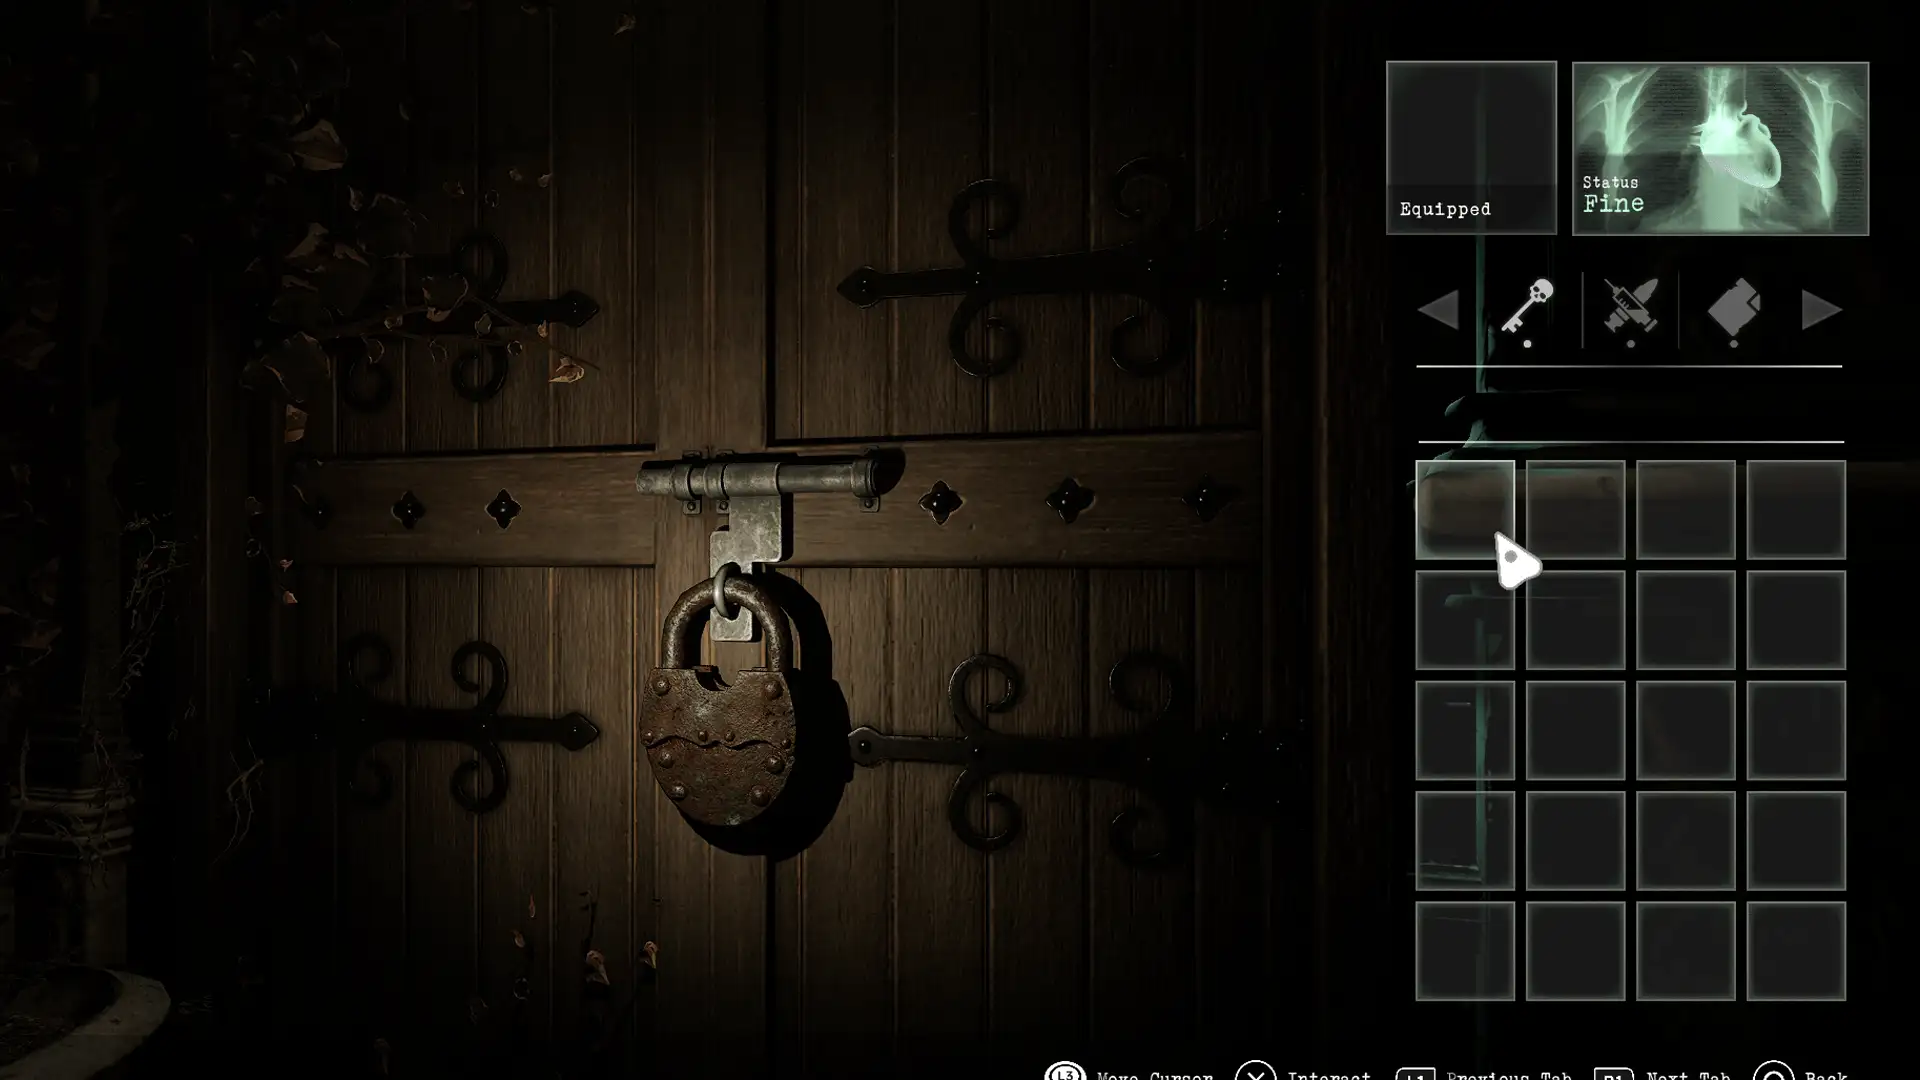
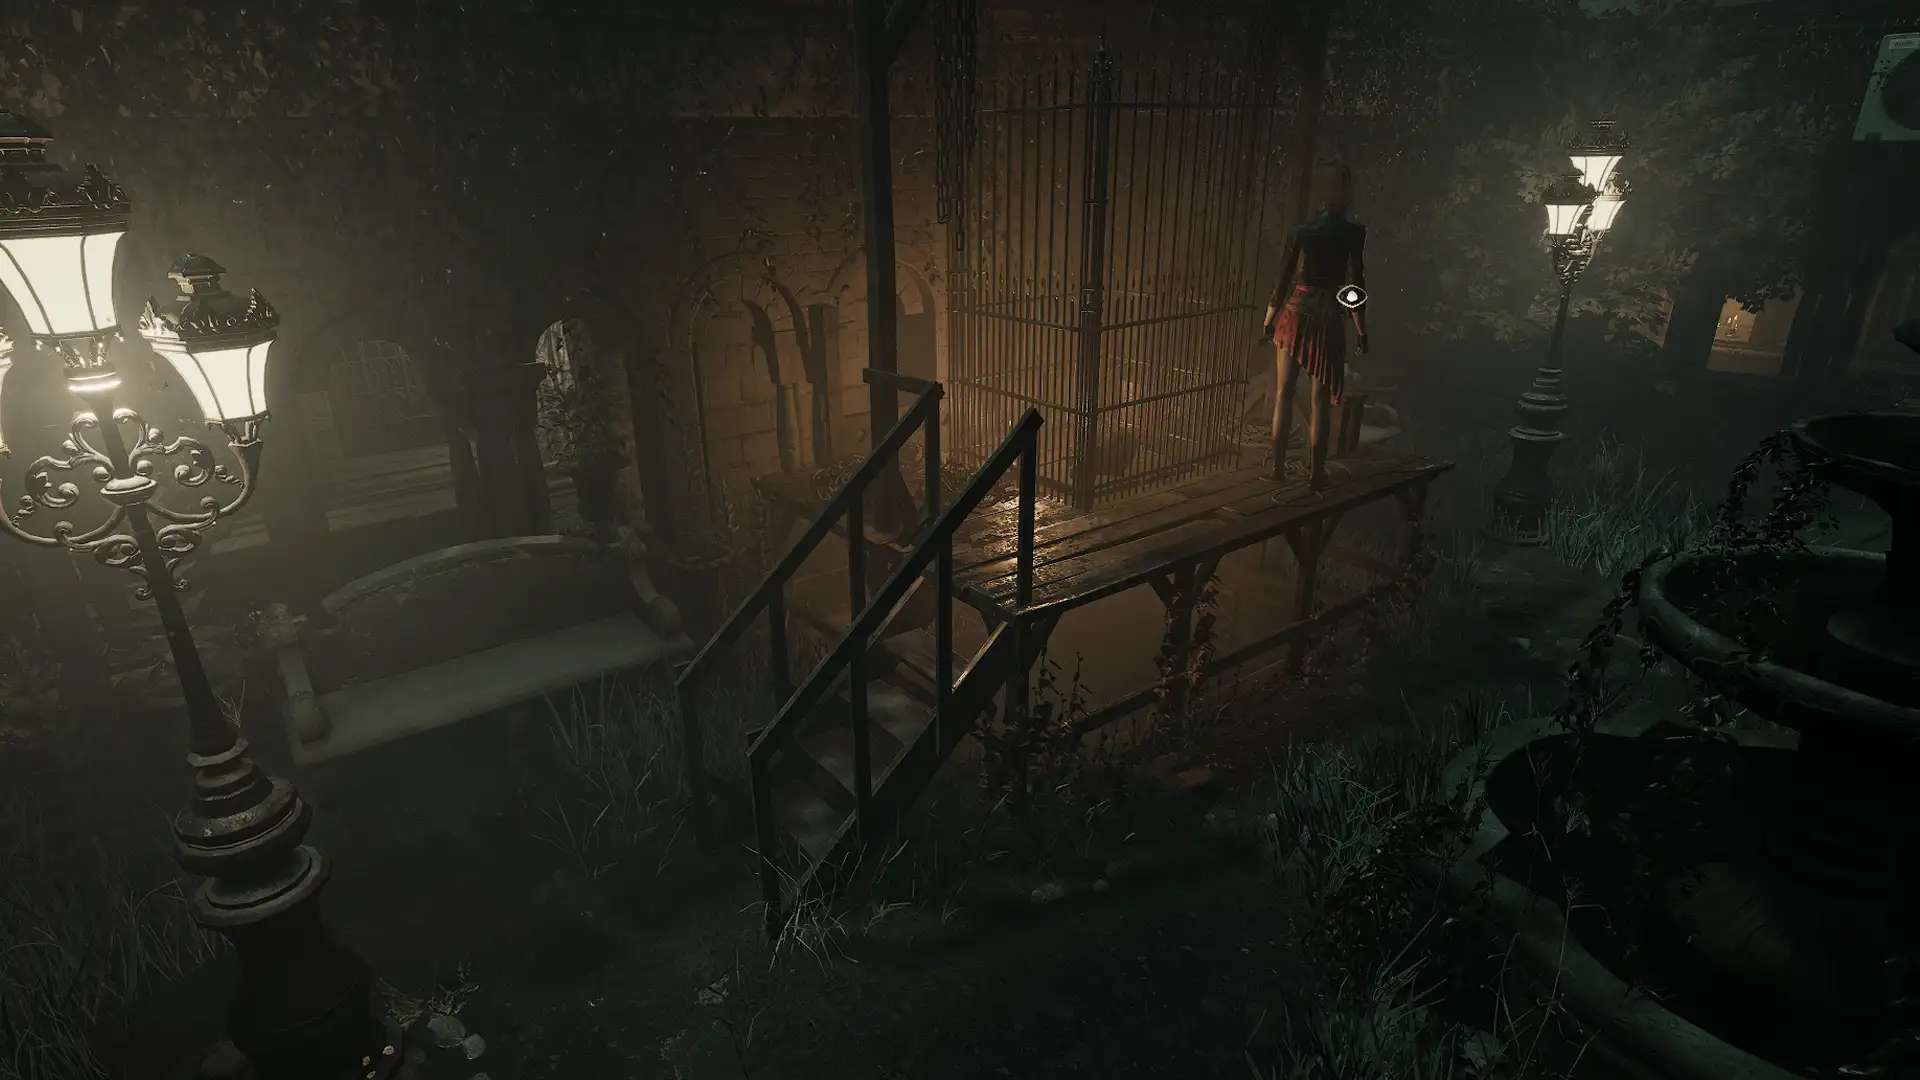
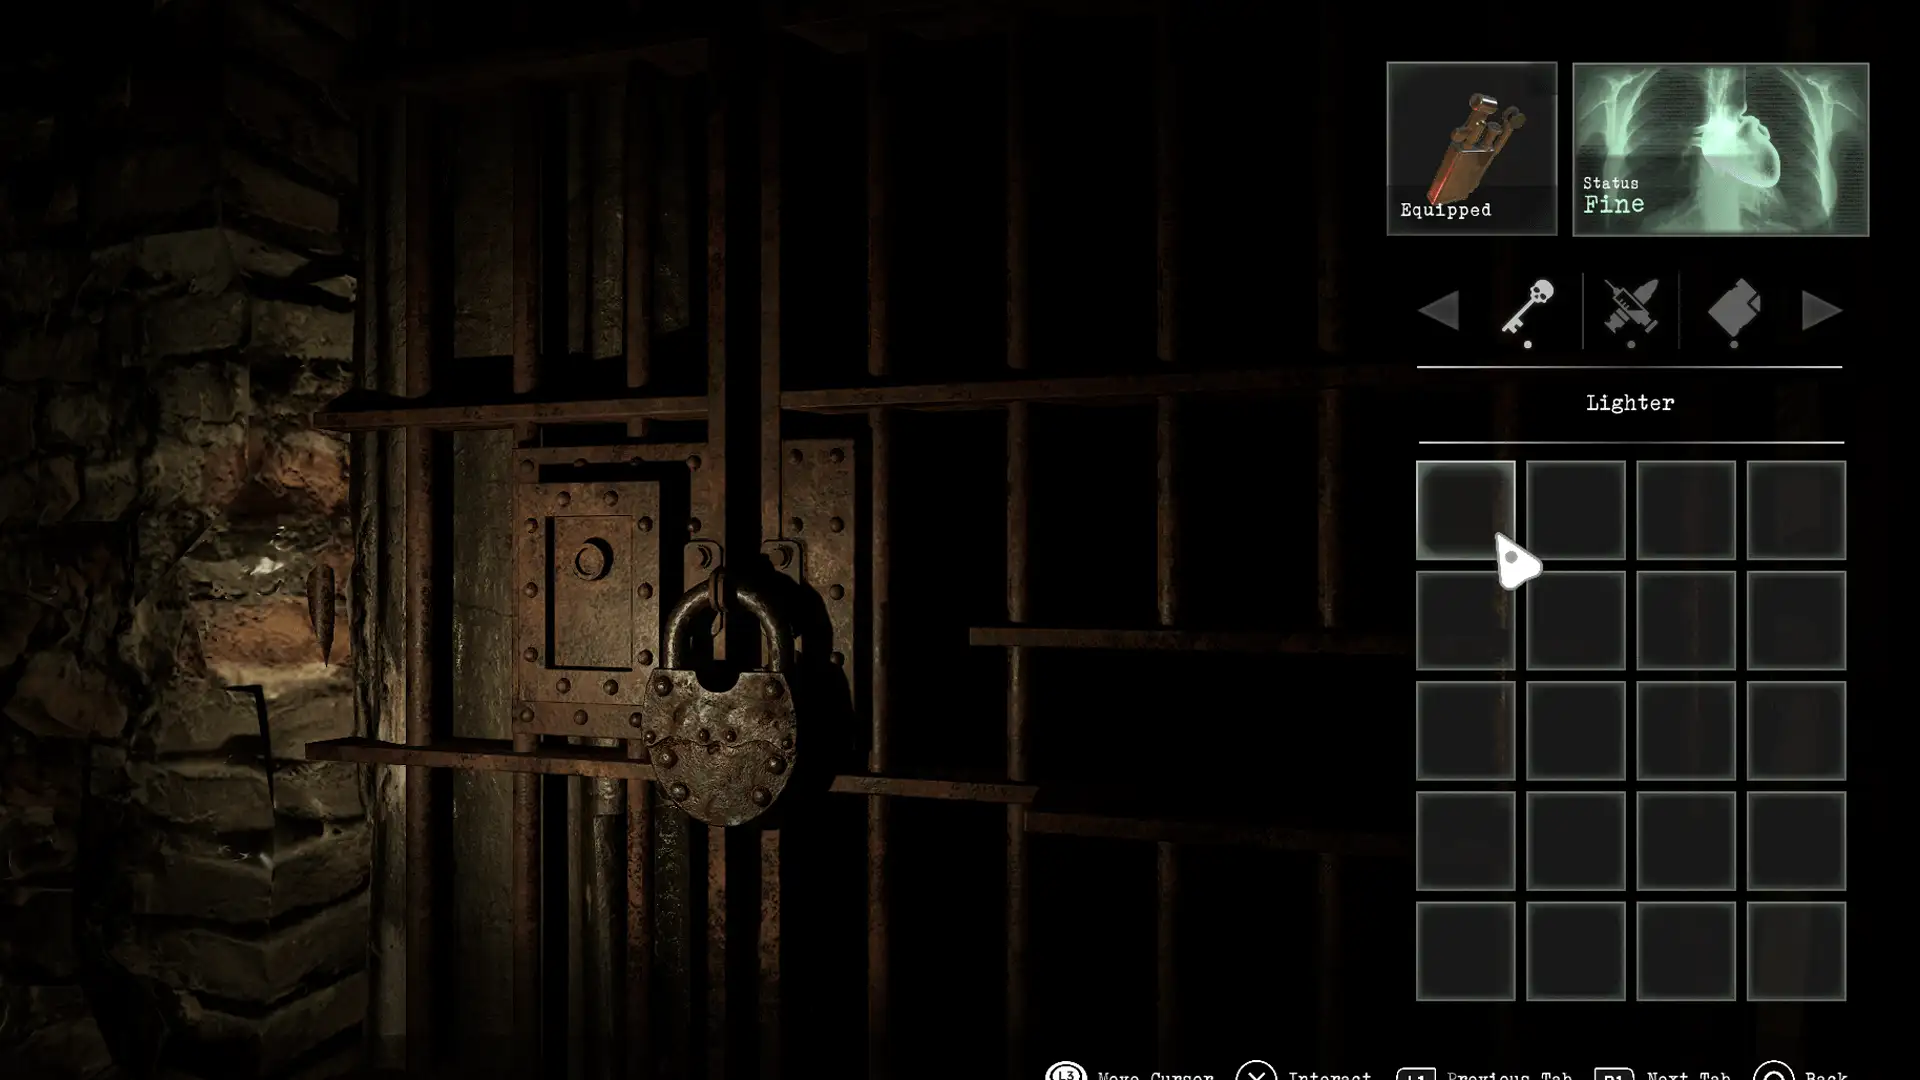
Padlocked door to Courtyard
Location: Convent – North Corridor
Items needed: Hammer
Solution: Interact with the padlock then use the hammer to break it
Notes: The hammer is obtained from the Crematorium in the basement
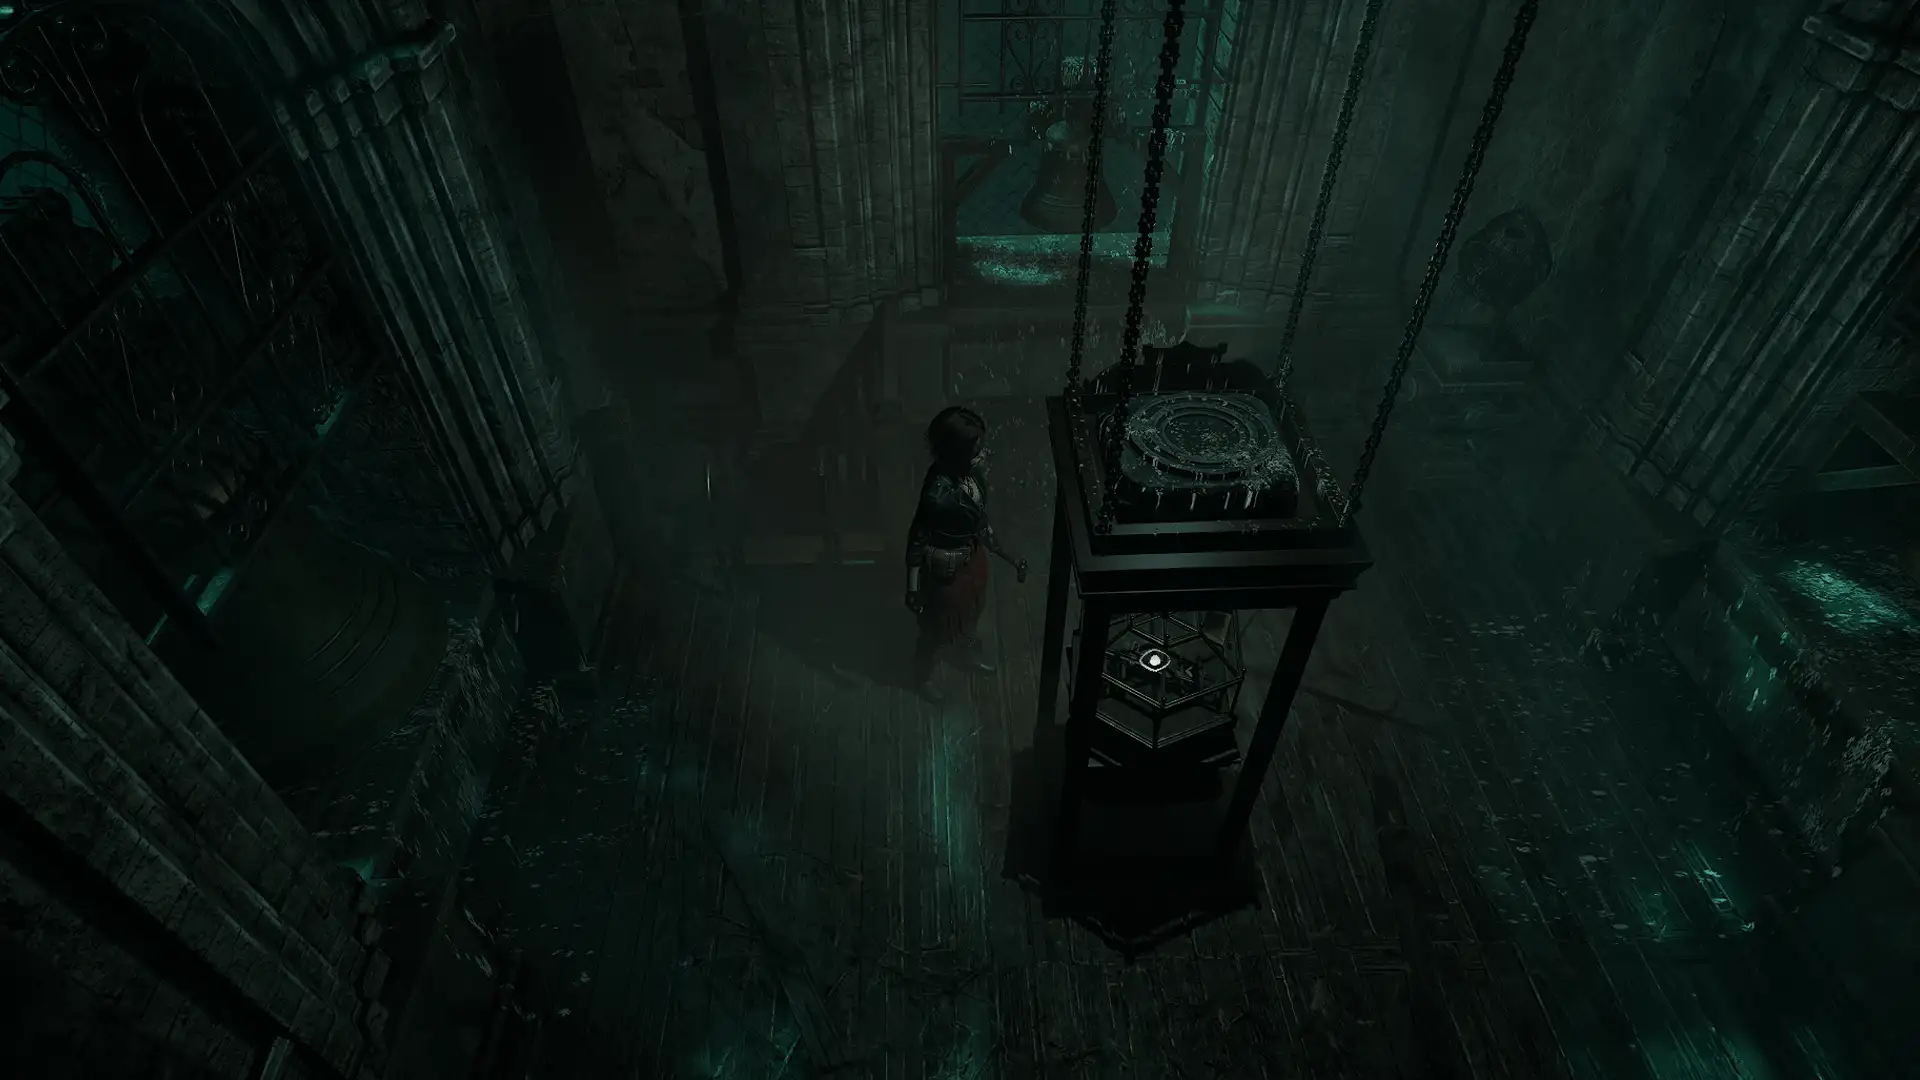
Bell Tower glass (Shotgun)
Location: Convent – Bell Tower (top)
Items needed: Hammer
Solution: Hit the bells in order to smash the glass casing and allow the player to obtain the shotgun:
3 (third largest)
1 (largest)
4 (smallest)
2 (second largest)
Notes: The hint is found by interacting with the plaque below the glass casing. The hammer is found in the crematorium
Gallows
Location: Convent – Courtyard
Items needed: Pliers
Solution: Use the lever next to the gallows to drop the torso down, then use the pliers to remove the saw blade
Notes: Pliers can be found in the Staff Room on F1
Frozen hand
Location: Convent – Kitchen
Items needed: Saw blade – Saw handle
Solution: Combine saw blade parts and use handsaw on the frozen hand
Notes: Saw blade can be found in the Courtyard, saw handle can be found in the refectory behind a hidden entrance – find it by moving the moveable shelves
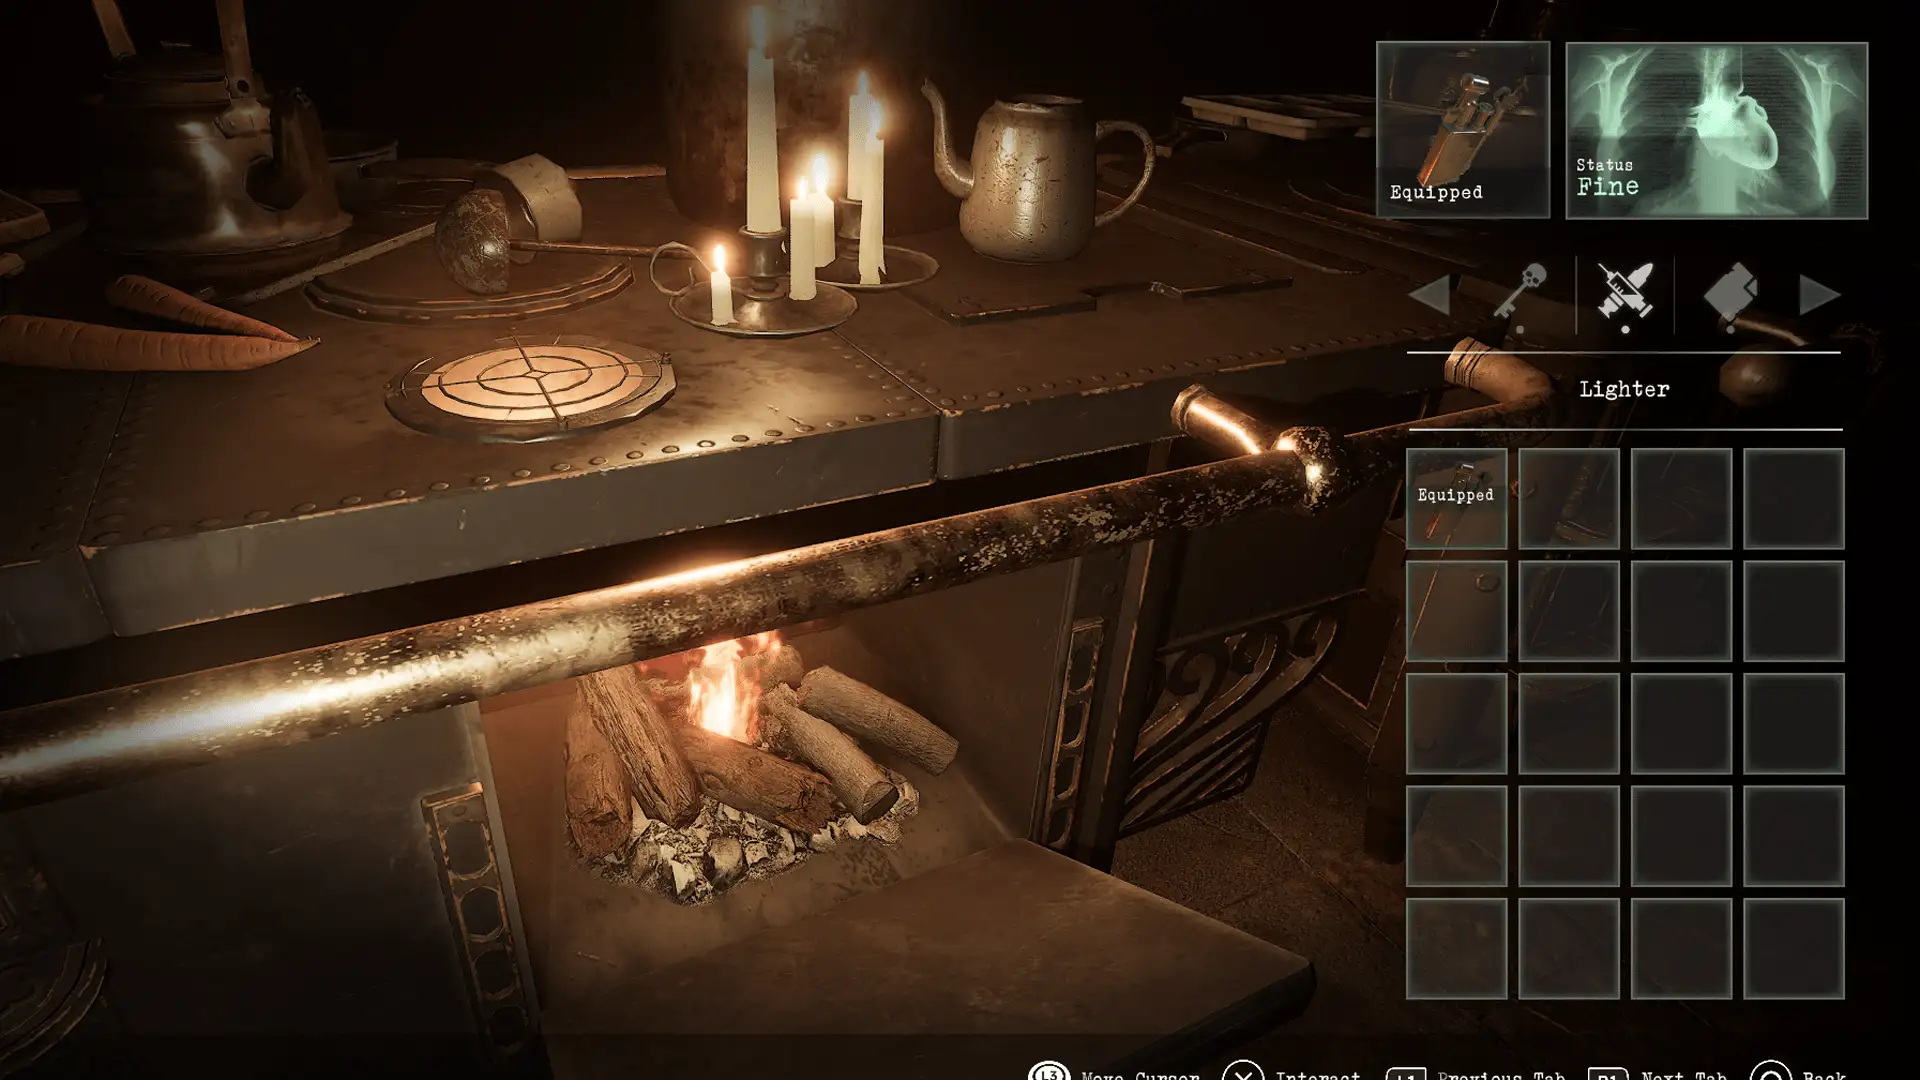
Melting the frozen hand
Location: Convent – Kitchen
Items needed: Lighter
Solution: Locate the cooker and open the oven door by selecting it, then use the lighter on the wood to start a fire. Place the frozen hand on top of the stove to melt it and release the Cryptex
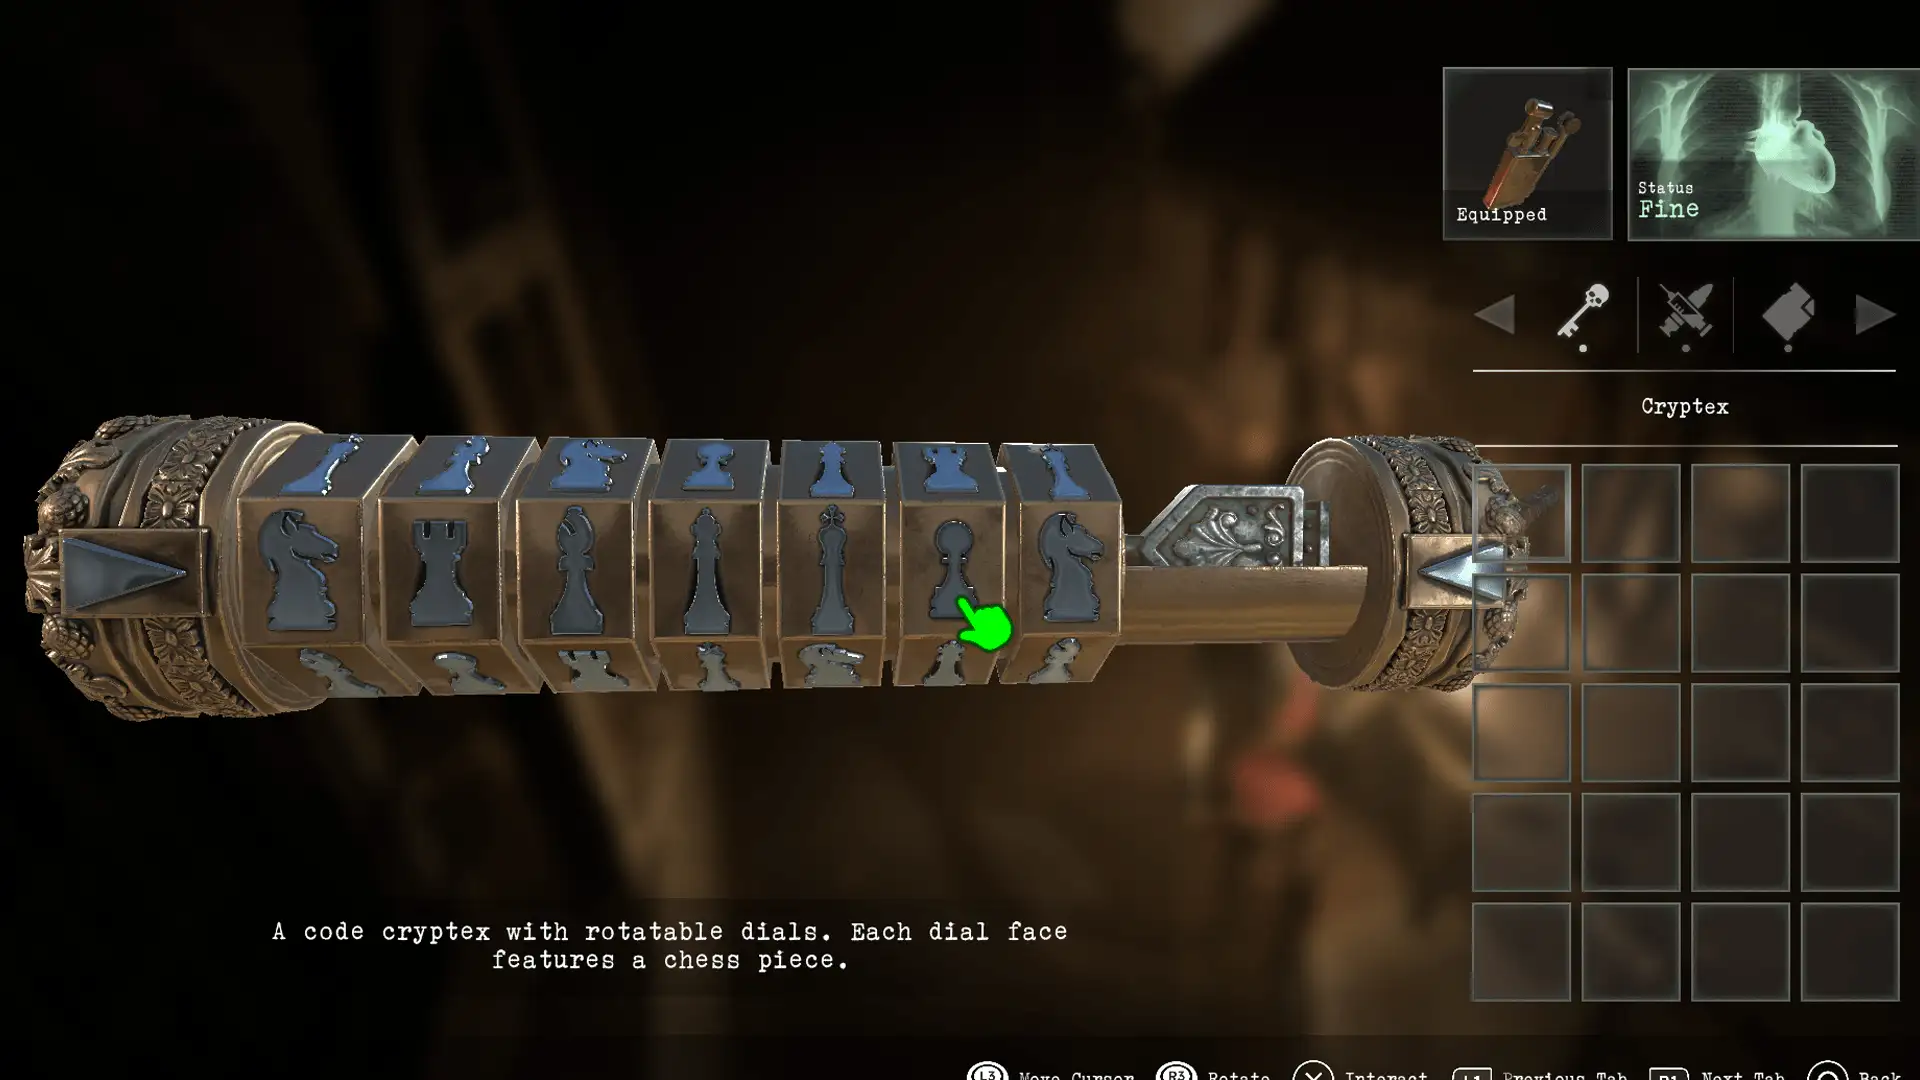
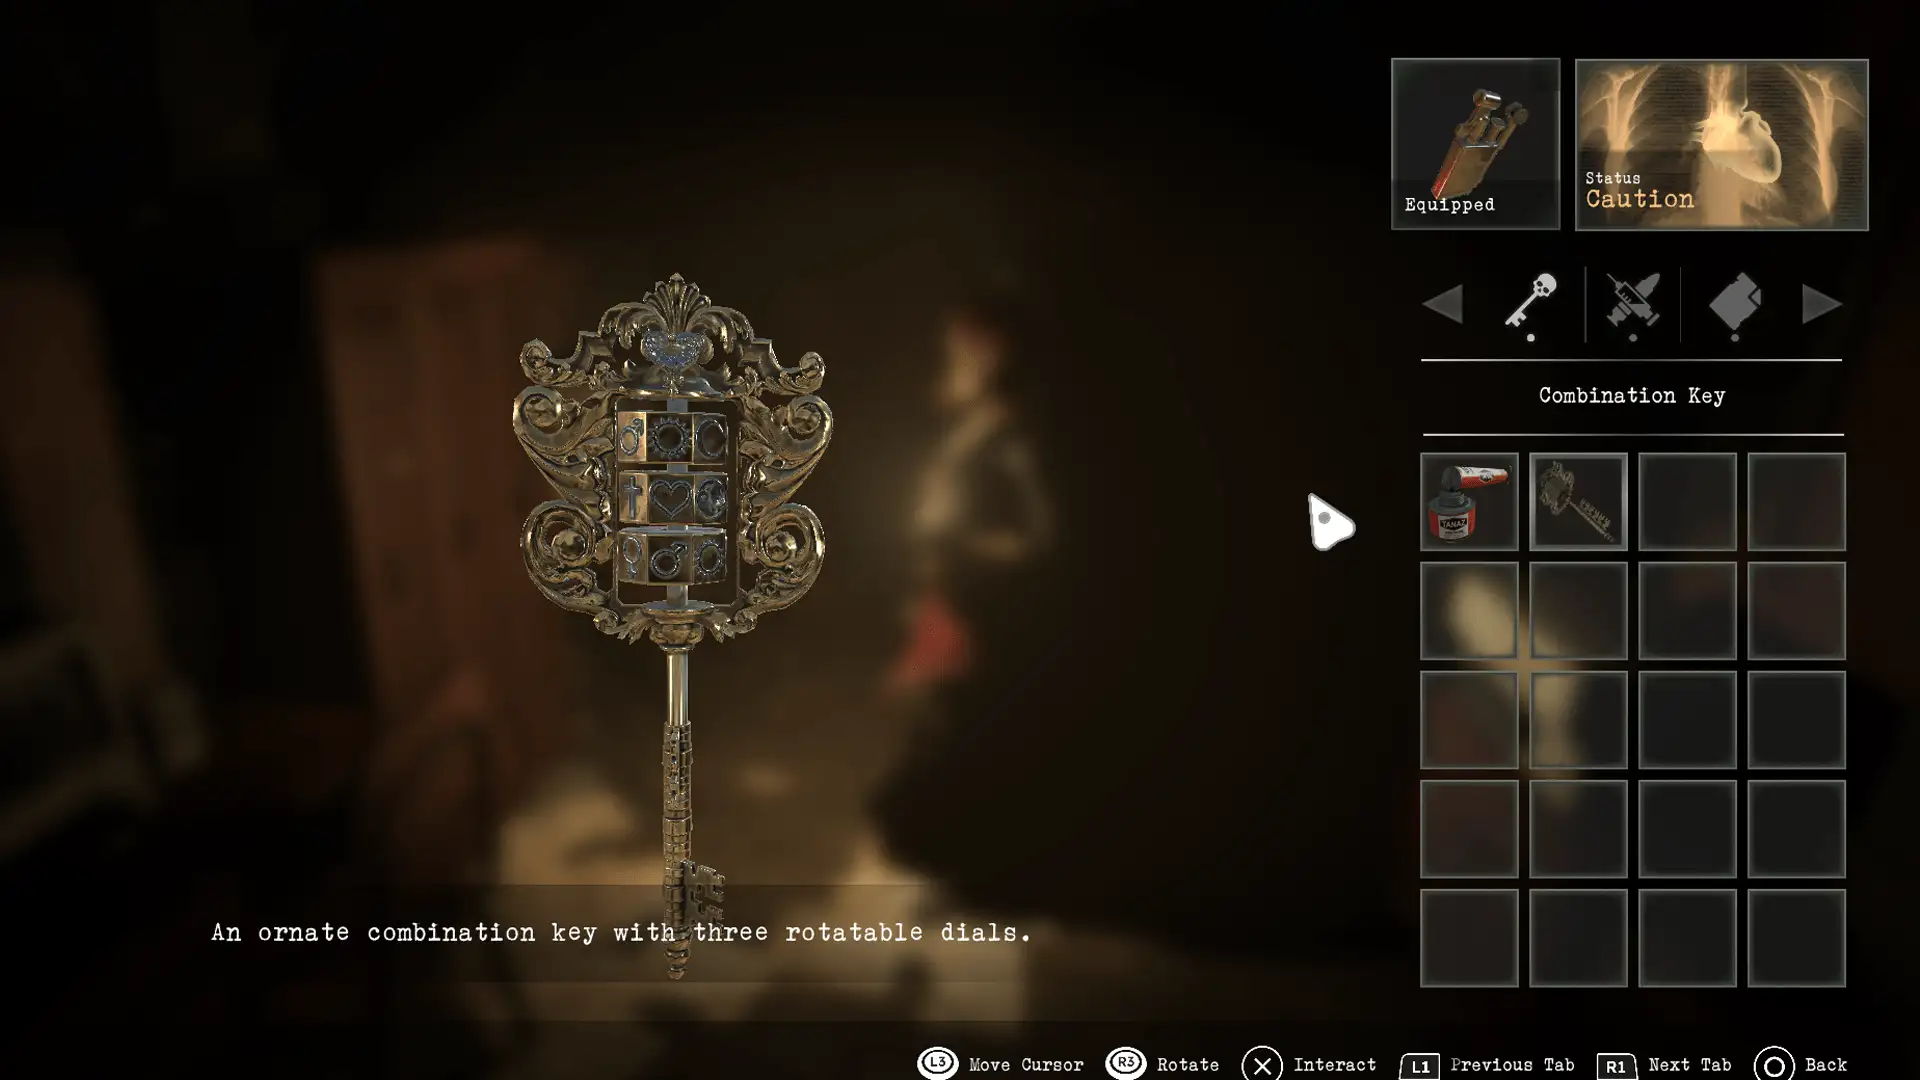
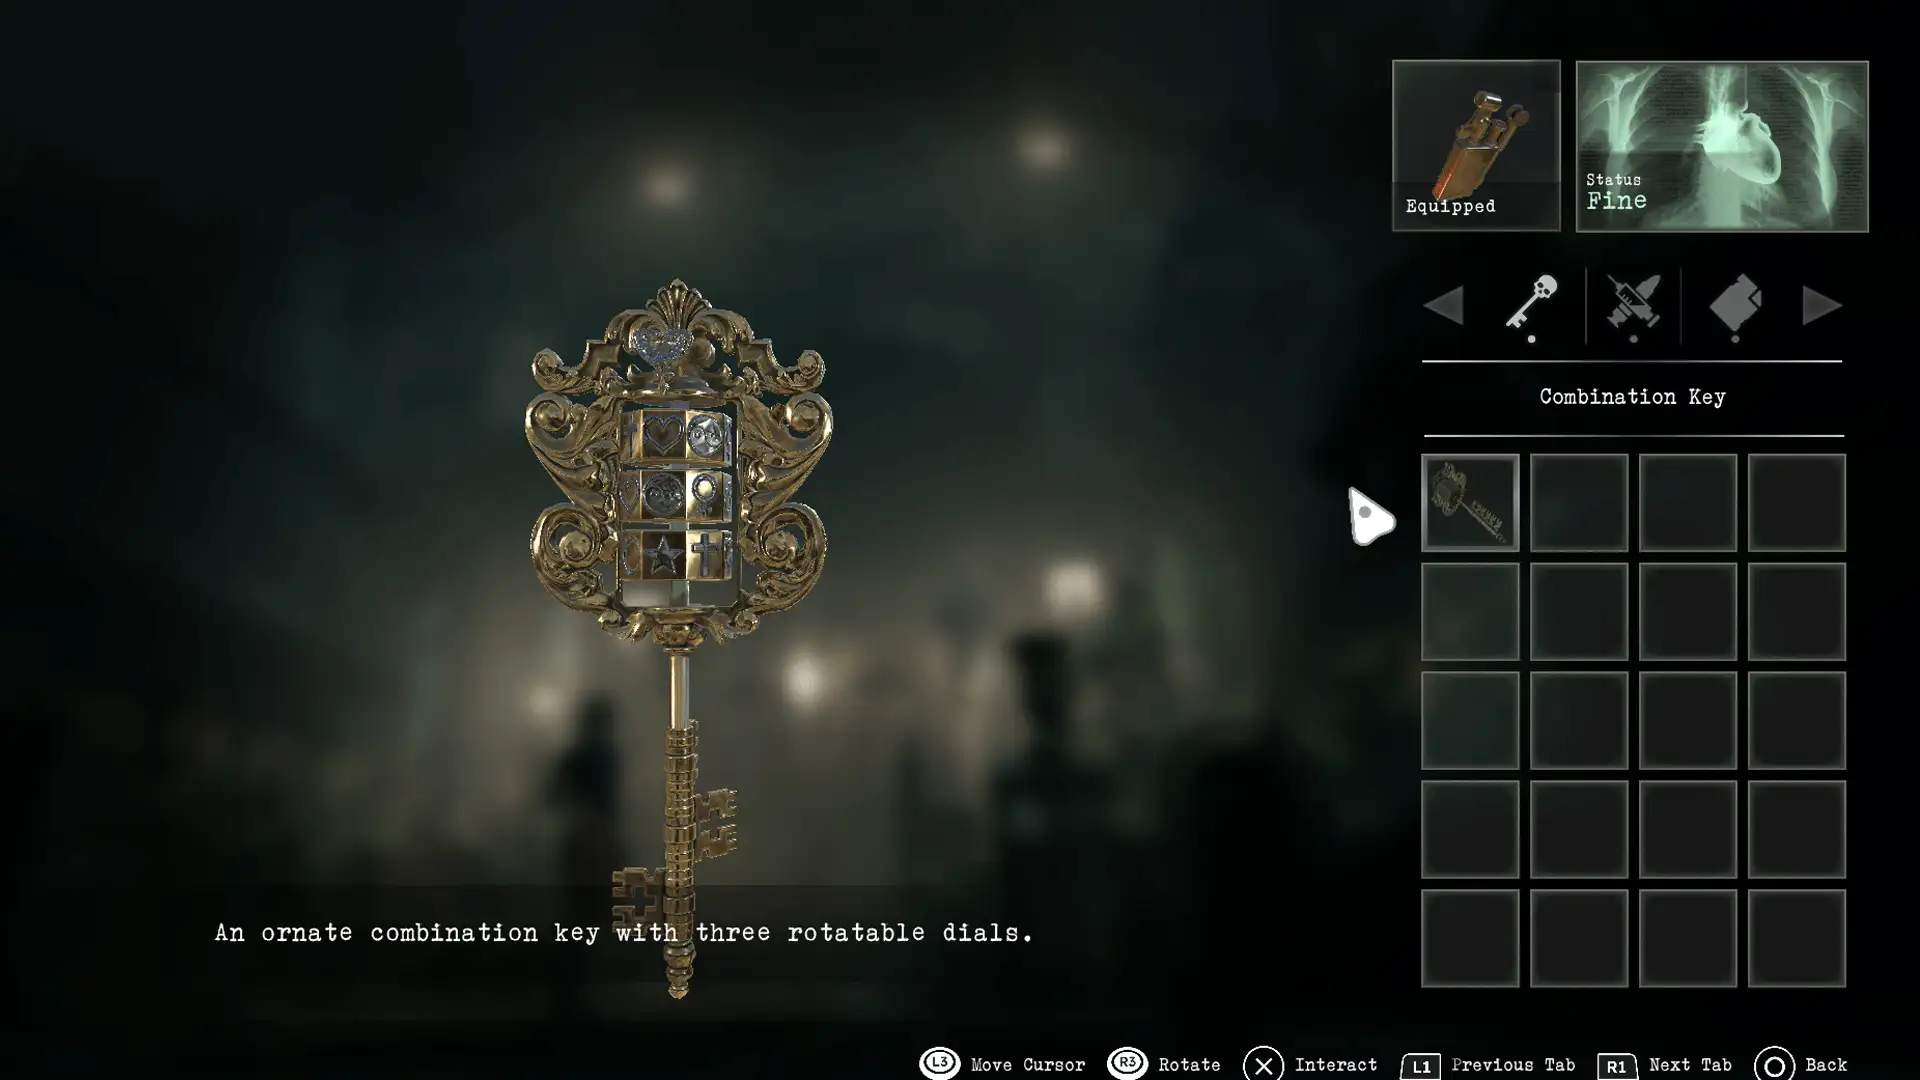
Cryptex
Location: Convent – Kitchen
Items needed: Chess Paper
Solution: Examine the back of the chess paper and locate the black lines. The lines show the movements of chess pieces on a board. Use these to turn each section of the cryptex to the corresponding chess piece i.e. L shape is a Castle, Y is a Rook etc.
Notes: The chess paper is found in the Calefactory room. Solving the Cryptex gives the crown key for the locked door in the basement
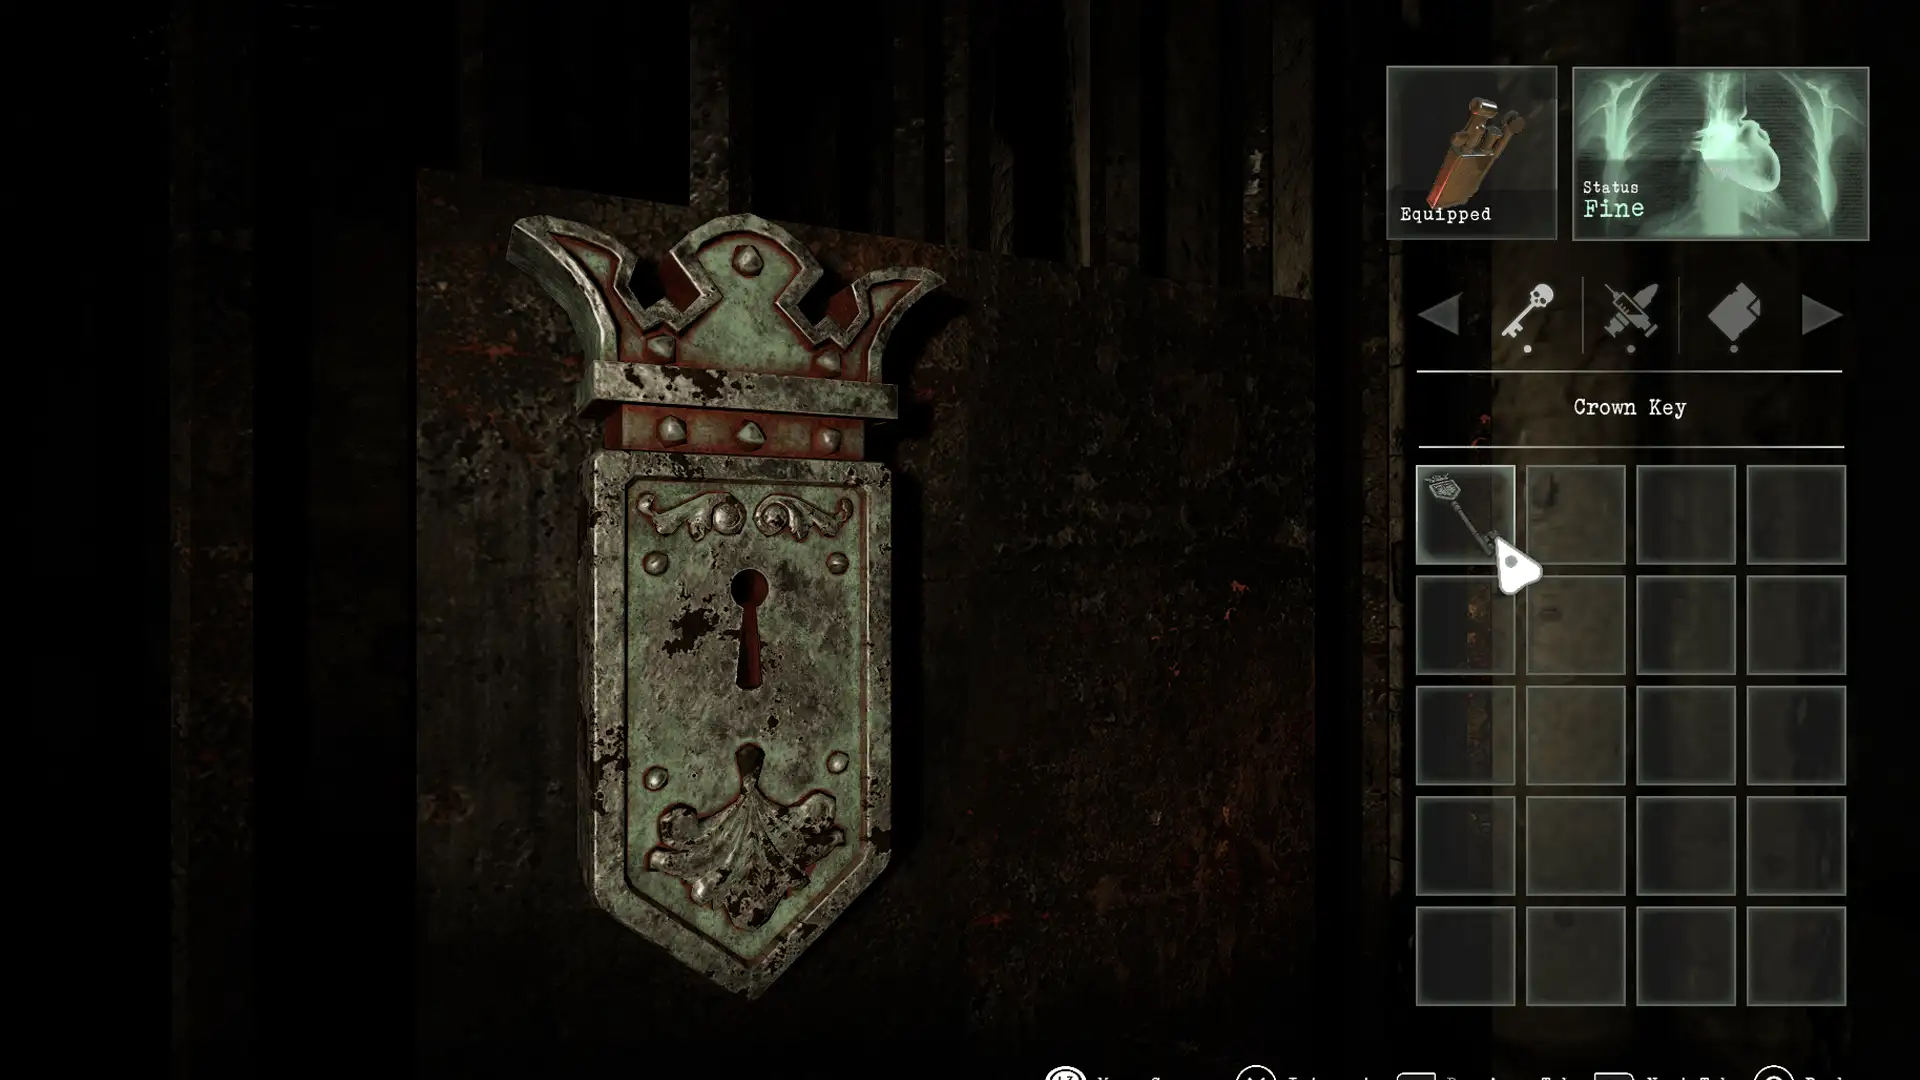
Crown lock
Location: Convent – Basement
Items needed: Crown key
Solution: Obtained by completing the Cryptex. Unlocking the door leads to the Prison areas
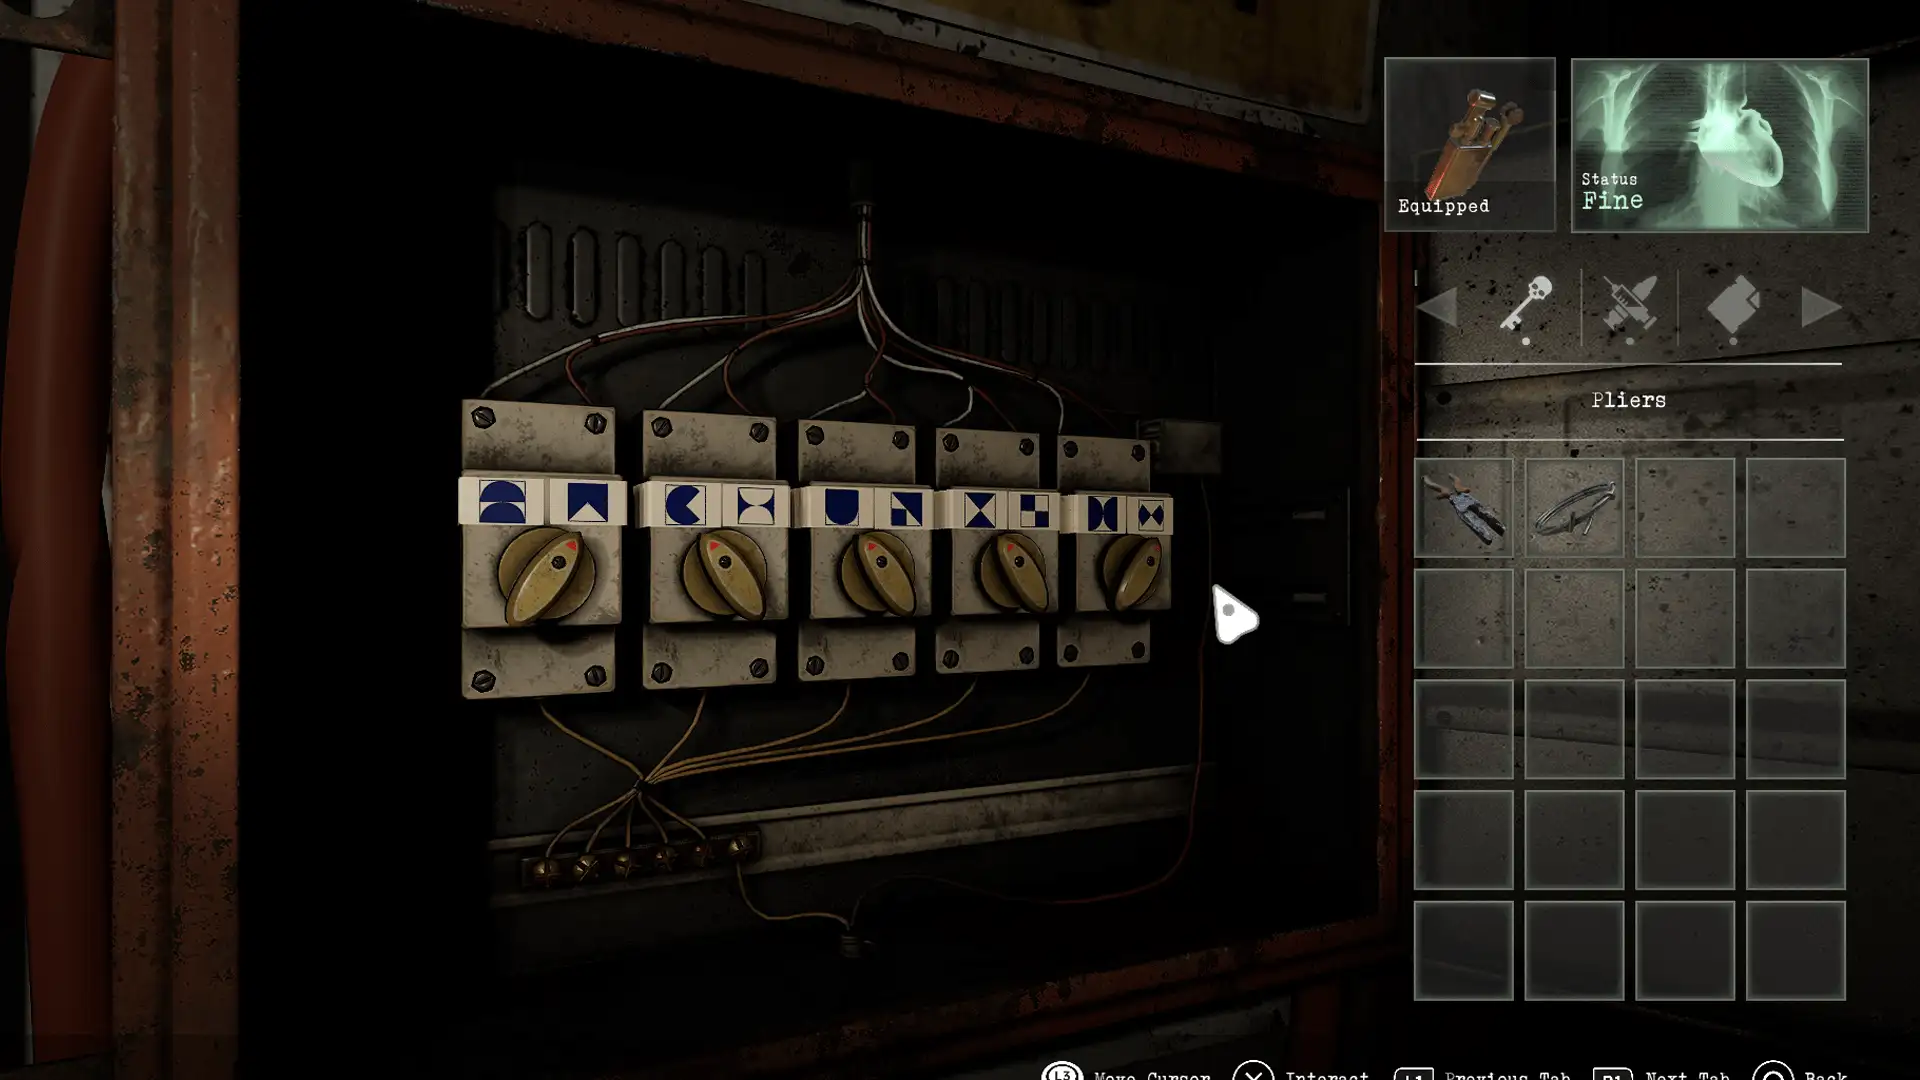
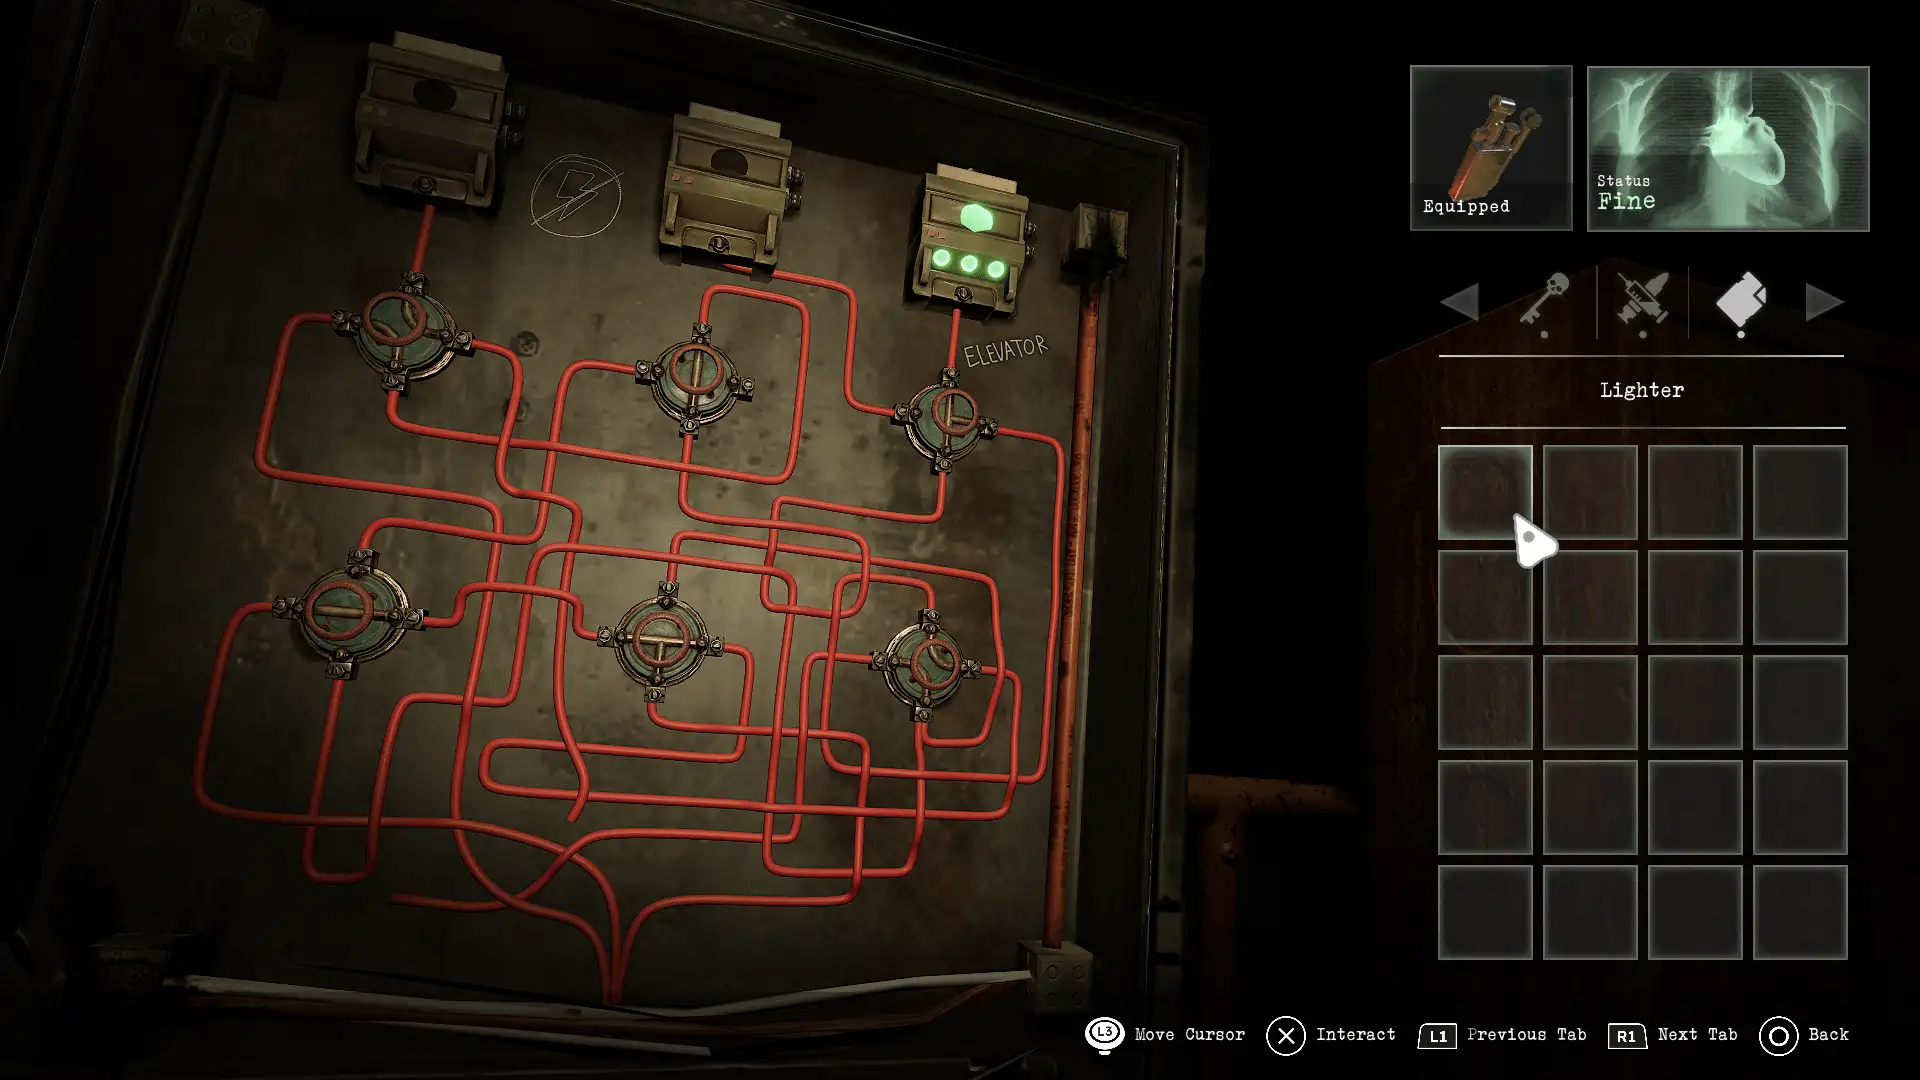
Prison cell power
Location: Convent – Prison
Items needed: Pliers
Solution: Use the pliers on the wire to open the fuse box then turn the dials so that they point to the symbols that fit inside the shape shown.
/ \ \ \ /
Go through to the other room where the cells are found and use the lever on the platform to power them.
Notes: The paper hint is found in one of the cells in the Prison

Cursed book
Location: Convent – Prison
Items needed: Christ book
Solution: Swap the cursed book with the bible, then deliver the cursed book to Joseph in the Crematorium
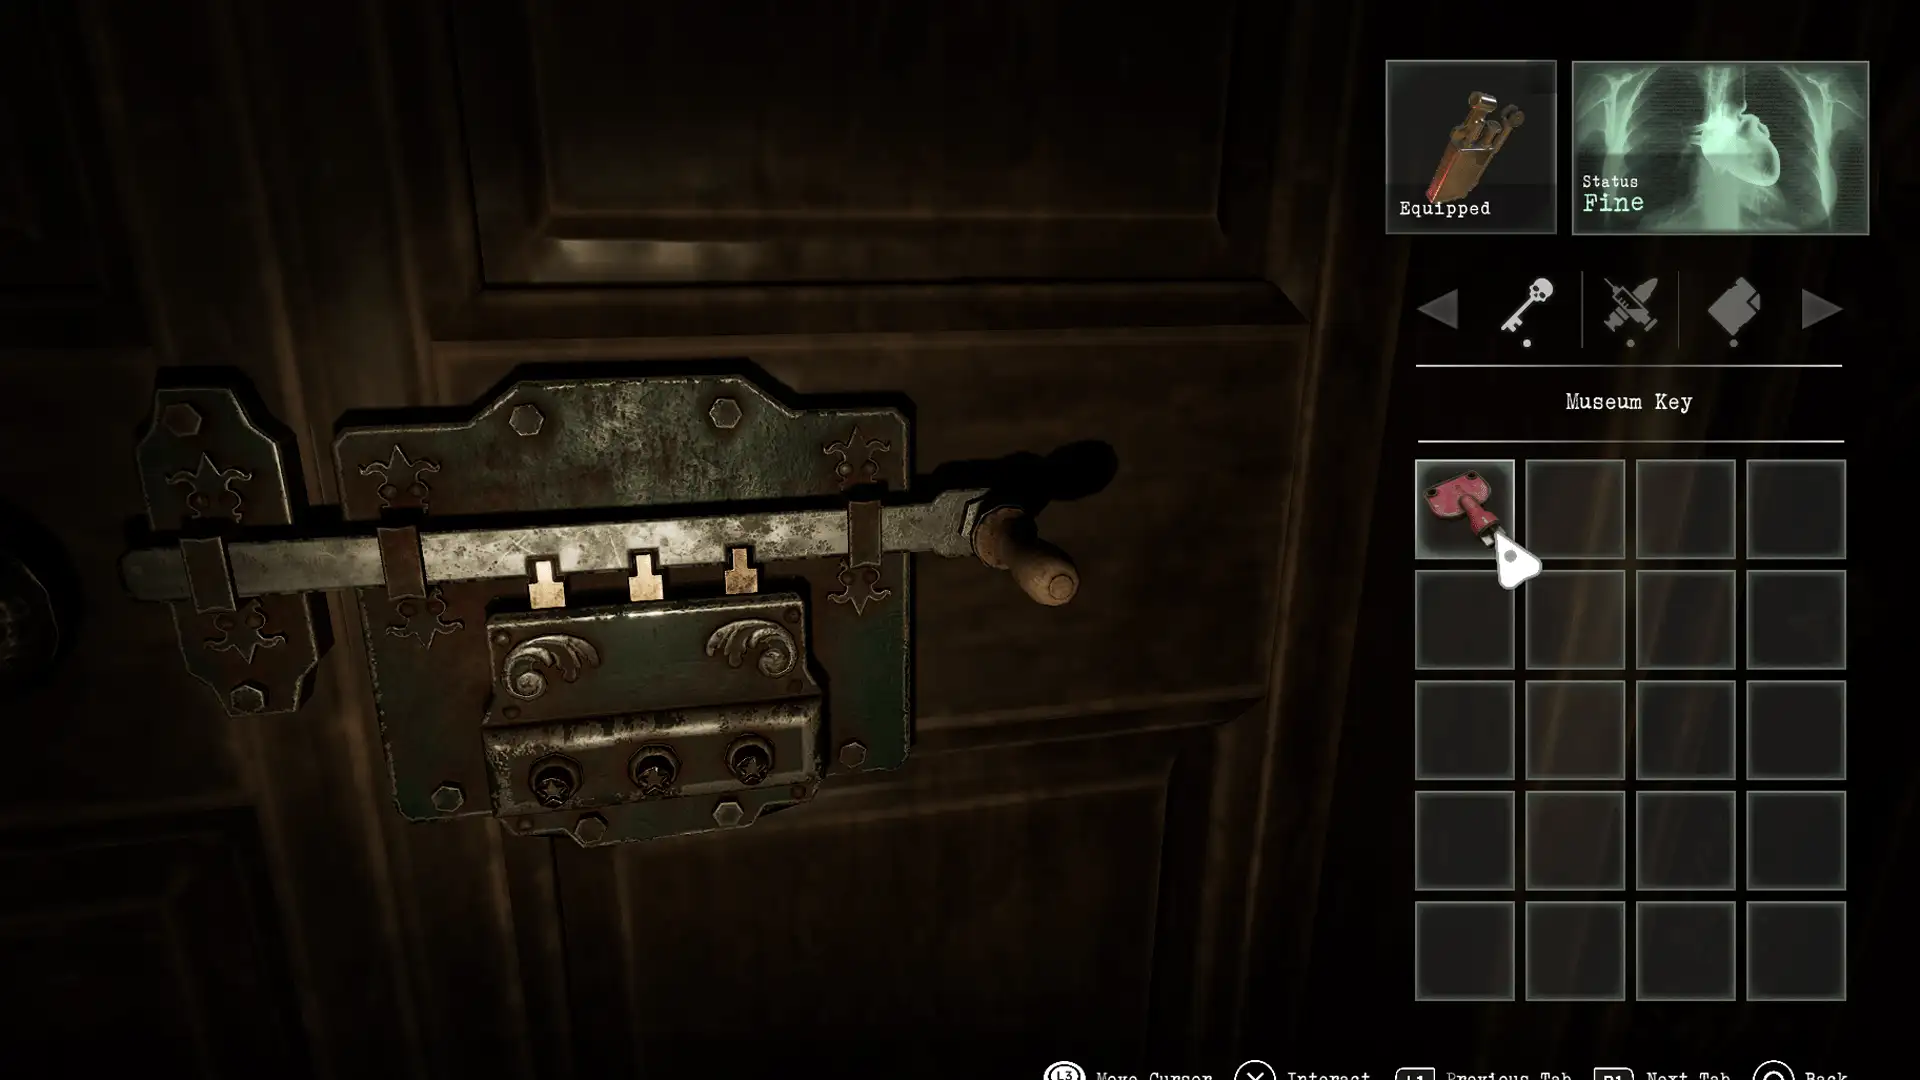
Museum door
Location: Convent – Museum
Items needed: Museum Key
Solution: Use the key on the three star bolts going from middle to right to left, then select the handle to slide it away
Notes: The museum key is obtained by delivering the cursed book to Joseph
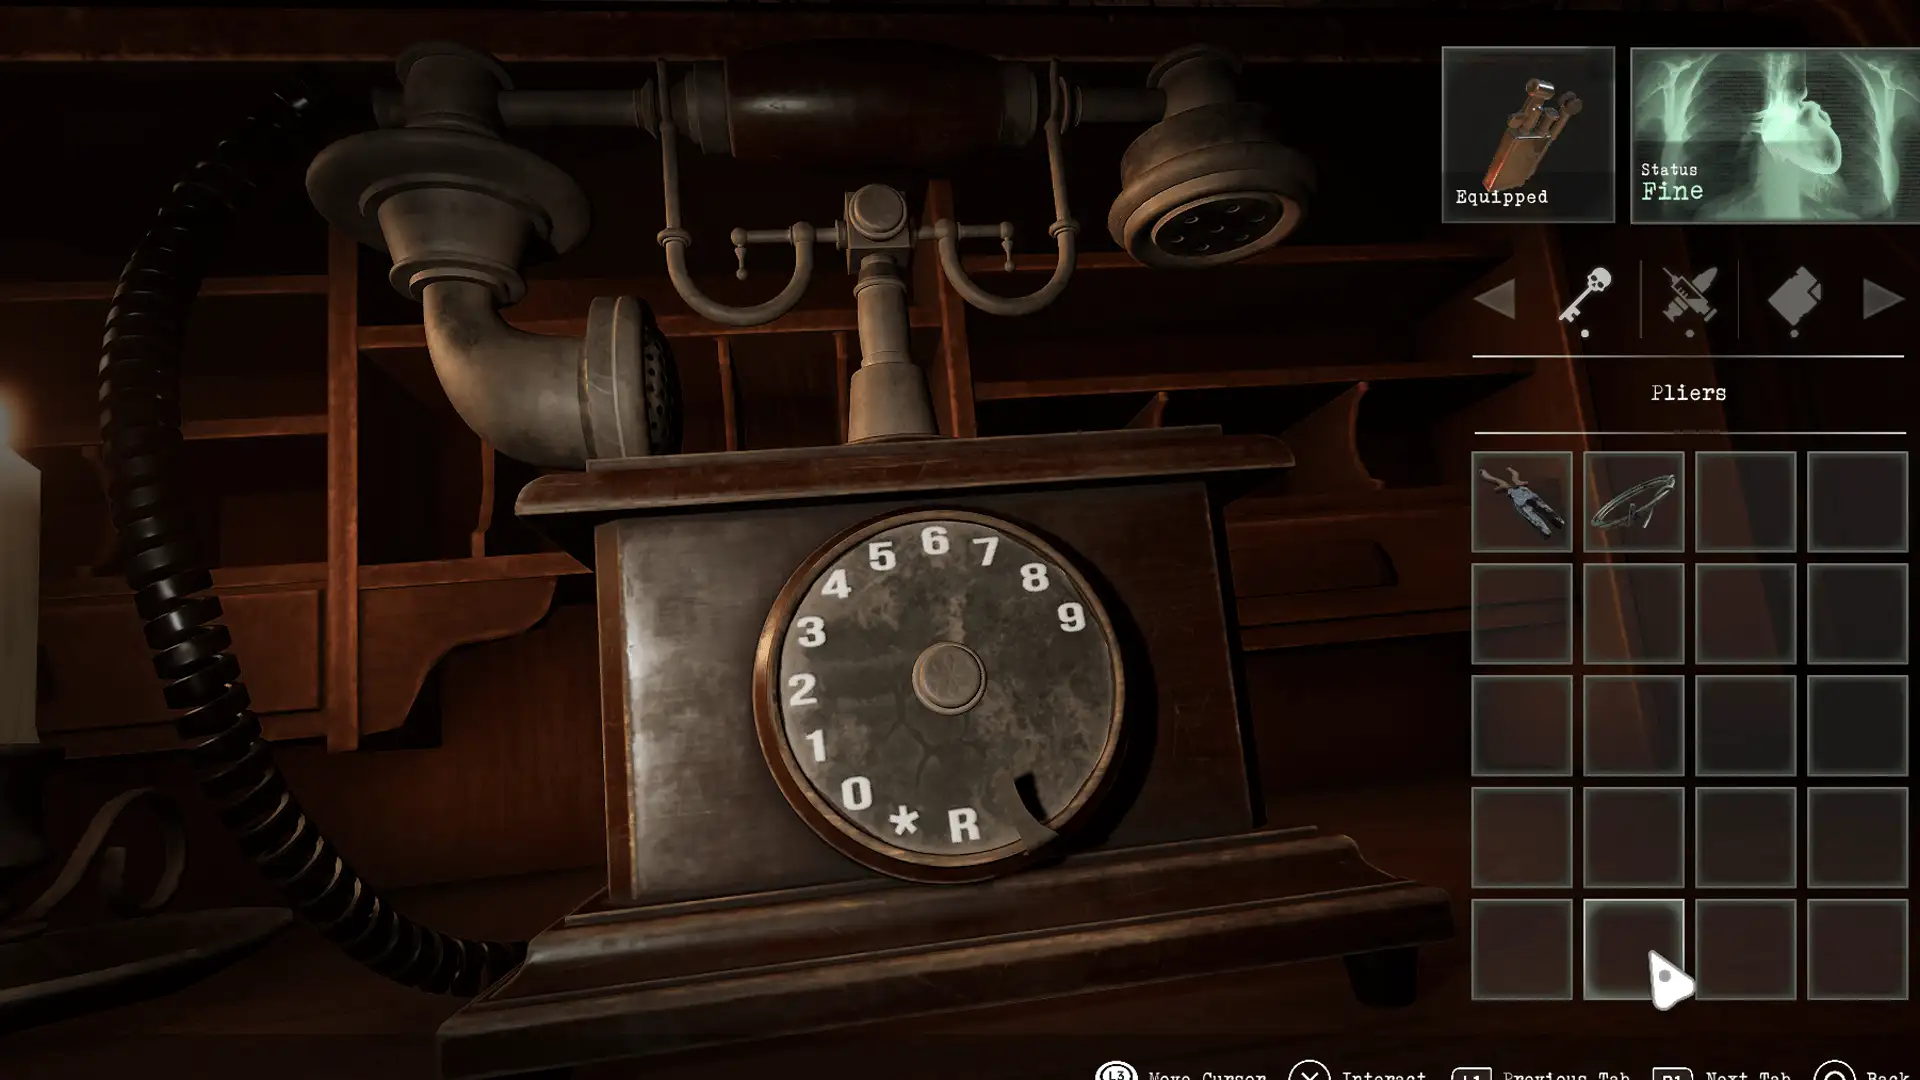
Telephone / Jade disc
Location: Convent – Library
Items needed: Old telephone dial – Yellow page
Solution: Attach the dial to the telephone base in the library then enter the code 3890*. The jade disc will then be revealed behind a nearby painting
Notes: The solution can be found by flipping the yellow page paper and using the lines on both sides to create the numbers. The rotary dial is found in the basement, accessed via the torture museum. The yellow page is found in the last prison cell.

Jade cross
Location: Convent – Calefactory Room
Items needed: Cross Disk
Solution: Combine the jade disc with the jade cross and use the buttons to spin the discs to create a closed circuit of lines and make a square. Press the arrows in the following order: RIGHT-DOWN-LEFT-RIGHT-RIGHT
Use this on the Chapter House door to unlock it.
Notes: The jade cross can be found in the lower area of the museum behind the stairs. Obtain from the jade disc from the library by completing the phone puzzle.
Padlocked door in Torture Chamber
Location: Convent – Torture Museum
Items needed: Hammer
Solution: Interact with the padlock then use the hammer to break it
Teleport mirror
Location: Convent – Torture Museum
Items needed: Lighter – Hammer
Solution: Use the hammer to break the padlock, then use the lighter to light candles around the mirror: bottom left, top left, middle 2 right, bottom right
X000
0 X
0 X
X X
Notes: The hint for the mirror can be found in the museum – there is a portrait of a woman looking into a mirror that shows the order in which the candles should be lit
Torture Chamber stretcher
Location: Convent – Torture Museum (Other side)
Solution: Use the lighter to light candles on the mirror to go through to the ‘hell world’. Locate the stretcher and use the turn handle to rip open the scarecrow. Go back to the ‘normal’ world and obtain the shotgun pipe from the punished body
Angel statue
Location: Convent – Museum
Items needed: Lighter – Angel heart
Solution: Go the ‘hell’ version of the Museum and use the lighter on the scroll to remove it. Use the second mirror in the torture chamber ‘hell’ to go through to a secret area in the ‘normal’ world. Locate the bronze bull and obtain the stone heart from the corpse inside. Go back through to the ‘hell’ world and back through the first mirror to the ‘normal’ torture chamber.
Go back to the angel statue and place the stone heart in the hole to fill the font with blood.
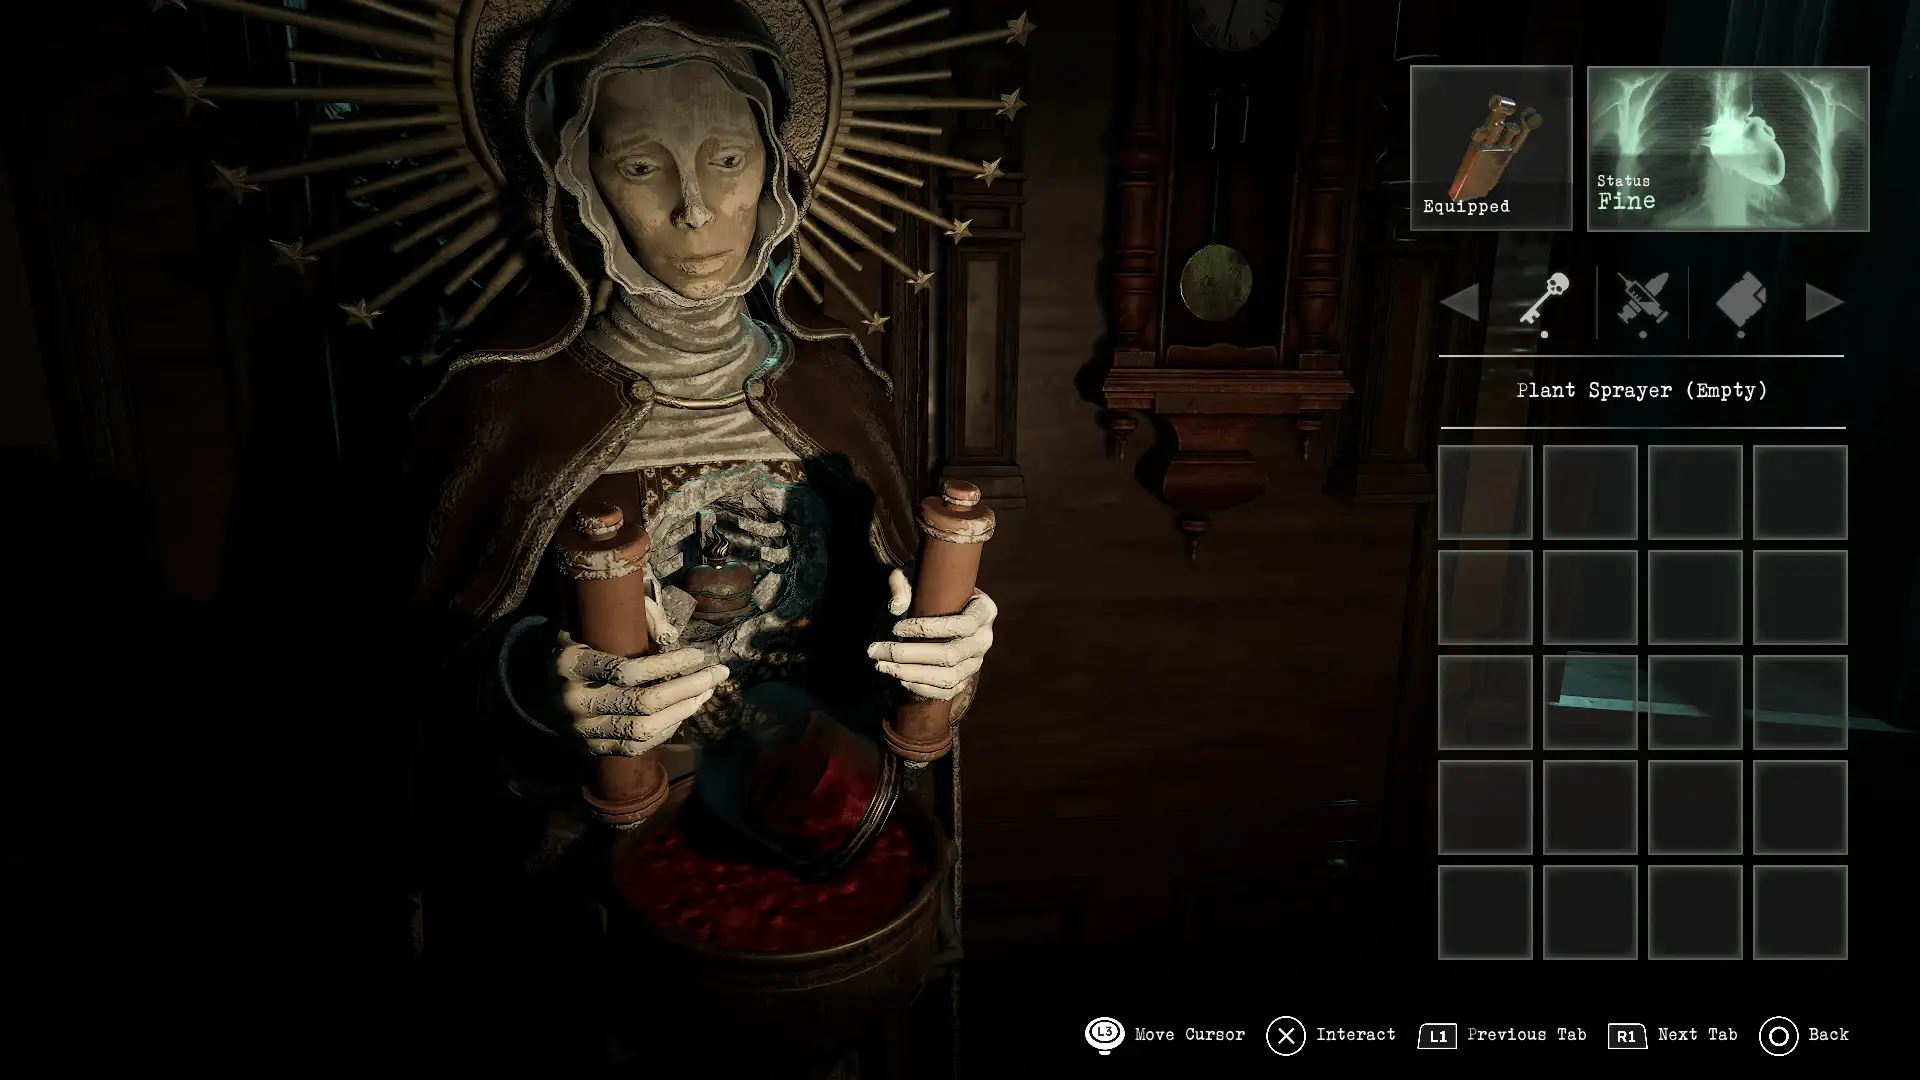
Blood-filled atomiser
Location: Convent – Museum
Items needed: Plant sprayer
Solution: Once the angel statue puzzle is complete, use the plant sprayer on the font filled with blood. Examine the plant sprayer and use the pump 3 times to pressurise it.
Notes: Obtain the plant sprayer from Chapter House.
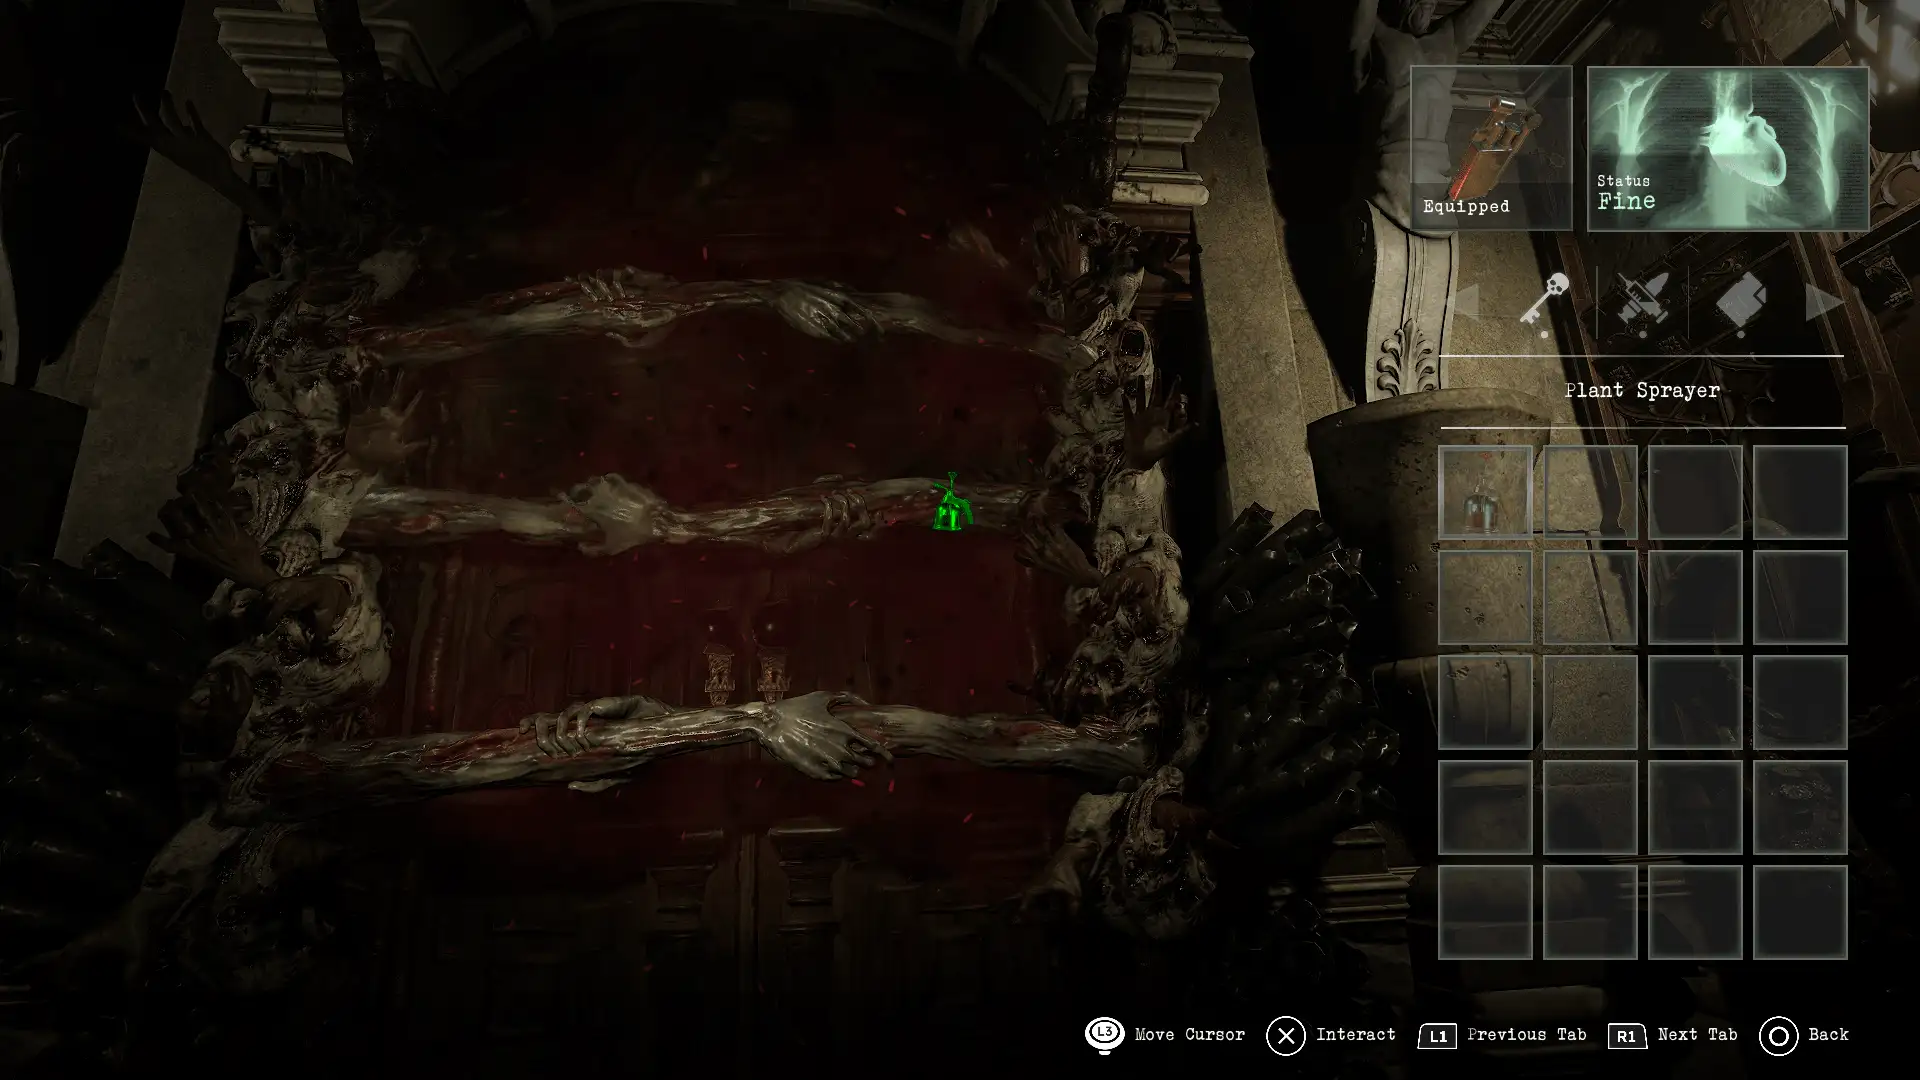
Cursed door
Location: Convent – North Corridor
Items needed: Blood-filled plant sprayer
Solution: Use the blood-filled plant sprayer on the cursed door to remove the blockage.
Mall back entrance lock
Location: Town – Commercial district
Items needed: Mall back entrance key
Solution: The key is obtained from the lower area of the butcher’s shop, on a dead body nailed to the wall
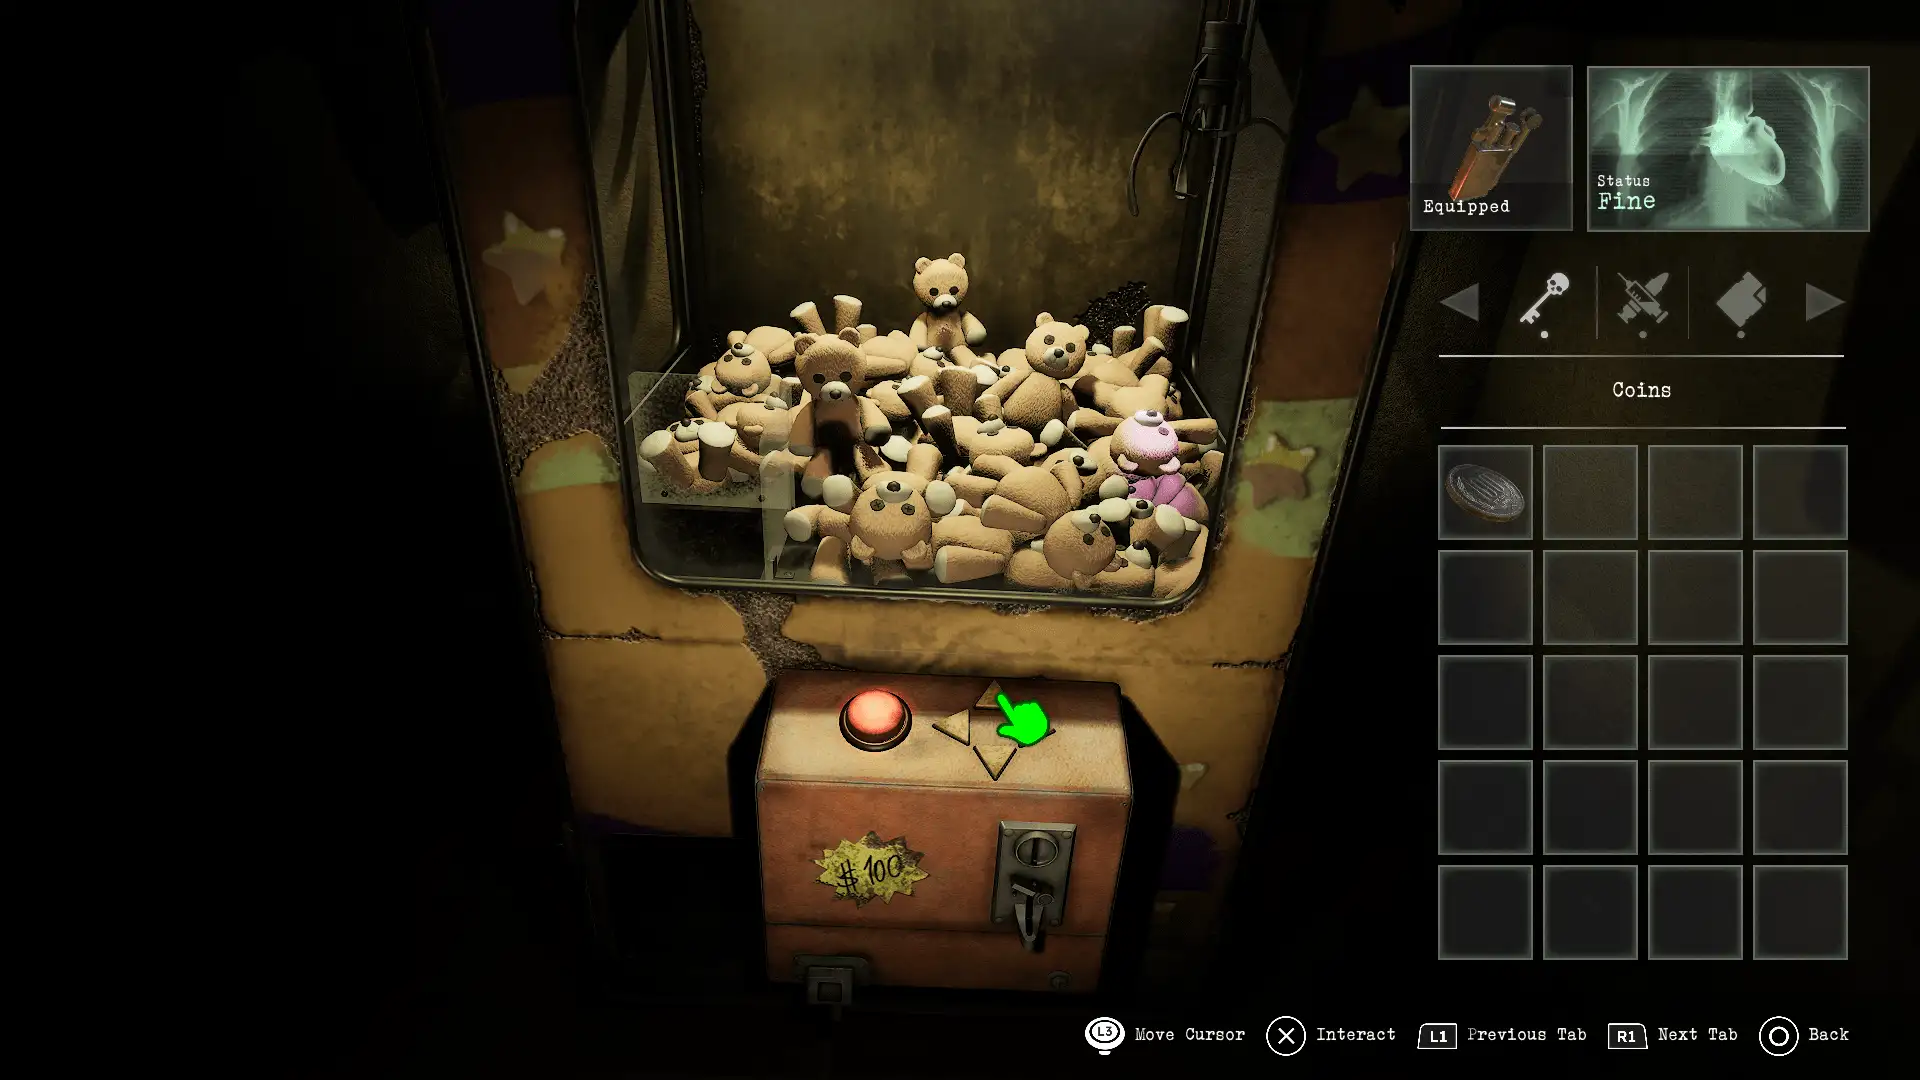
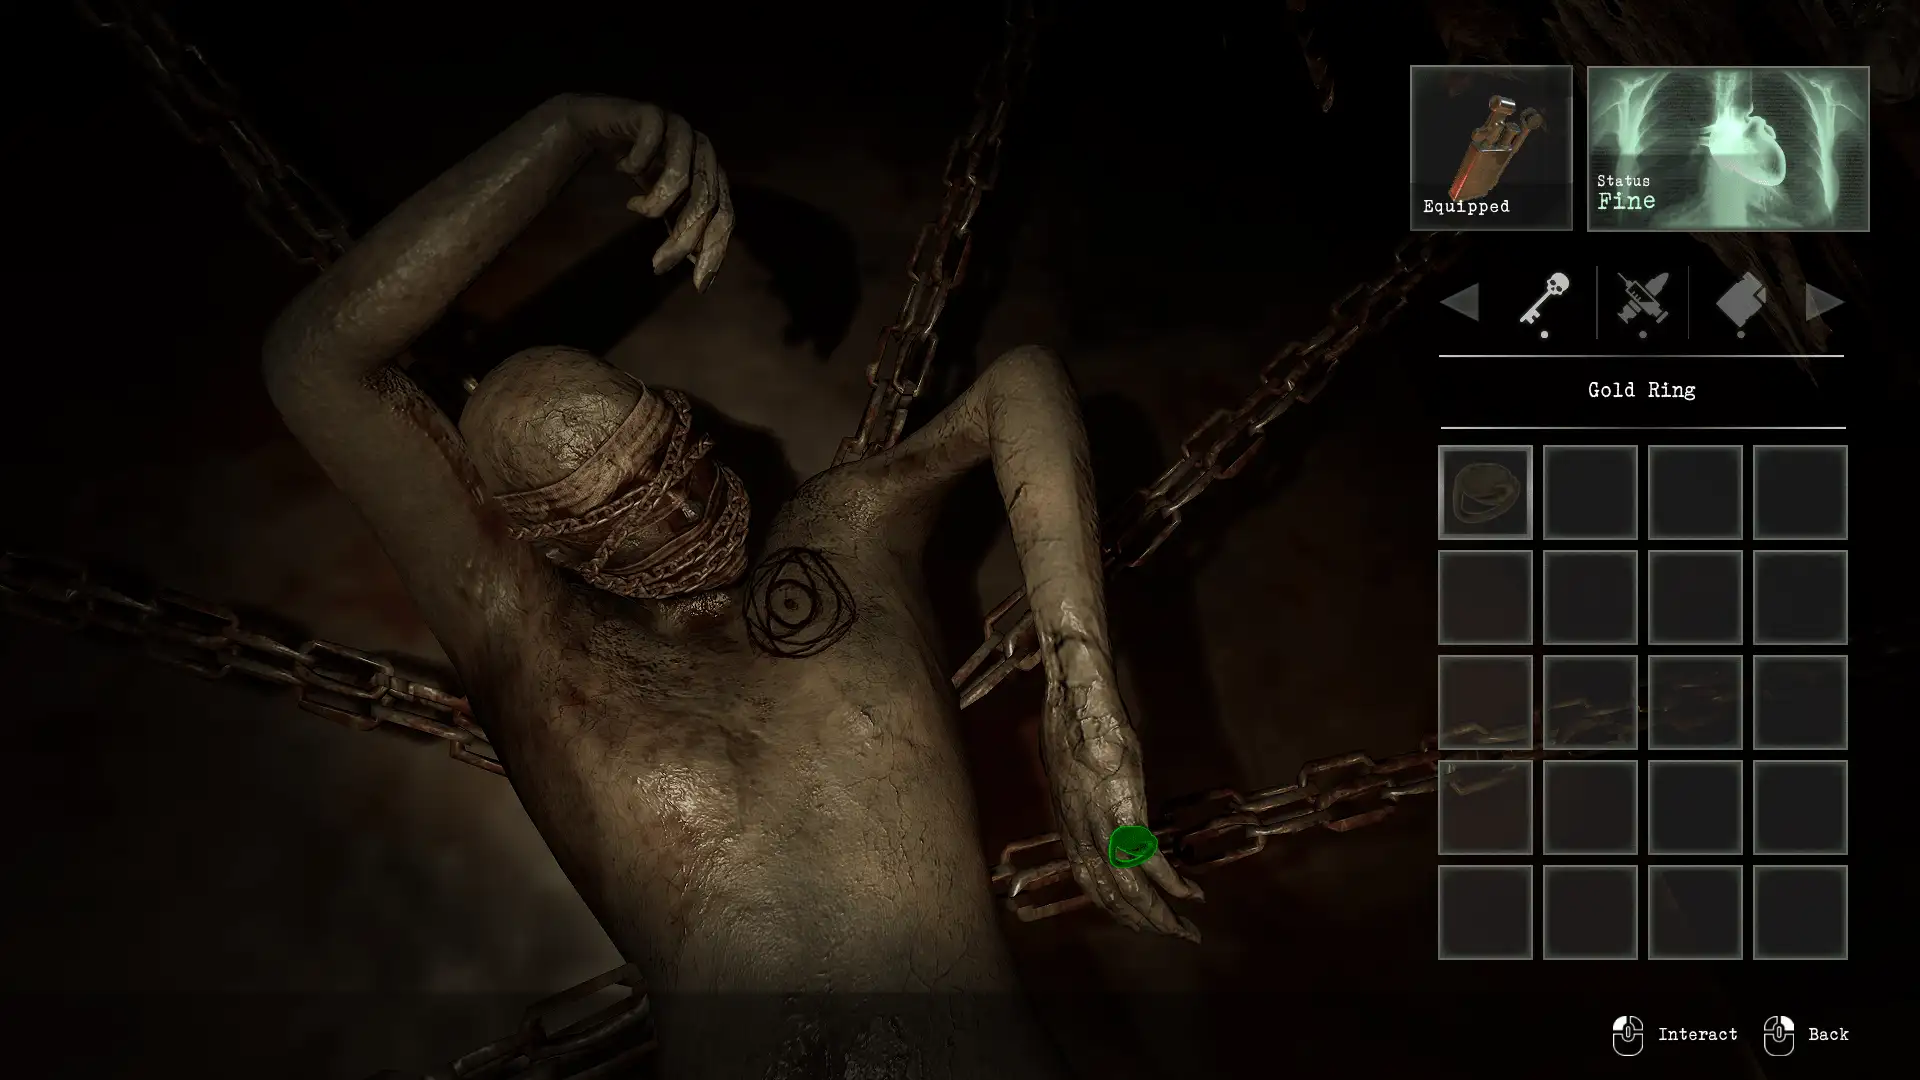
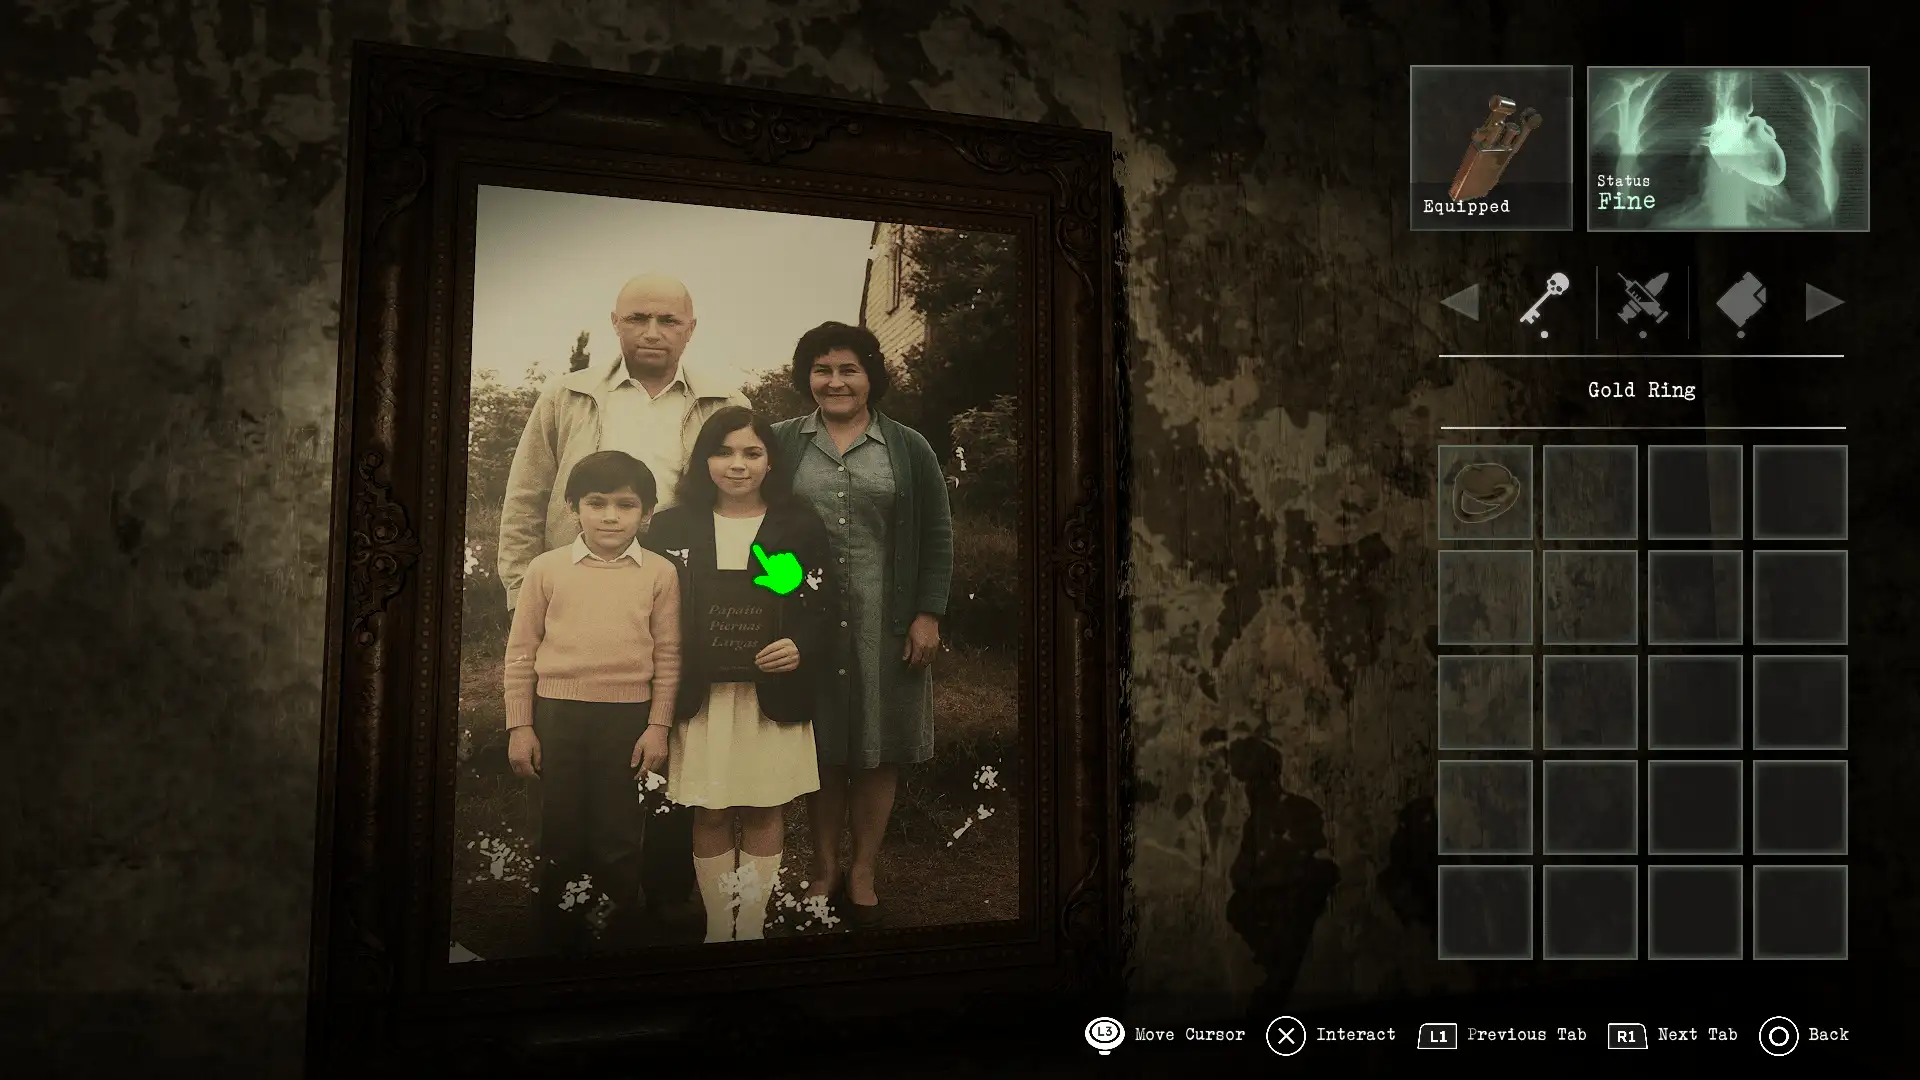
Arcade machine
Location: Mall – Arcade
Items needed: Arcade Coin
Solution: Turn on the power in the mall then go to the arcade machine. Use the coin from the town phone to start the claw machine. Use the arrows to move the claw and the red button to drop the claw. Once a bear is obtained use the box cutter to open the bear and find a gold ring
Notes: The cutter is found inside the locked gym room in the mall F3. The fold ring is then use on the chained up man in Mall Lower Level to get to the next area of town (Backstreets)
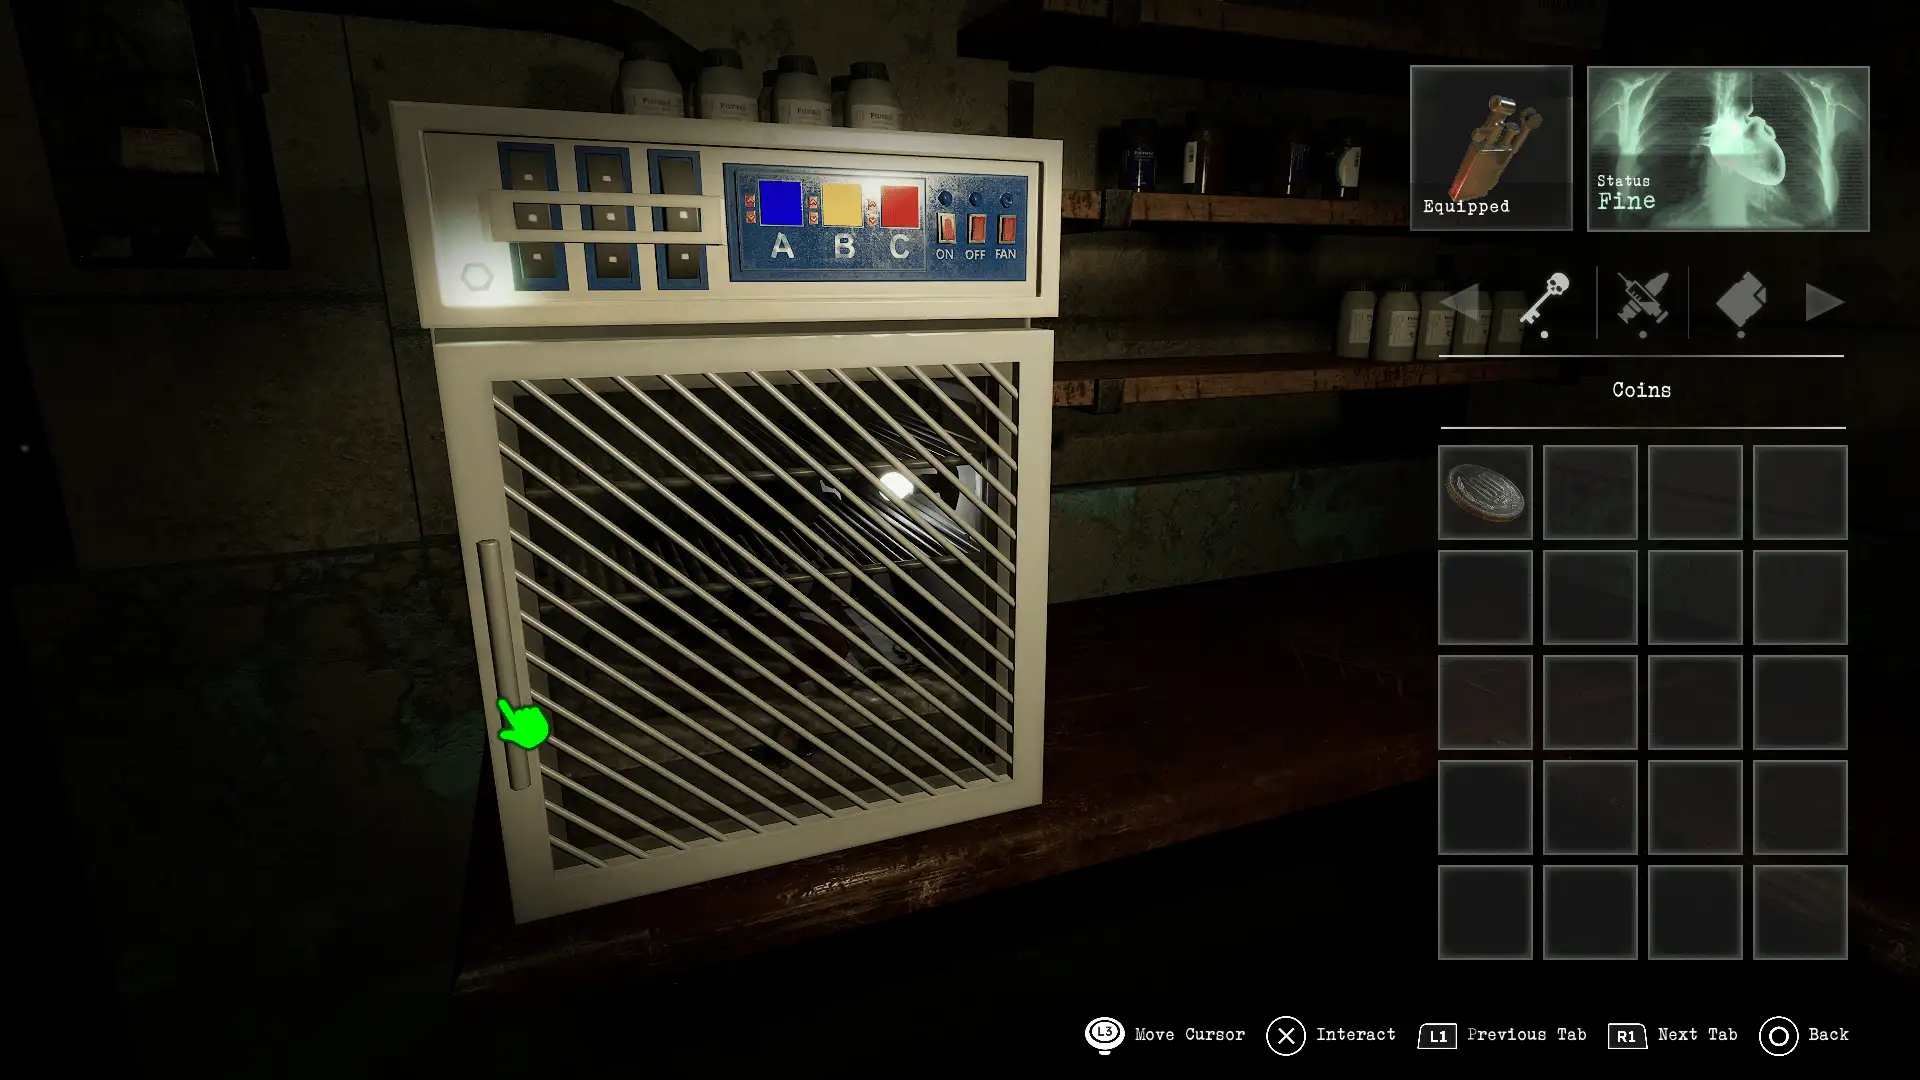
Pharmacy mini fridge
Location: Mall – Pharmacy
Items needed: Pharmacy polaroid
Solution: Find the polaroid picture and turn it around to see various numbers to add together. Go to the fridge to work out the colours for the combination – Blue, Yellow, Red
Notes: The polaroid is found in the lower level of the pharmacy. The numbers colarate to the coloured backgrounds – the solution is what colour the combined numbers would make
Gym lock
Location: Mall – Mall entrance
Solution: Obtain the key from completing the mini fridge puzzle in the Pharmacy
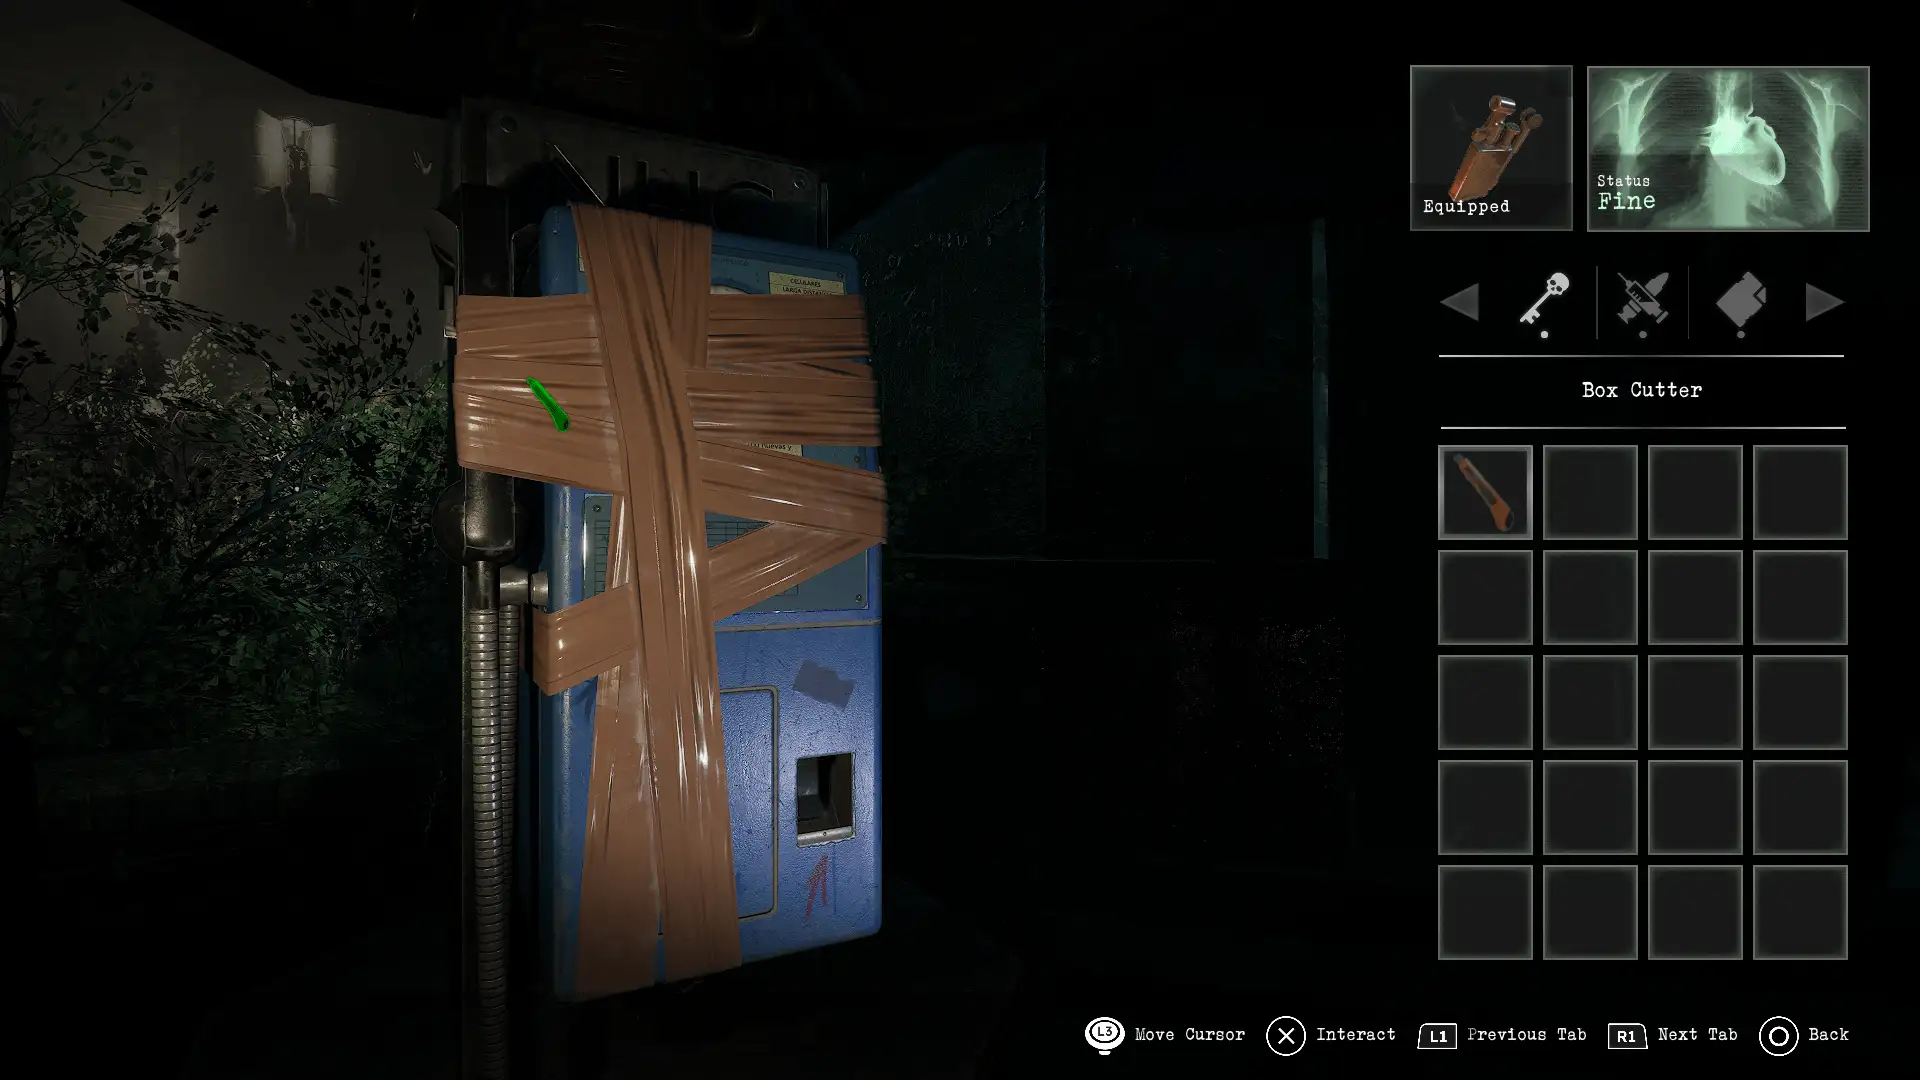
Town telephone
Location: Town – Commercial district
Items needed: Box cutter
Solution: Use the cutter on the tape covering the ringing phone in the town. This will then give you the coins for the mall arcade machine
Notes: The cutter is found inside the locked store room in the mall F3
Chained man / gold ring
Location: Mall – Mall Lower floor
Items needed: Bear Gift – Salvation ring
Solution: Give the gold ring to the chained man in Mall B. This will cause him to disappear and clear access to the next area of Town
Notes: Obtain the gold ring from the arcade machine
Hidden room
Location: Processing Plant – Freezer
Solution: To find the secret room where Anna has been kept, go into the open door after the row of freezers and press the portrait on top of the chest of the daughter
Notes: The hint can be found in the diary on an oil drum outside the room (press the heart of the person dearest to me)
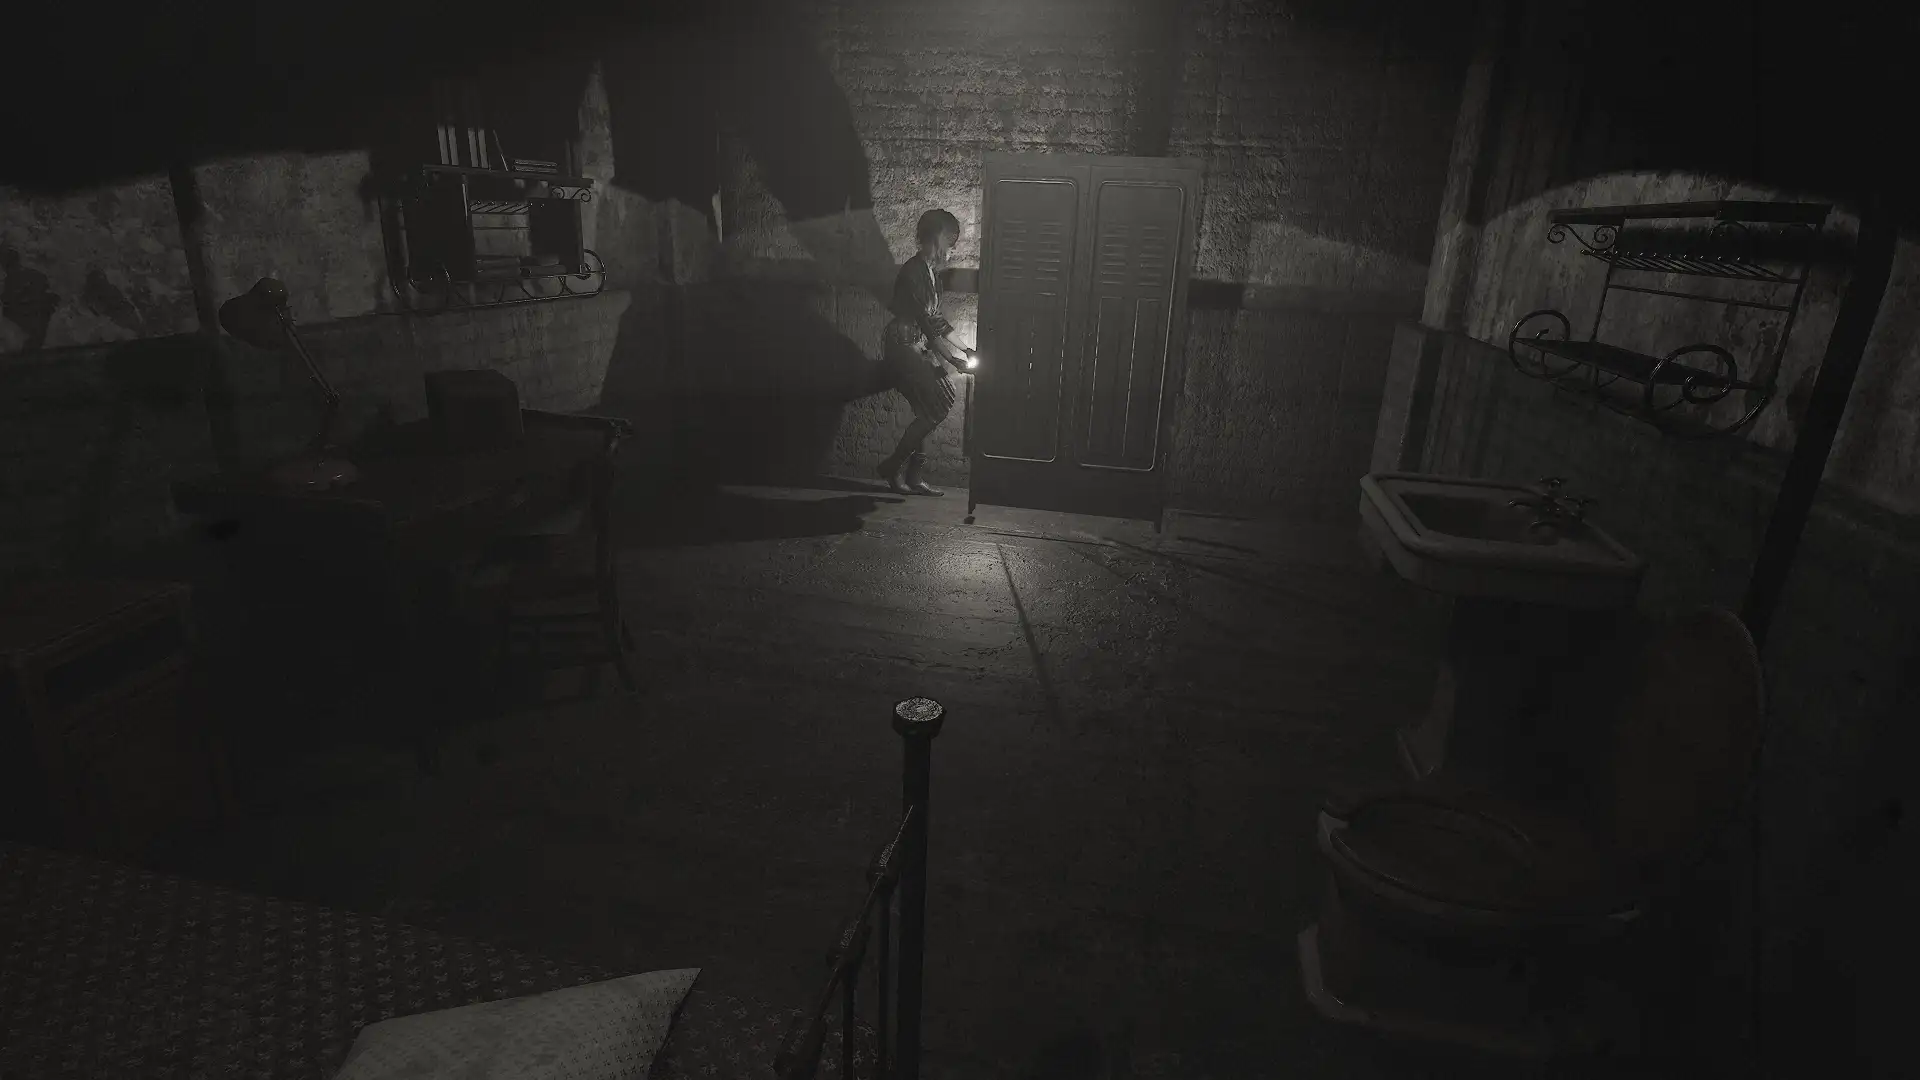
Open vent – save Anna
Location: Processing Plant – Freezer (Past)
Items needed: Bear Gift – Salvation ring
Solution: Go into the past of the Processing Plant by using the VHS tape on the projector, then progress to the room where you saw the decapitated body. Move the wardrobe in front of the vent to block it off, meaning Anna will be alive in present day
Notes: The VHS tape is found in the current-day freezer on the bed. The projector is in the Conference Room
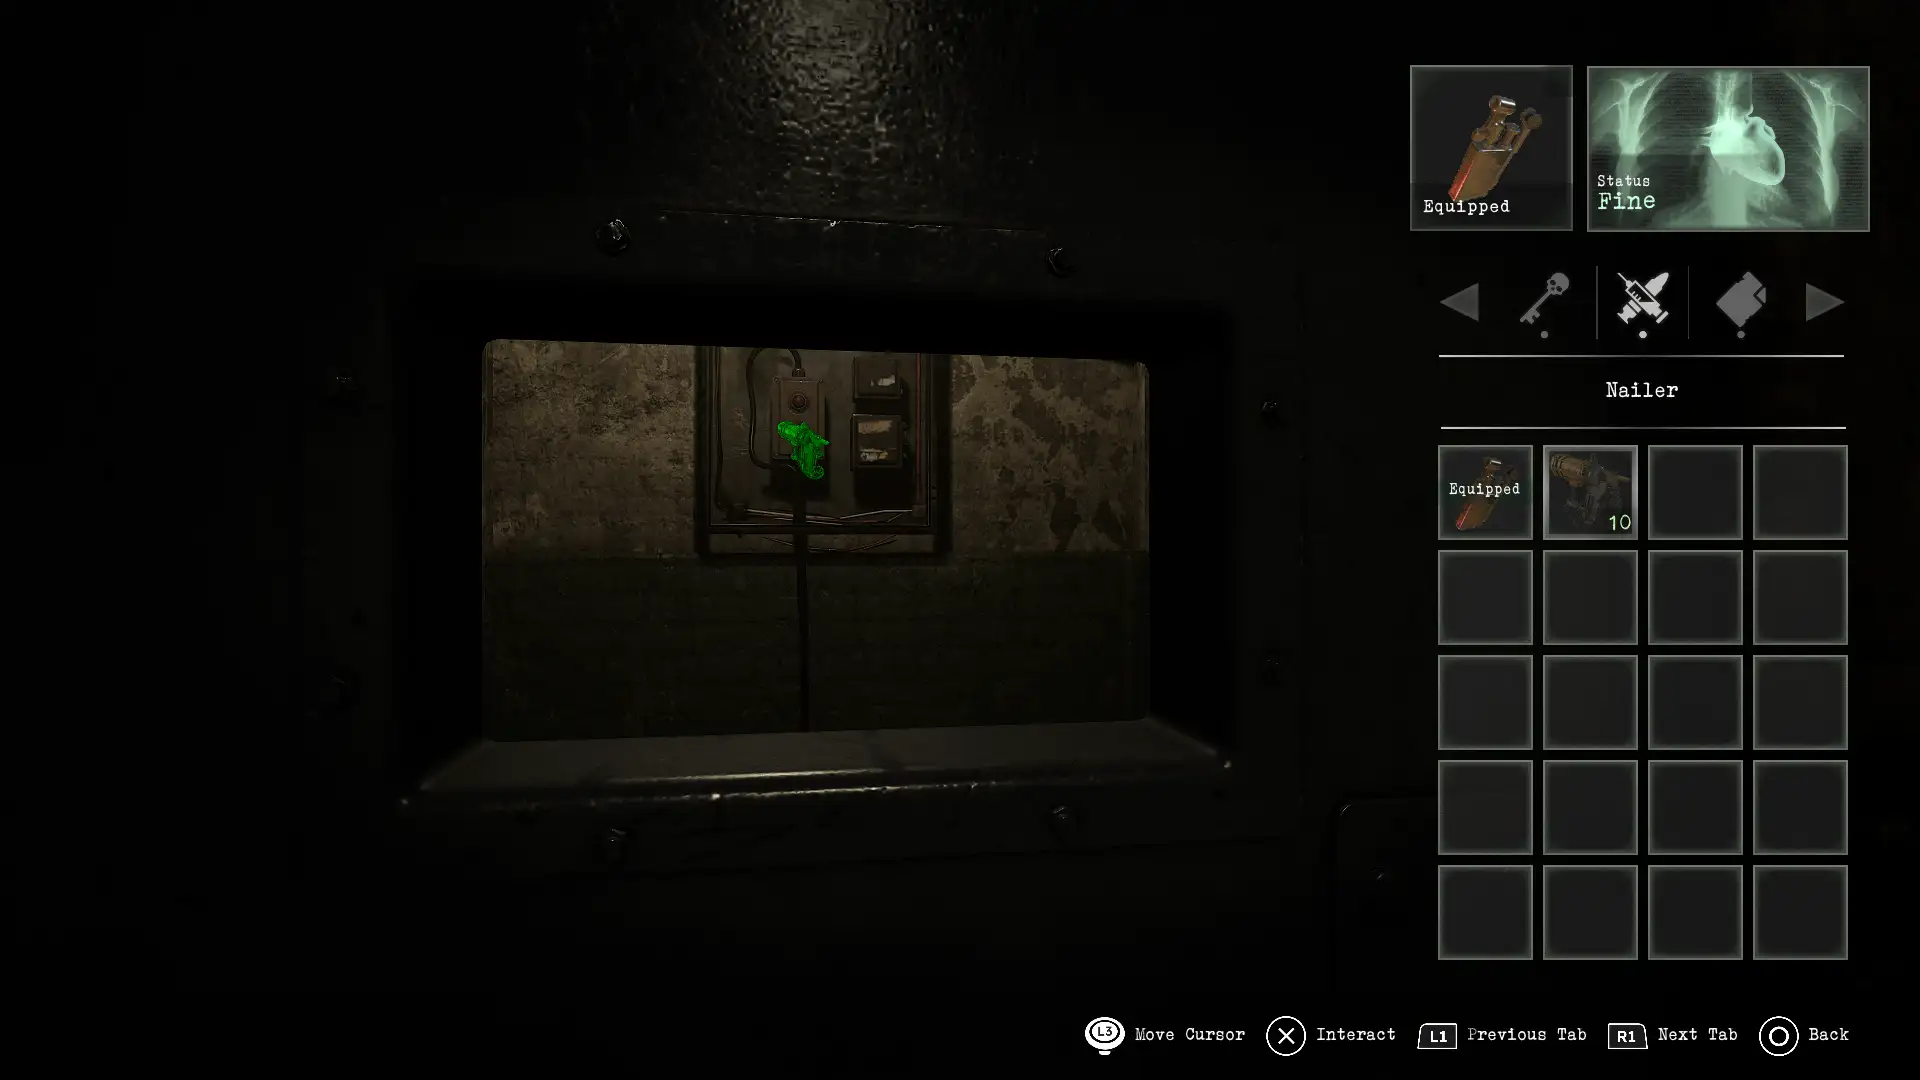
Escape the room
Location: Processing Plant – Freezer
Items needed: Nailer
Solution: Go to the door to look out of the slot, then shoot the nailer to push the button and open the door
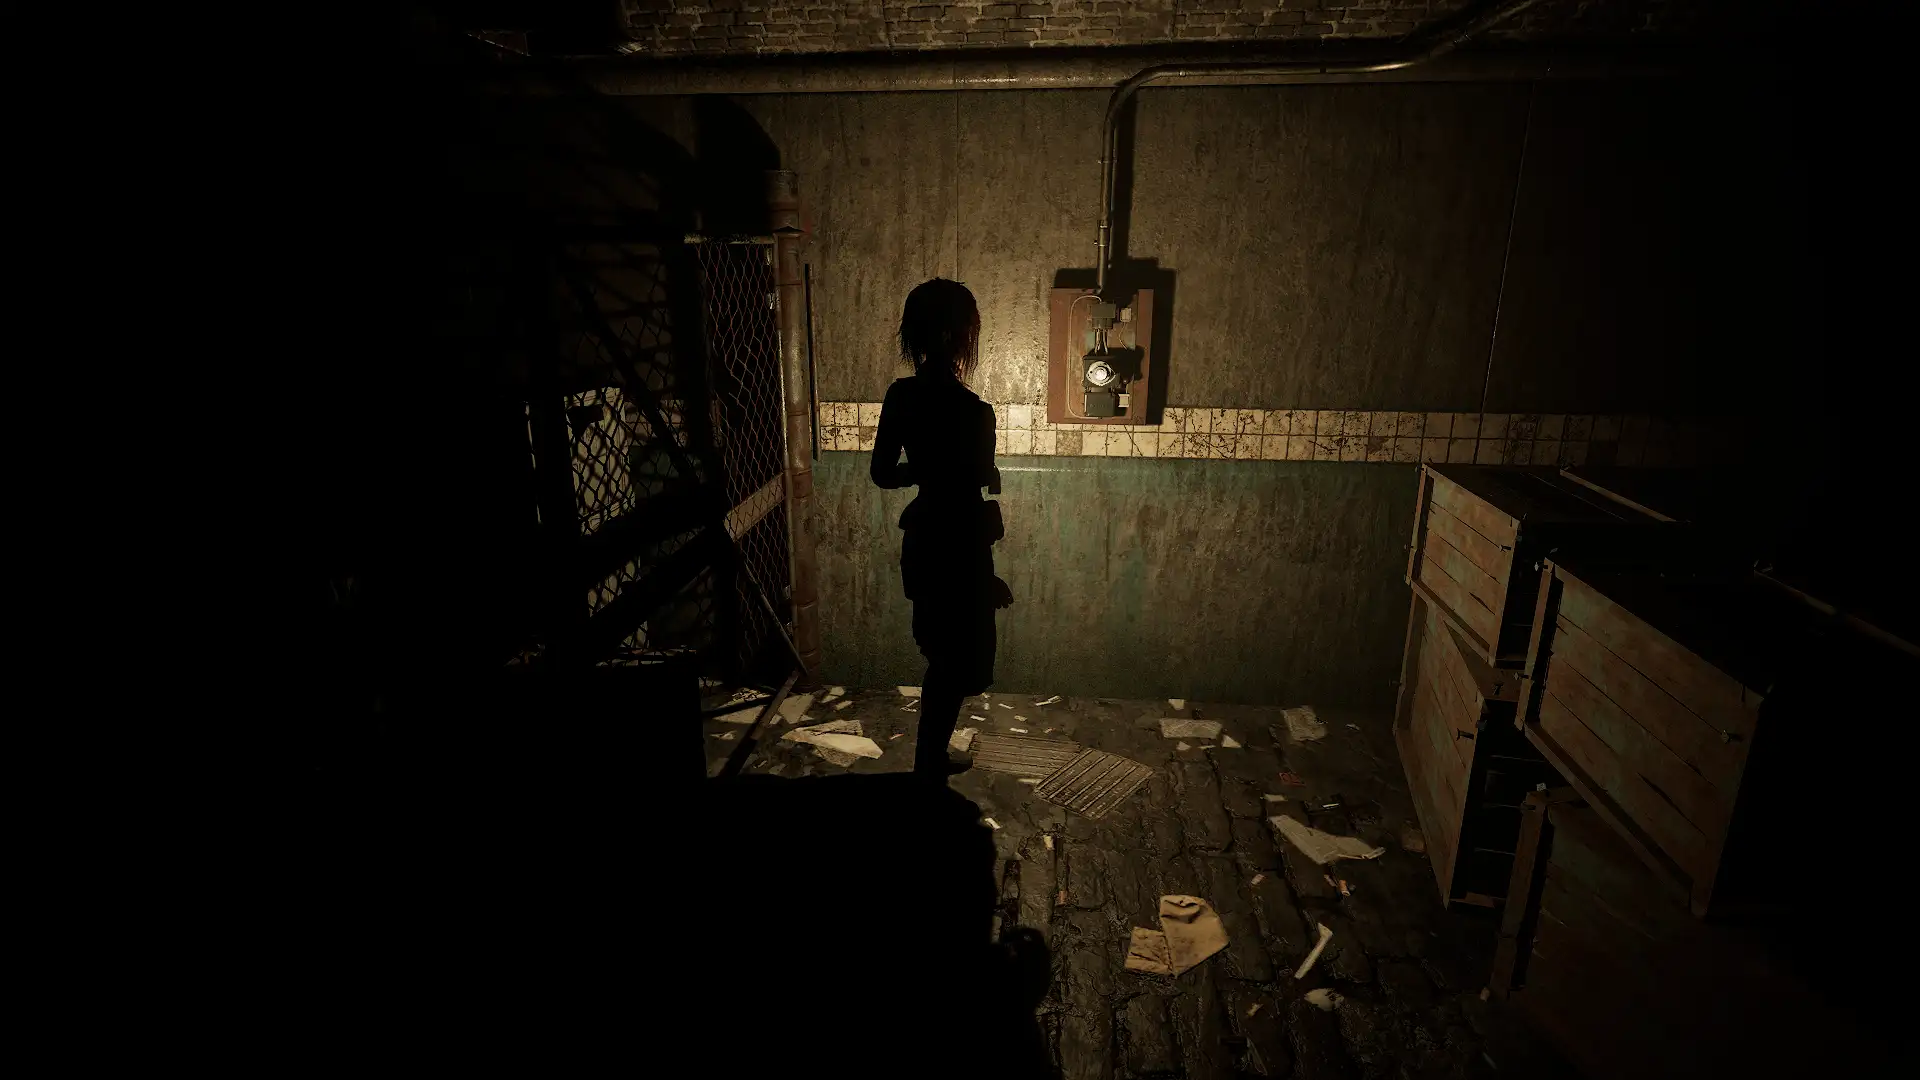
Accessing the elevator
Location: Processing Plant – Reception
Items needed: Lightbulb
Solution: Put the lightbulb into the slot on the wall, use the switch to then the light on then use the crowbar to smash the boxes
Notes: The lightbulb is found in Anna’s room after you have watched the cutscene of Caroline being locked in
Elevator power
Location: Processing Plant – Underground Docks
Items needed: Bear Gift – Salvation ring
Solution: Turn the dials to start elevator power and access the docks
Notes: Dial 2: one spin, Dial 3: three spins
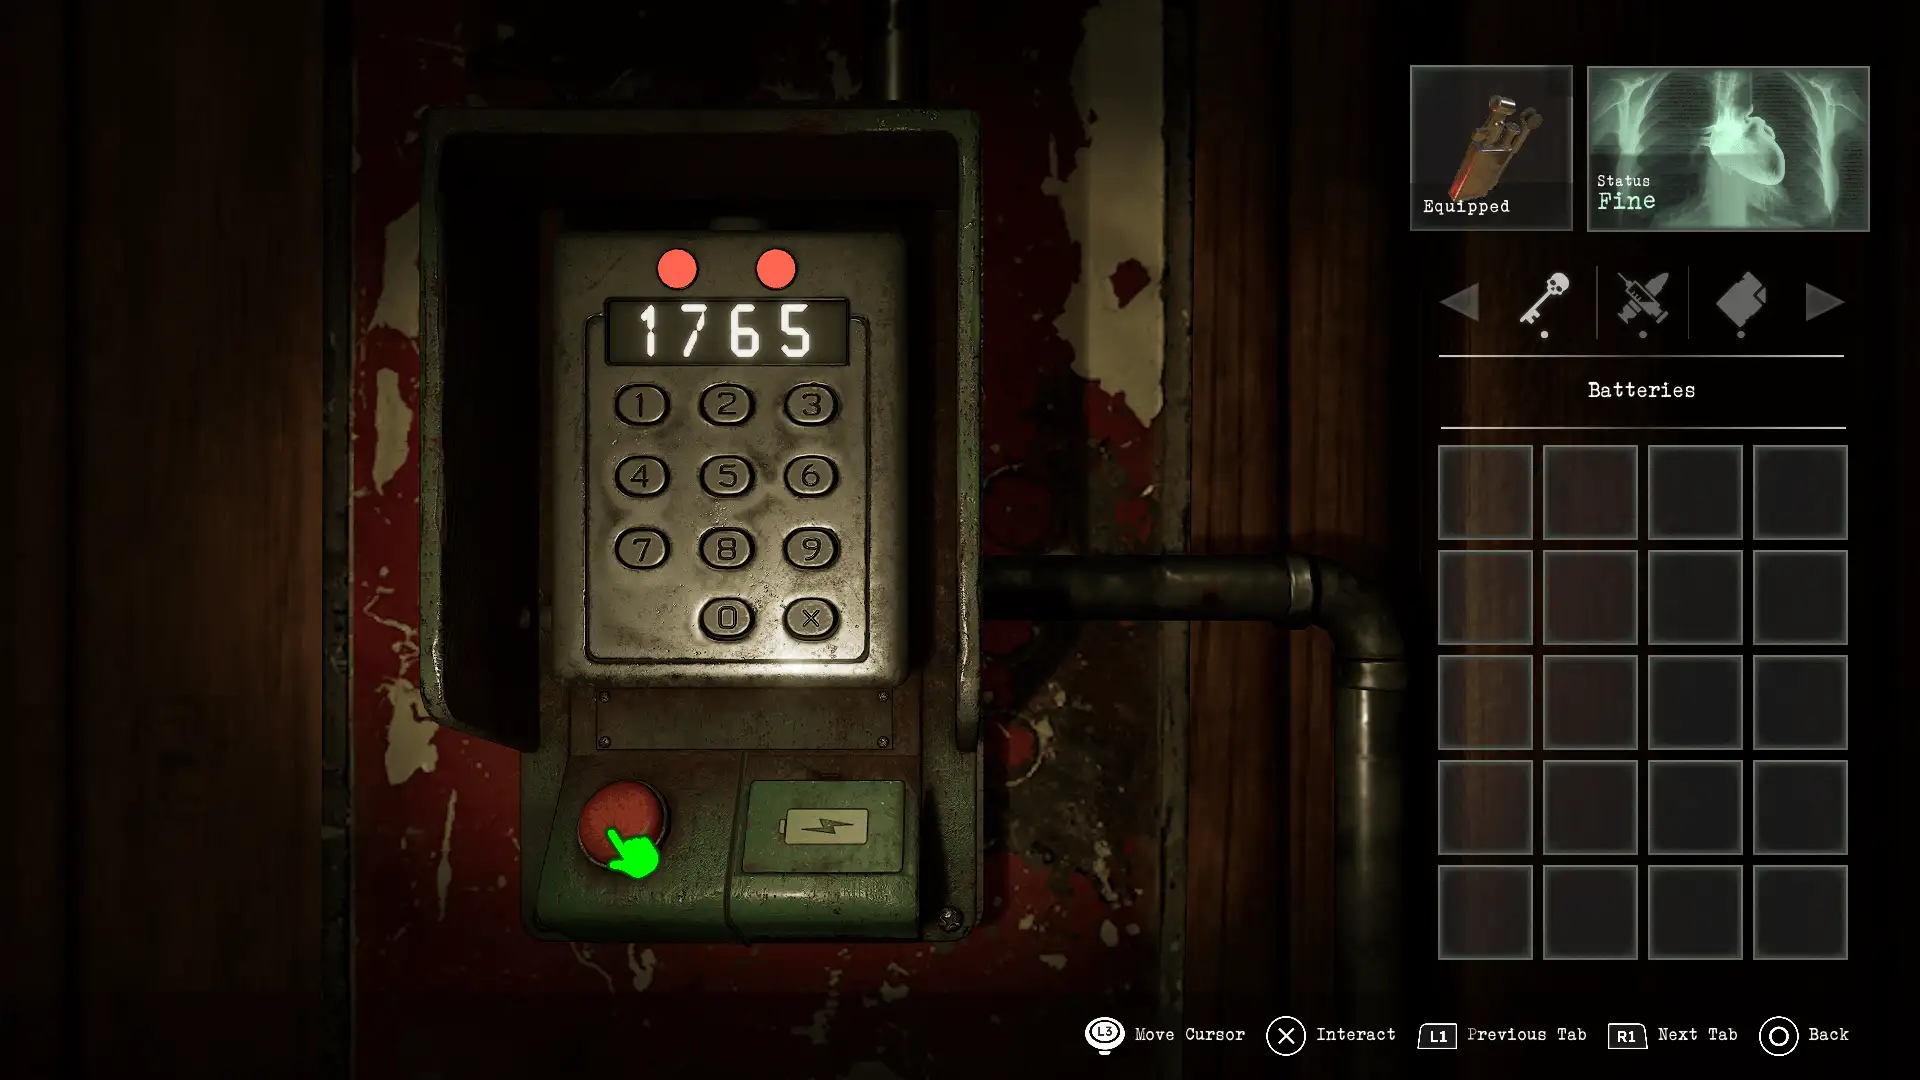
Passcoded door
Location: Processing Plant – Corridor 2F
Items needed: Batteries
Solution: Take batteries out of the cassette player and use them to power the keypad. The code is 1765
Notes: The cassette player is found in the Underground Docks. The combination is found in the upper level of the surveillance room with the numbers pinned to the wall (the 6 is upside down). Remove the batteries from the keypad after gaining access to use them in a later puzzle
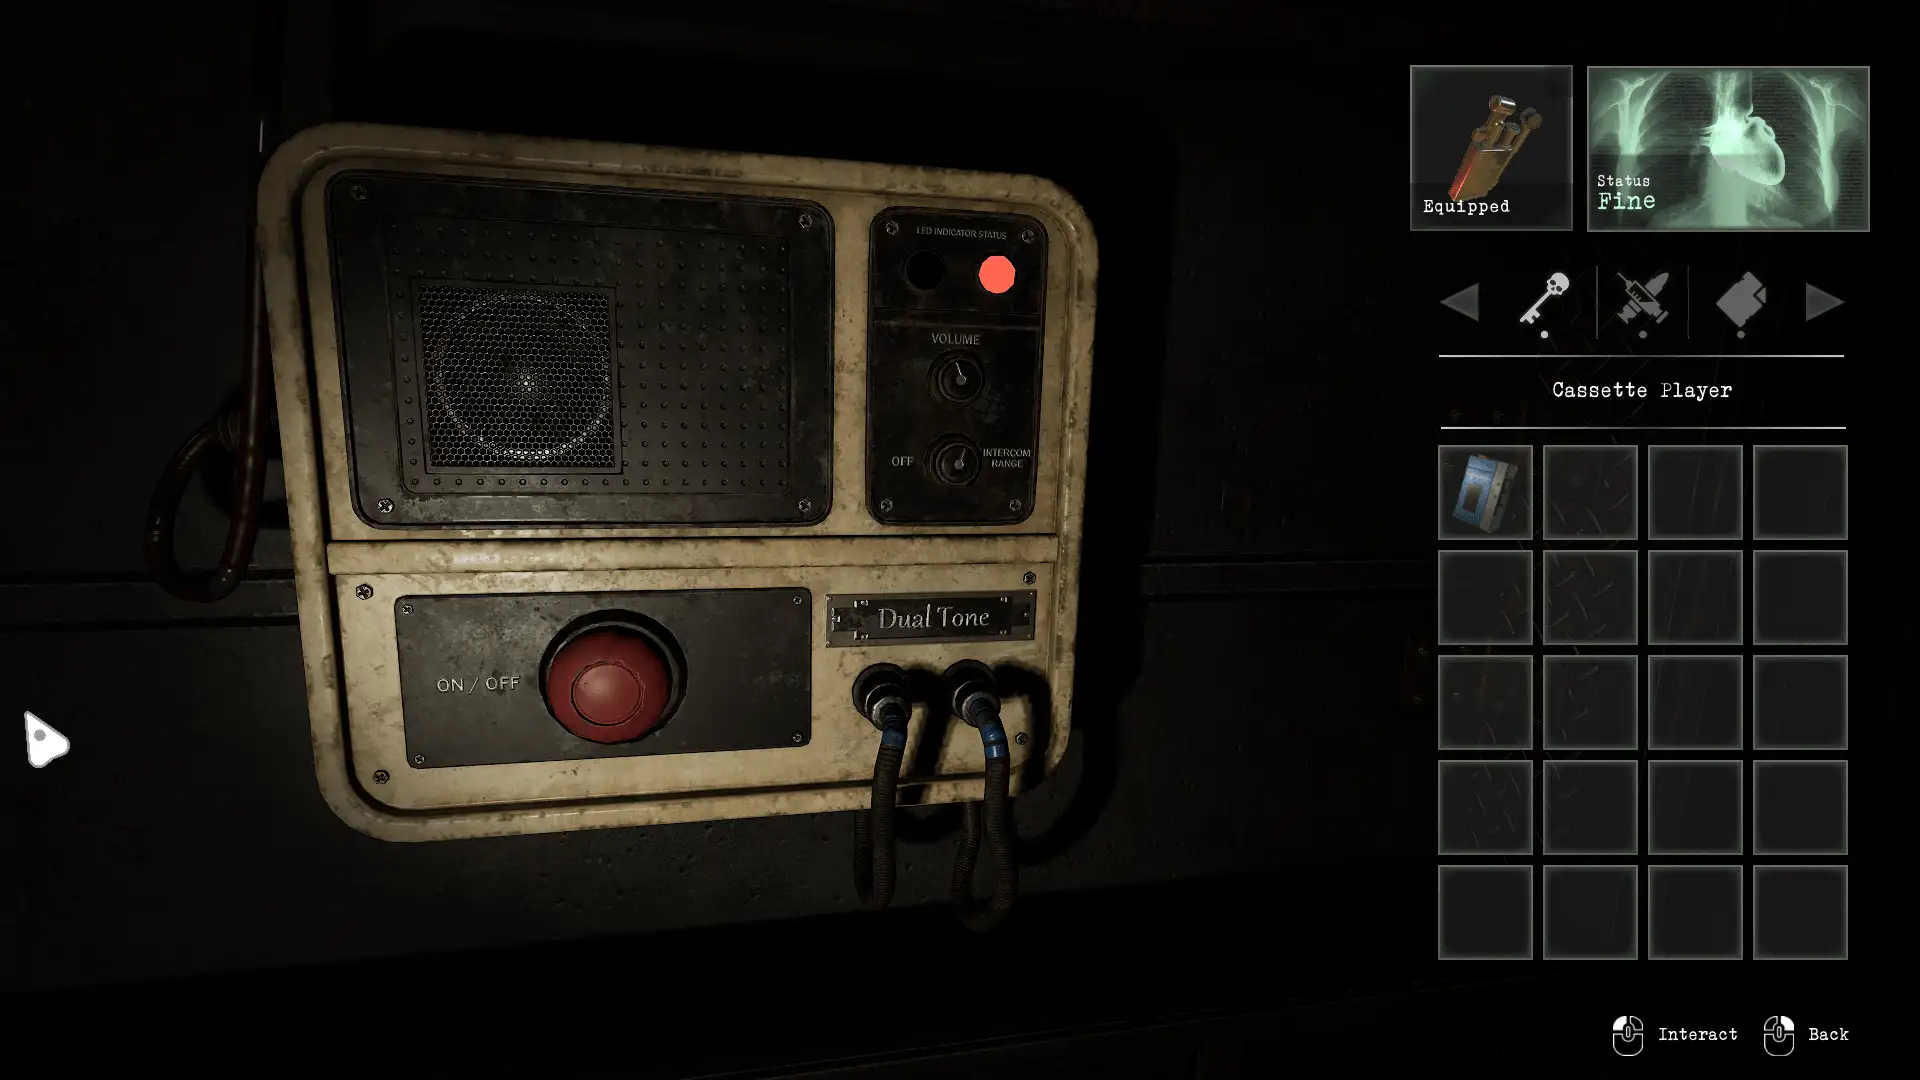
Voice activated lock
Location: Processing Plant – Corridor basement
Items needed: Batteries – Cassette tape (confession) – Cassette player
Solution: Put the batteries back into the cassette player and insert the confession tape. Locate the voice activated lock. Press play on the cassette then close the examine window. Listen to the VO – when it begins talking about the password, press the red button on the lock to line up the tape saying the password ‘long pig’ with the machine listening for the password
Notes: The batteries will have been used in the keypad in an earlier puzzle – go back to collect them if not already done
Moving cages to clear path
Location: Processing Plant – Warehouse
Solution: Locate the control panel for moving and dropping the cages – use this to move cages and clear a path which will be used in the normal world and the Other Side.
0XXX
0000
X000
X000

Other side mirror
Location: Processing Plant – Warehouse
Items needed: Lighter
Solution: Locate the mirror in the lower level of the Warehouse (where the cages are) and use the hint to light the correct candles:
000
0 0
X X
0 X
000
Notes: The writing on the mirror is showing times on a clock: 3 o’clock, quarter to, 20 past

Waste disposal furnace
Location: Processing Plant – Factory
Items needed: Bear Gift – Salvation ring
Solution: Place the toy figurine into the furnace in Waste Disposal other side, then return to the normal world waste disposal. Use the buttons to close the door to the furnace and turn it on to burn the enemy. Re-open the doors and collect the spiral keycard.
Notes: To turn on the gas for the furnace, use the nearby switchboard to get all the dials to all be vertical:
Bottom left, Top middle, Bottom middle, Middle left, Middle right, Top right, Top left, Bottom left
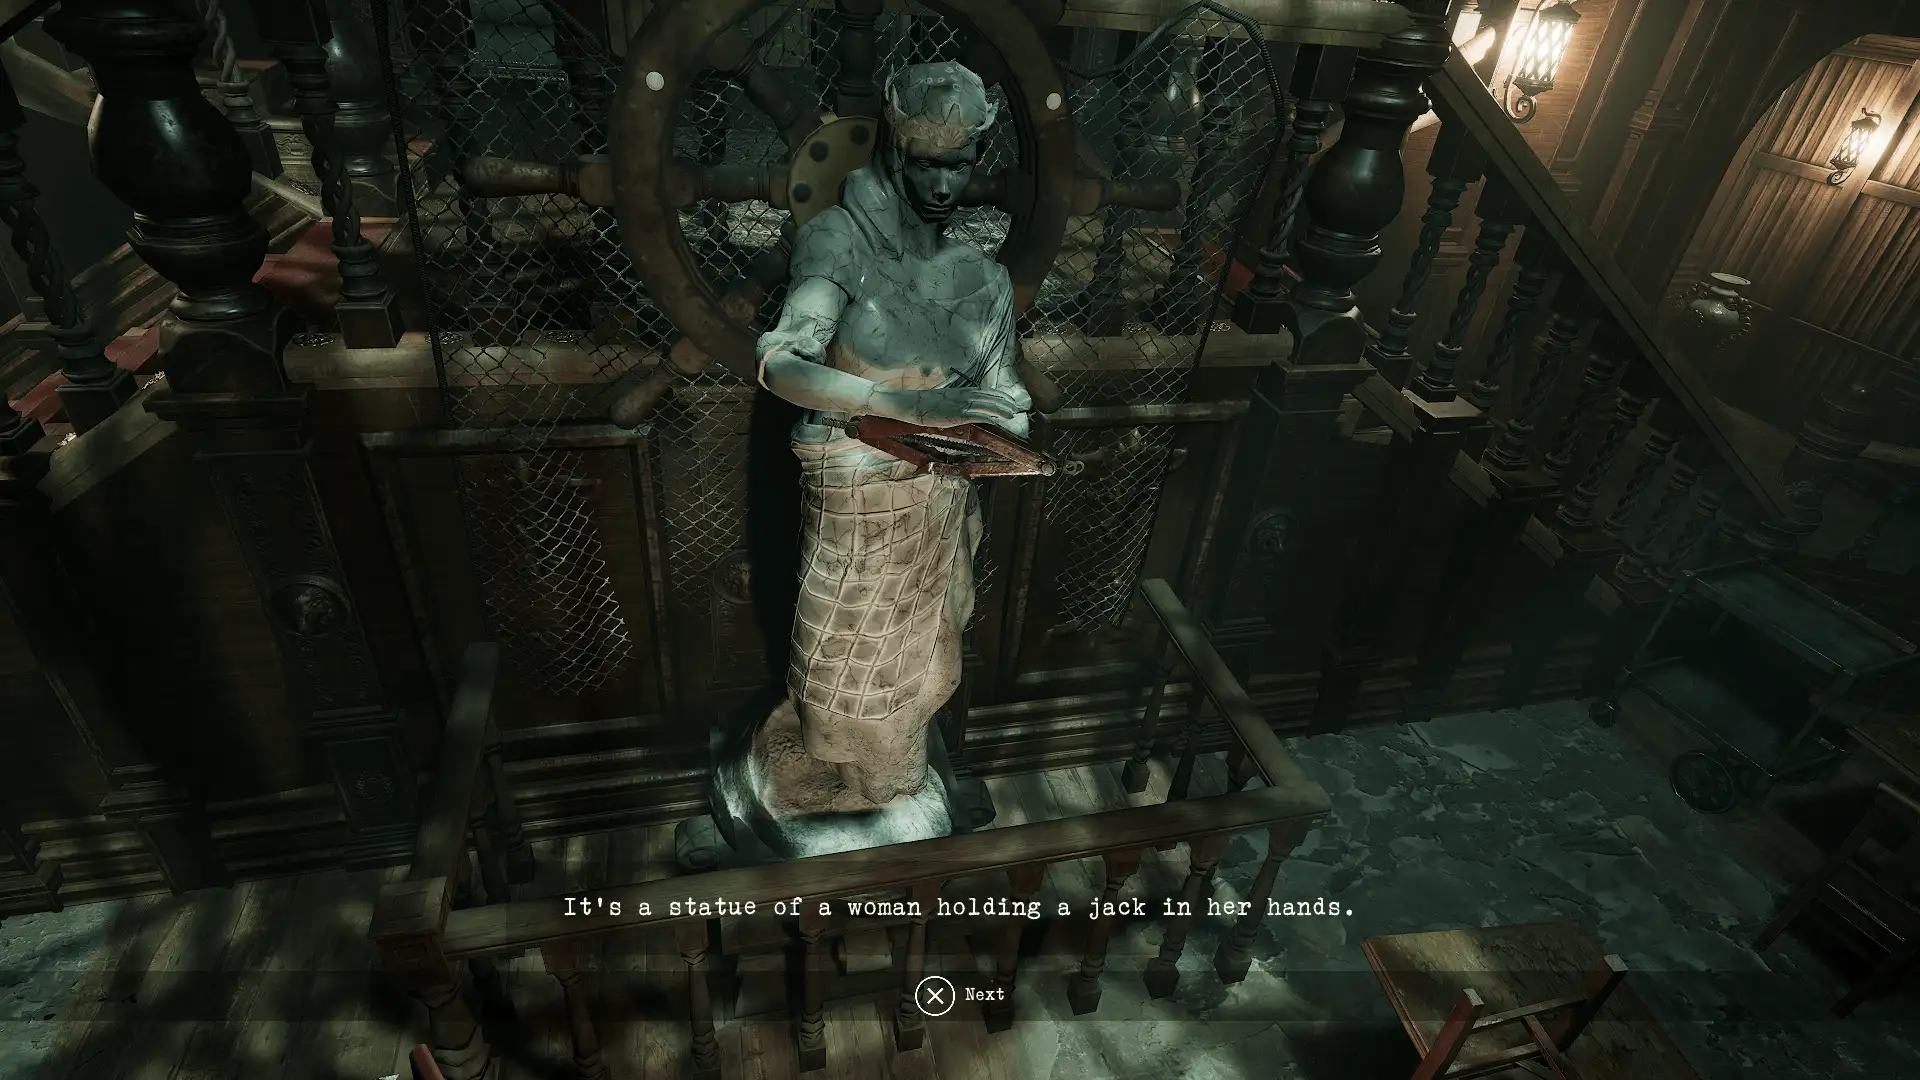
4x portraits to obtain mechanical jack
Location: Processing Plant – Dining Room
Items needed: Crossbow – Lighter – Hammer
Solution: Infront of each portait do the action required to turn on the light above: Hold up the lighter, aim the crossbow, swing the hammer, spin in a circle (tank controls). This will cause the statue in the room to release the mechanical jack
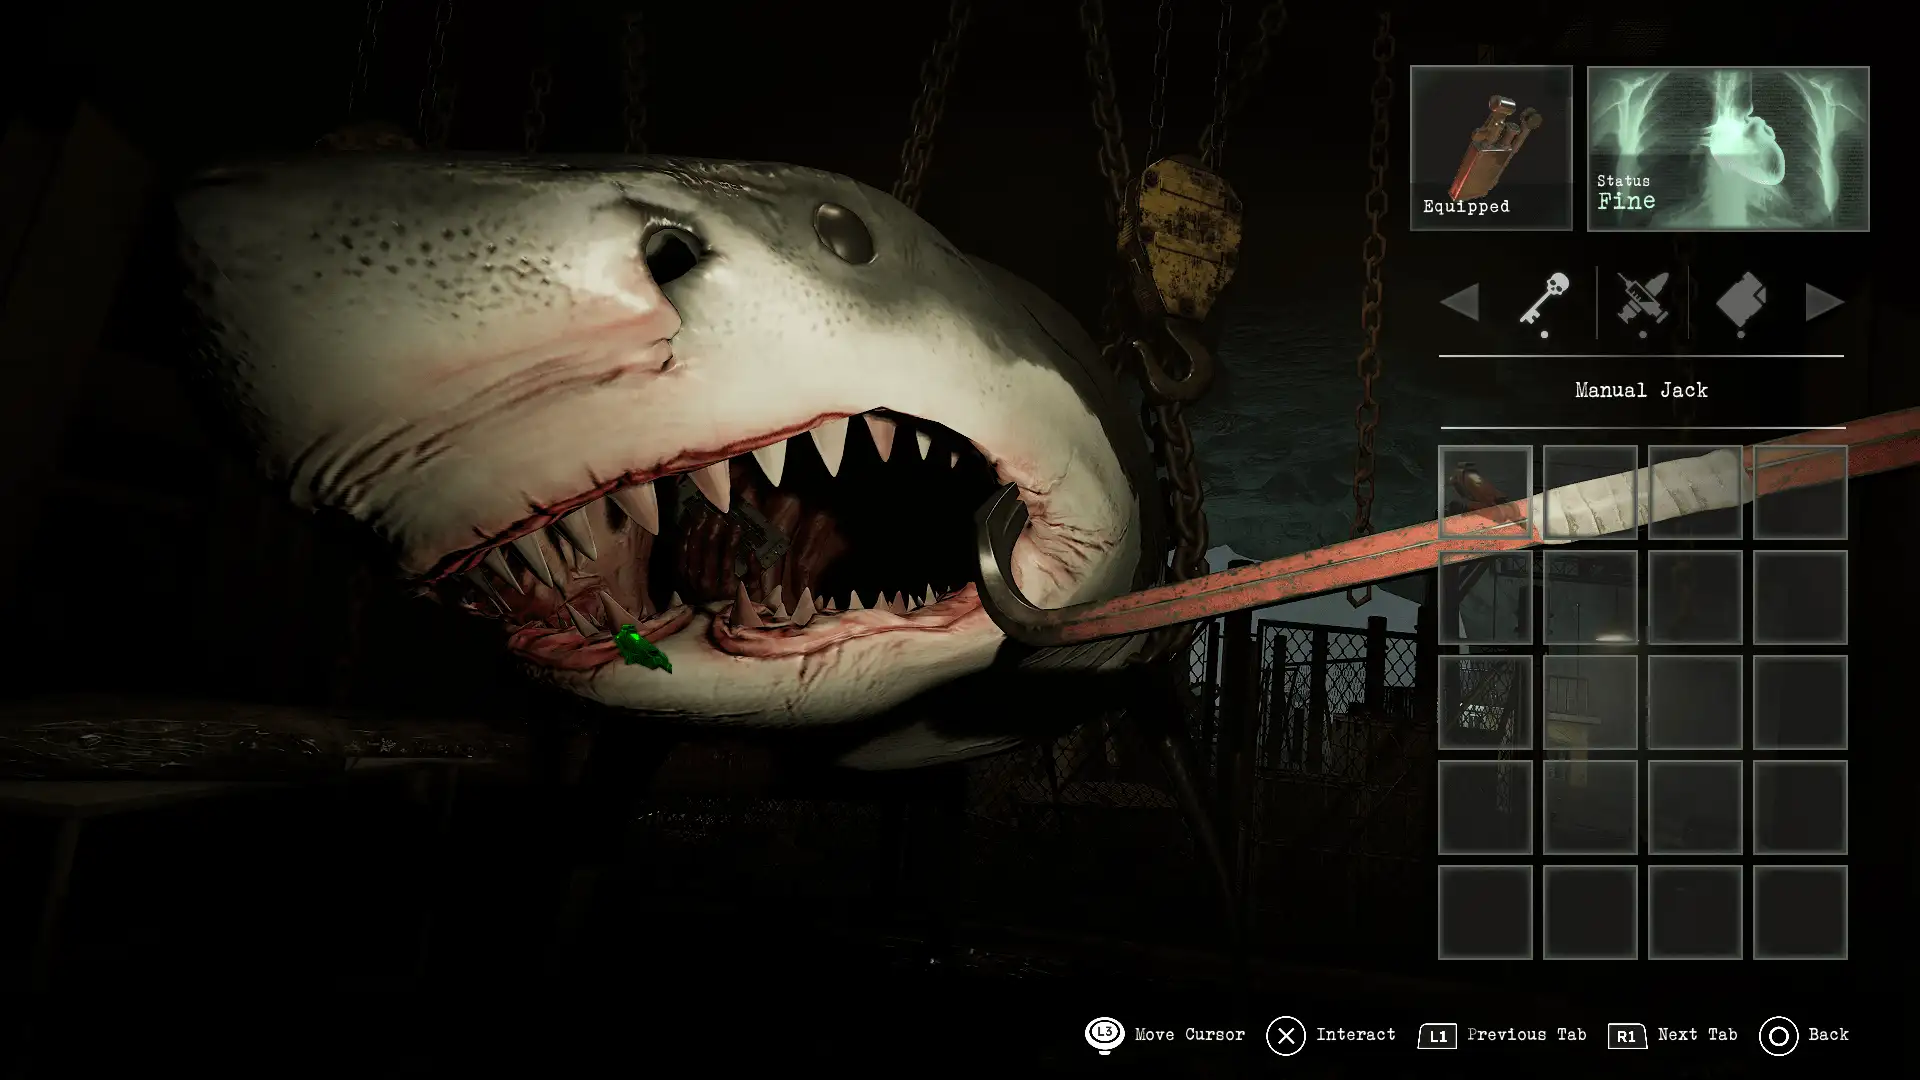
Hanging shark
Location: Processing Plant – Underground Docks
Items needed: Mechanical Jack – Crowbar
Solution: Use the crowbar to slightly open the shark’s mouth, then use the mechanical jack to open it the rest of the way and obtain the triangle keycard

3x Keycards
Location: Processing Plant – Factory kitchen
Items needed: Factory keycard (Eye) – Factory keycard (Spiral) – Factory keycard (Triangle)
Solution: Place the three keycards in the corresponding slots then push each button 3 times to open the door
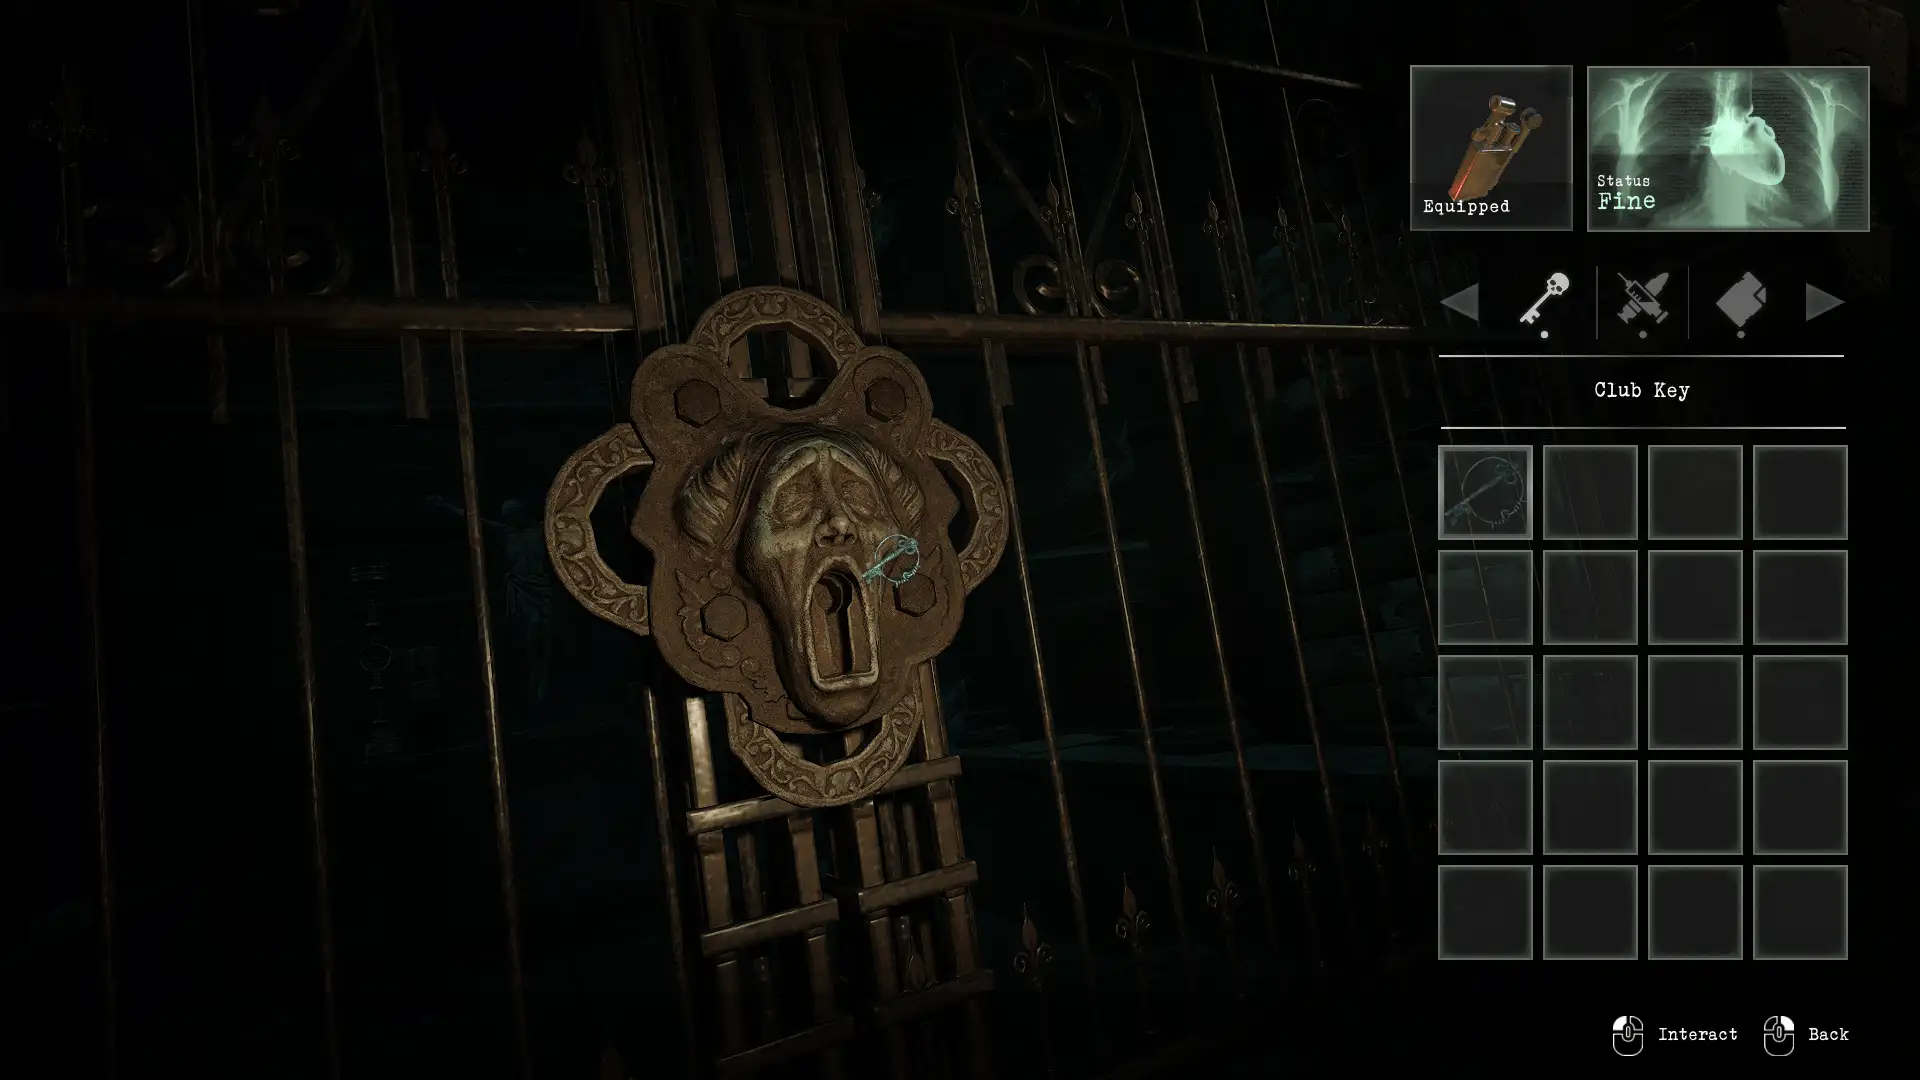
Old Mausoleum
Location: Cemetery – Cemetery Grounds
Items needed: Club key
Solution: Locate the key on the hanging tree then use it to unlock the Old Mausoleum to obtain the outer contellation star piece
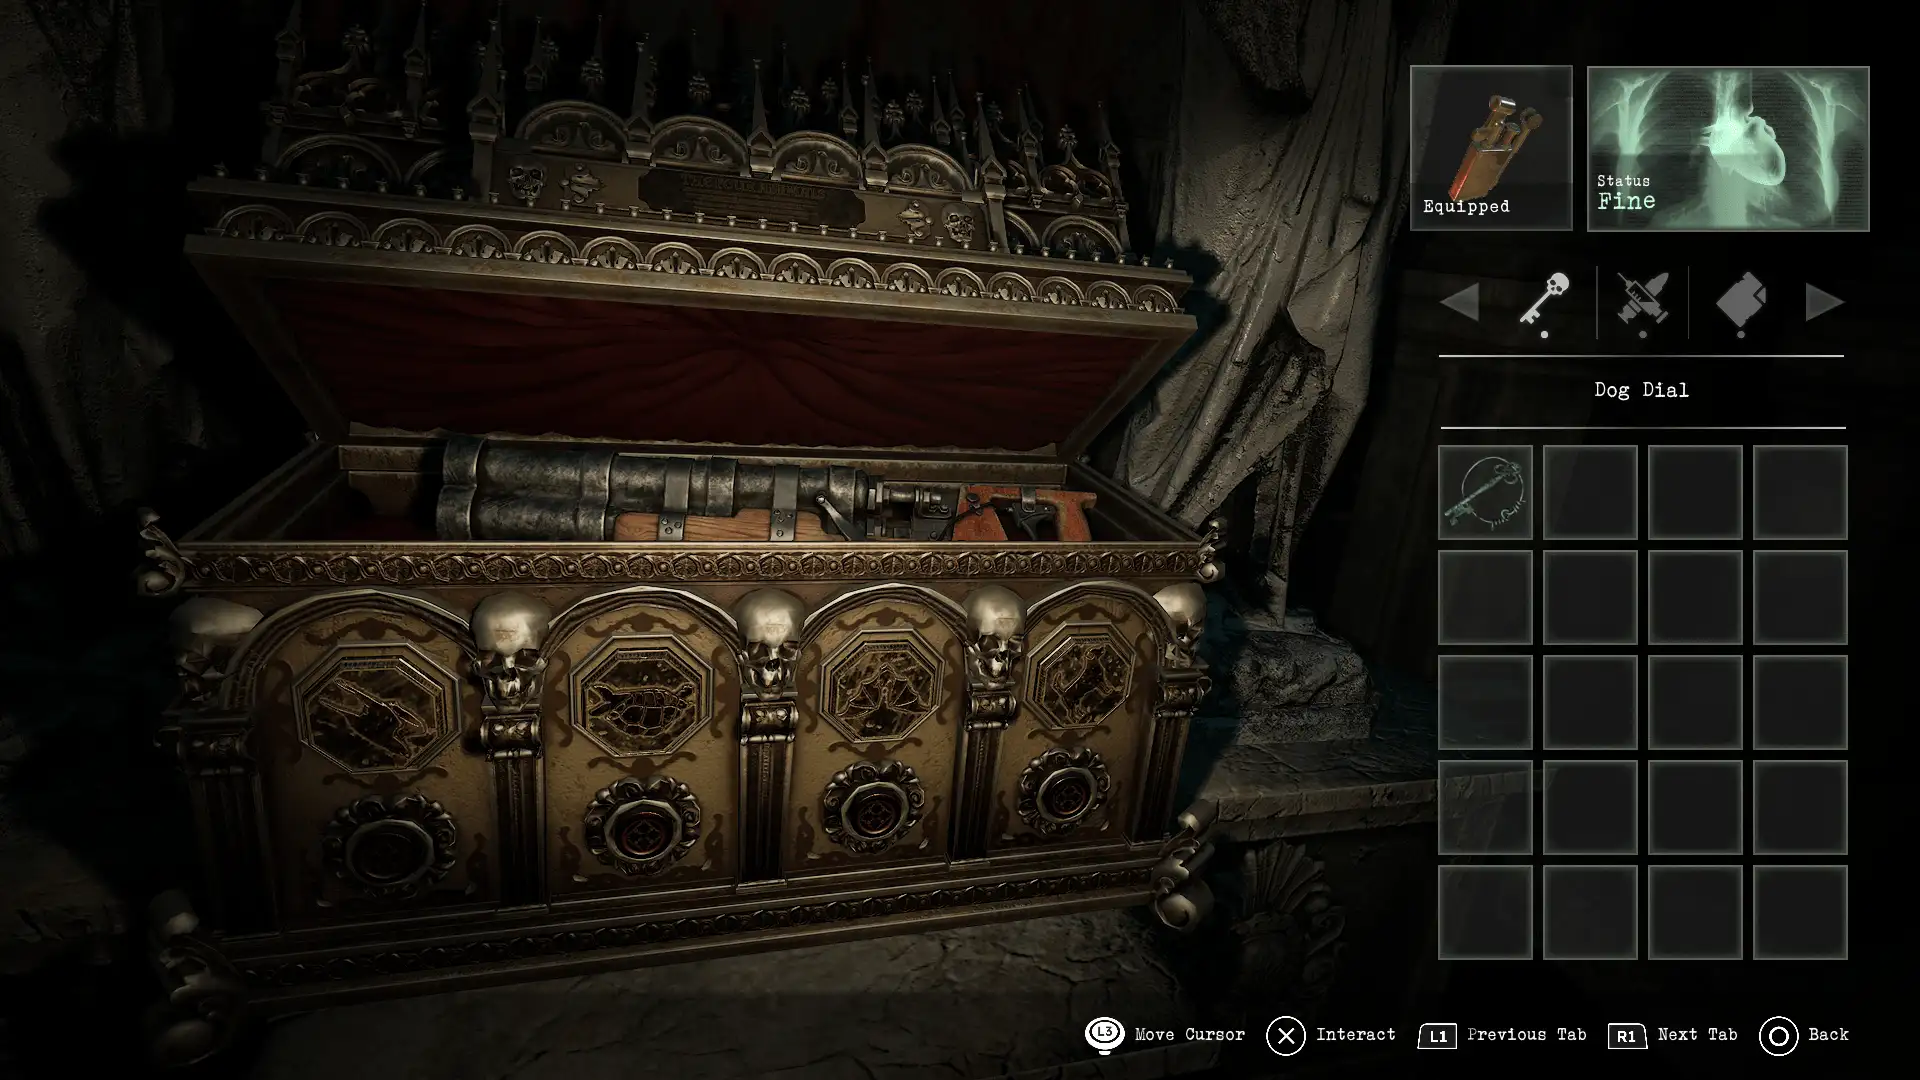
Animal pieces & reliquary
Location: Cemetery – Cemetery Grounds
Items needed: Bat dial – Dog dial – Turtle dial – Bird dial
Solution: Put the 4 animal pieces in order of the hint written above the slots. Use the buttons below them to rotate and obtain the hand cannon.
Bird – Diagonal downwards(1). Turtle – Upside down (4). Bat – Upside down(4). Dog – Diagonal upwards(7).
Notes: Piece locations:
Bird – Cemetery Grounds (near PEDRO puzzle)
Turtle – Cemetery Entrance (inside tomb)
Bat – Cemetery Entrance (inside tomb)
Dog – Cemetery Grounds (bottom of stairs between cemetery grounds)
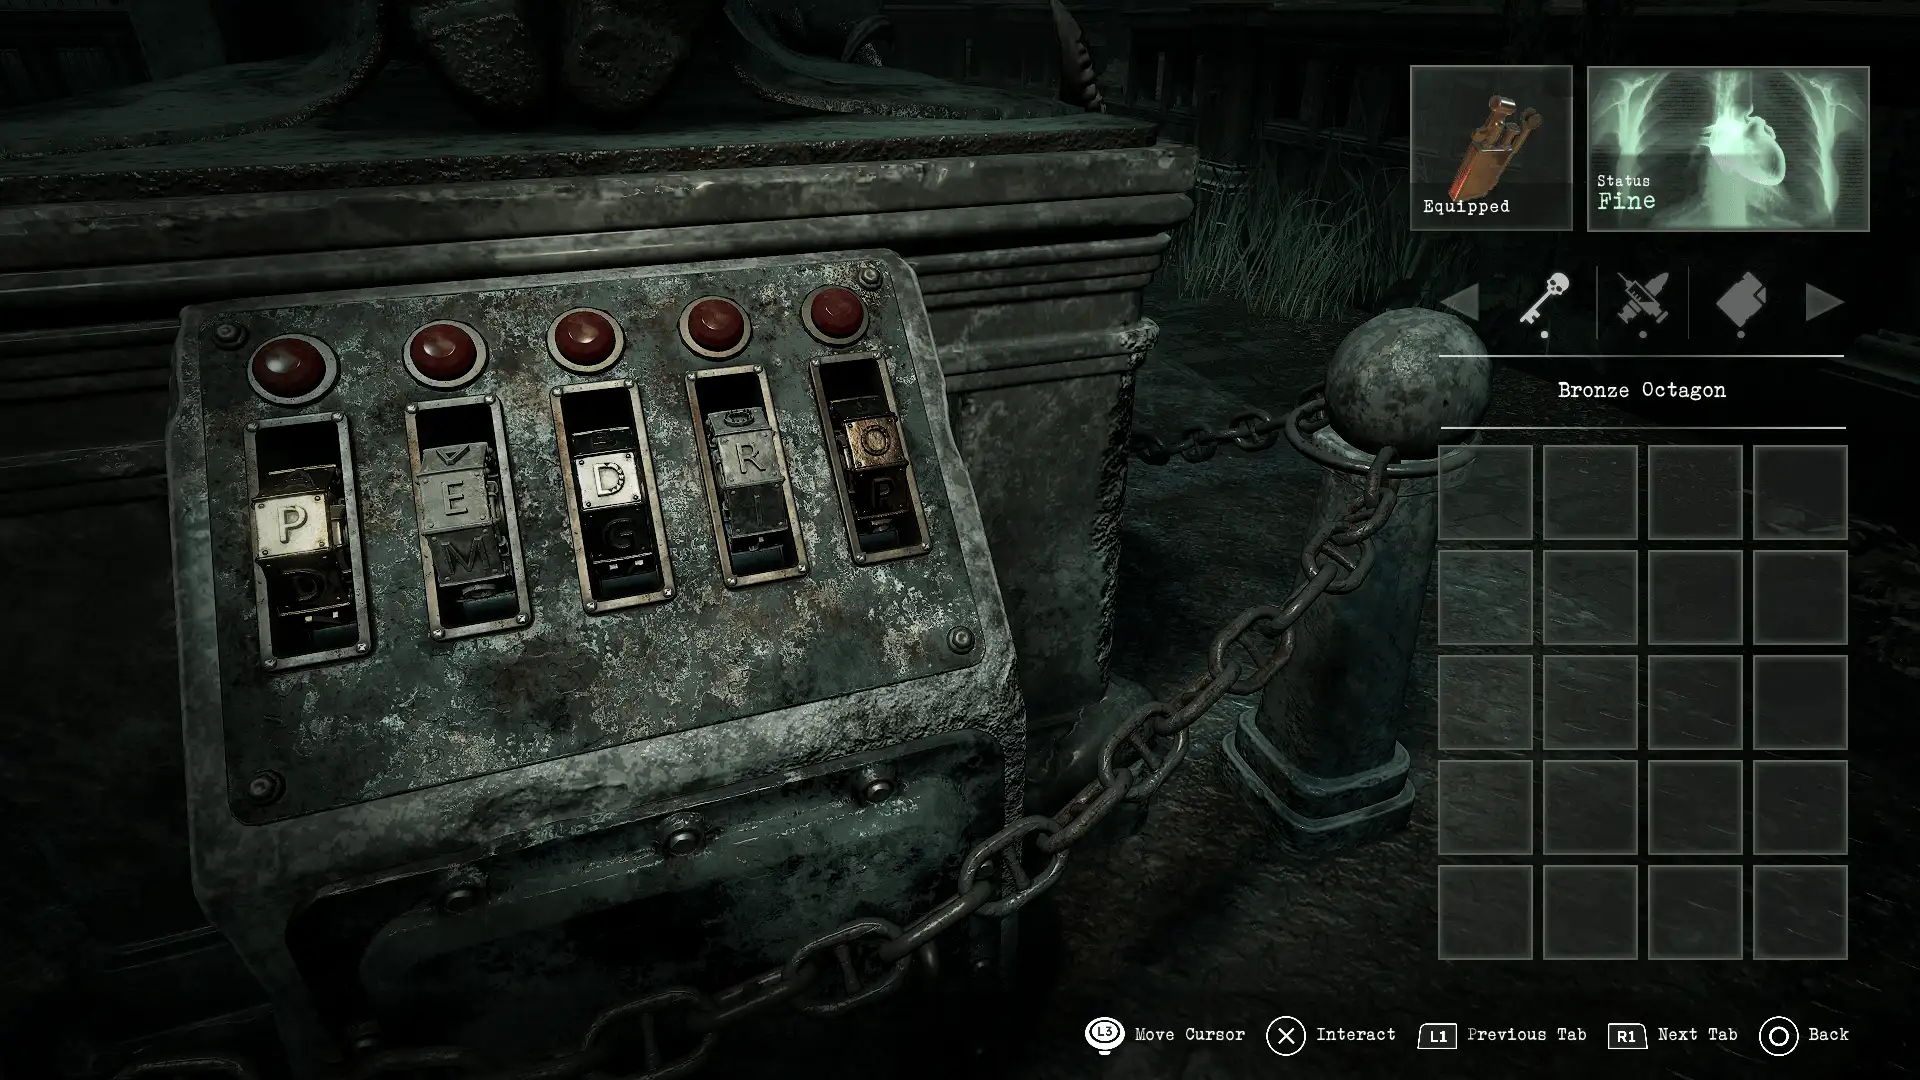
PEDRO grave
Location: Cemetery – Cemetery Grounds
Items needed: Gold Octagon – Silver Octagon – Bronze Octagon – Metal Detector
Solution: Obtain all 3 pieces using the metal detector and put them in order of Gold, Silver & Bronze to spell out PEDRO
Notes: The hint for the placement of pieces is on a sheet of paper in the mausoleum along with the metal detector. Pieces can be found with the metal detector in the following areas: Bronze – hanging tree. Silver – before the mini bridge, near the unlocked West Cemetery gate. Gold – West Cemetery behind the locked Mausoleum.
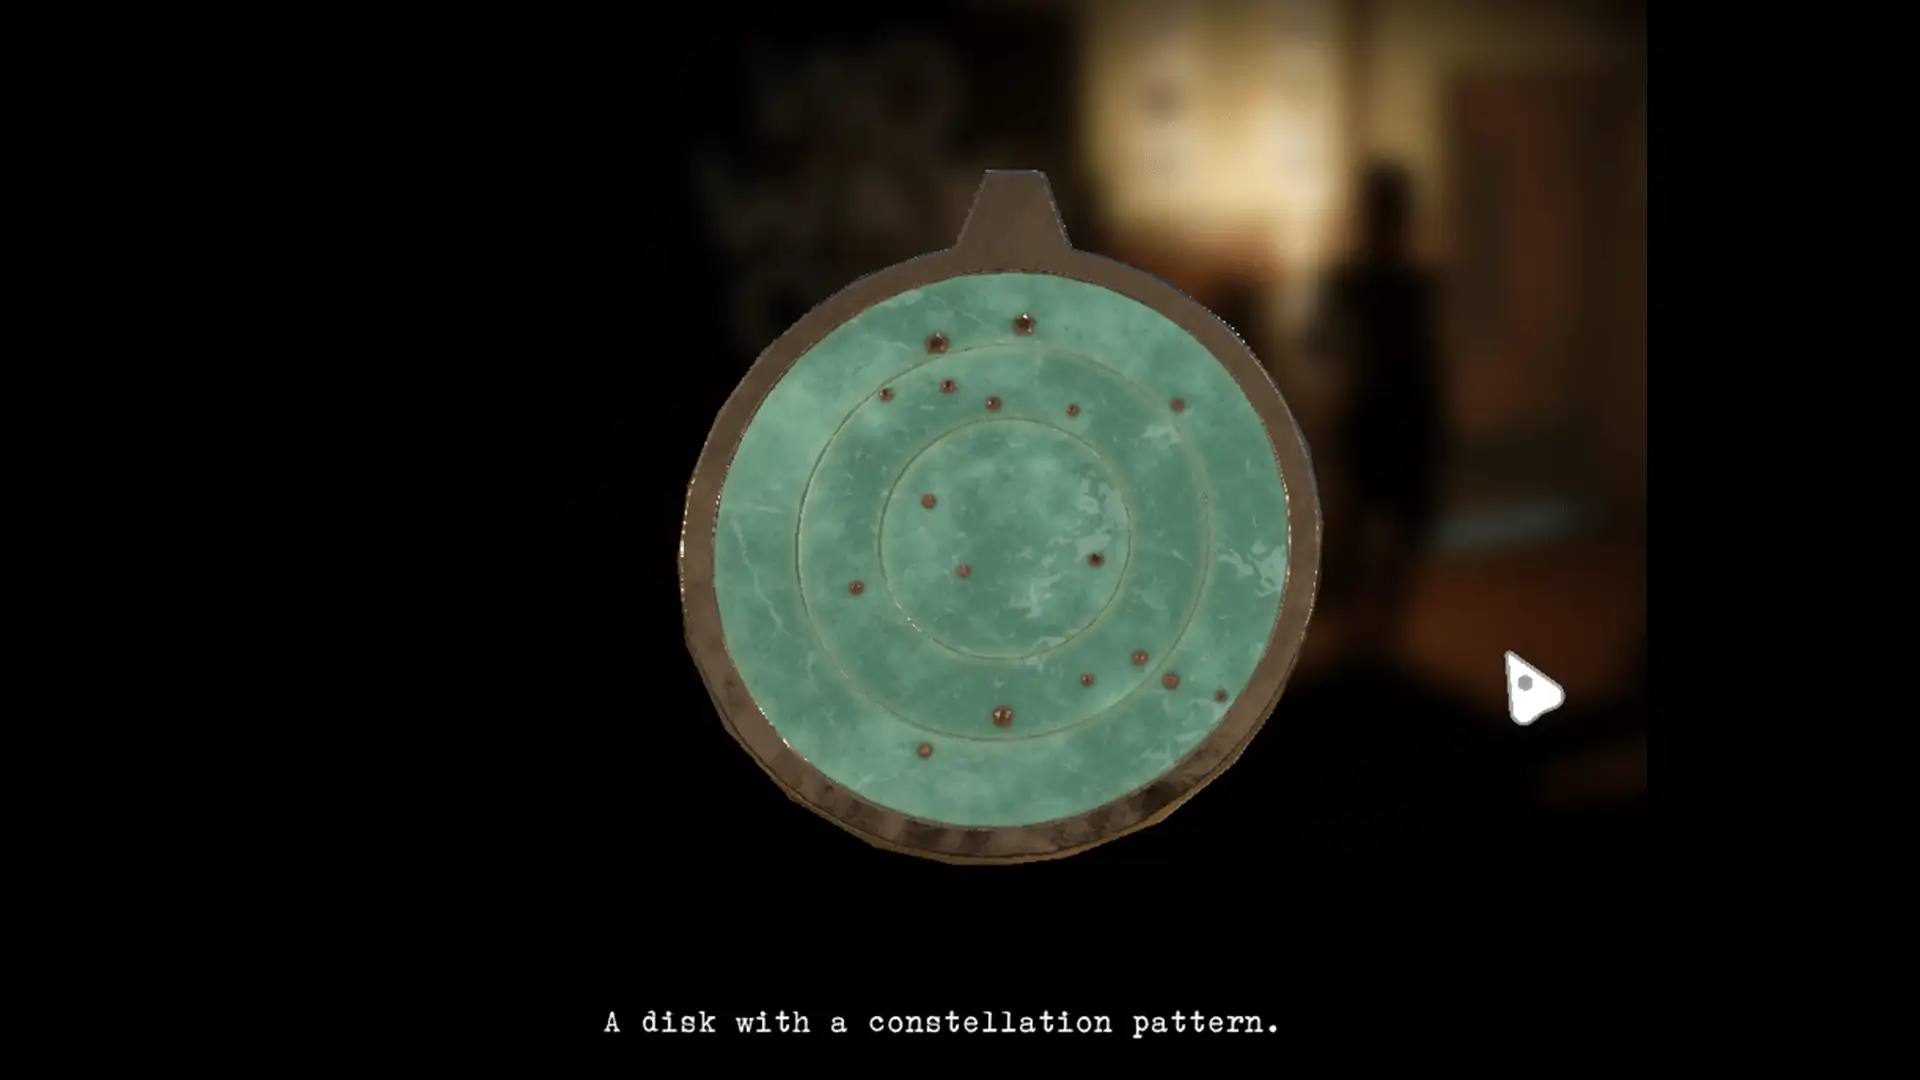
Star constellation
Location: Cemetery – Cemetery Entrance
Items needed: Constellation Centre Piece – Constellation Disc
Solution: Once the two constellation pieces have been obtained, combine them and then interact to spin the dials to match the Gemini constellation plaque. Place the completed constellation in the statue base outside the mausoleum to unlock the nearby Gemini mausoleum door
Notes: The constellation outer piece is found in a mausoleum in Cemetery Grounds (the key for the mausoelum is hanging from a tree). The inner piece is found inside the Burial Chamber
Outer ring rotations: 5
Middle ring rotations: 2
Centre piece rotations: 7
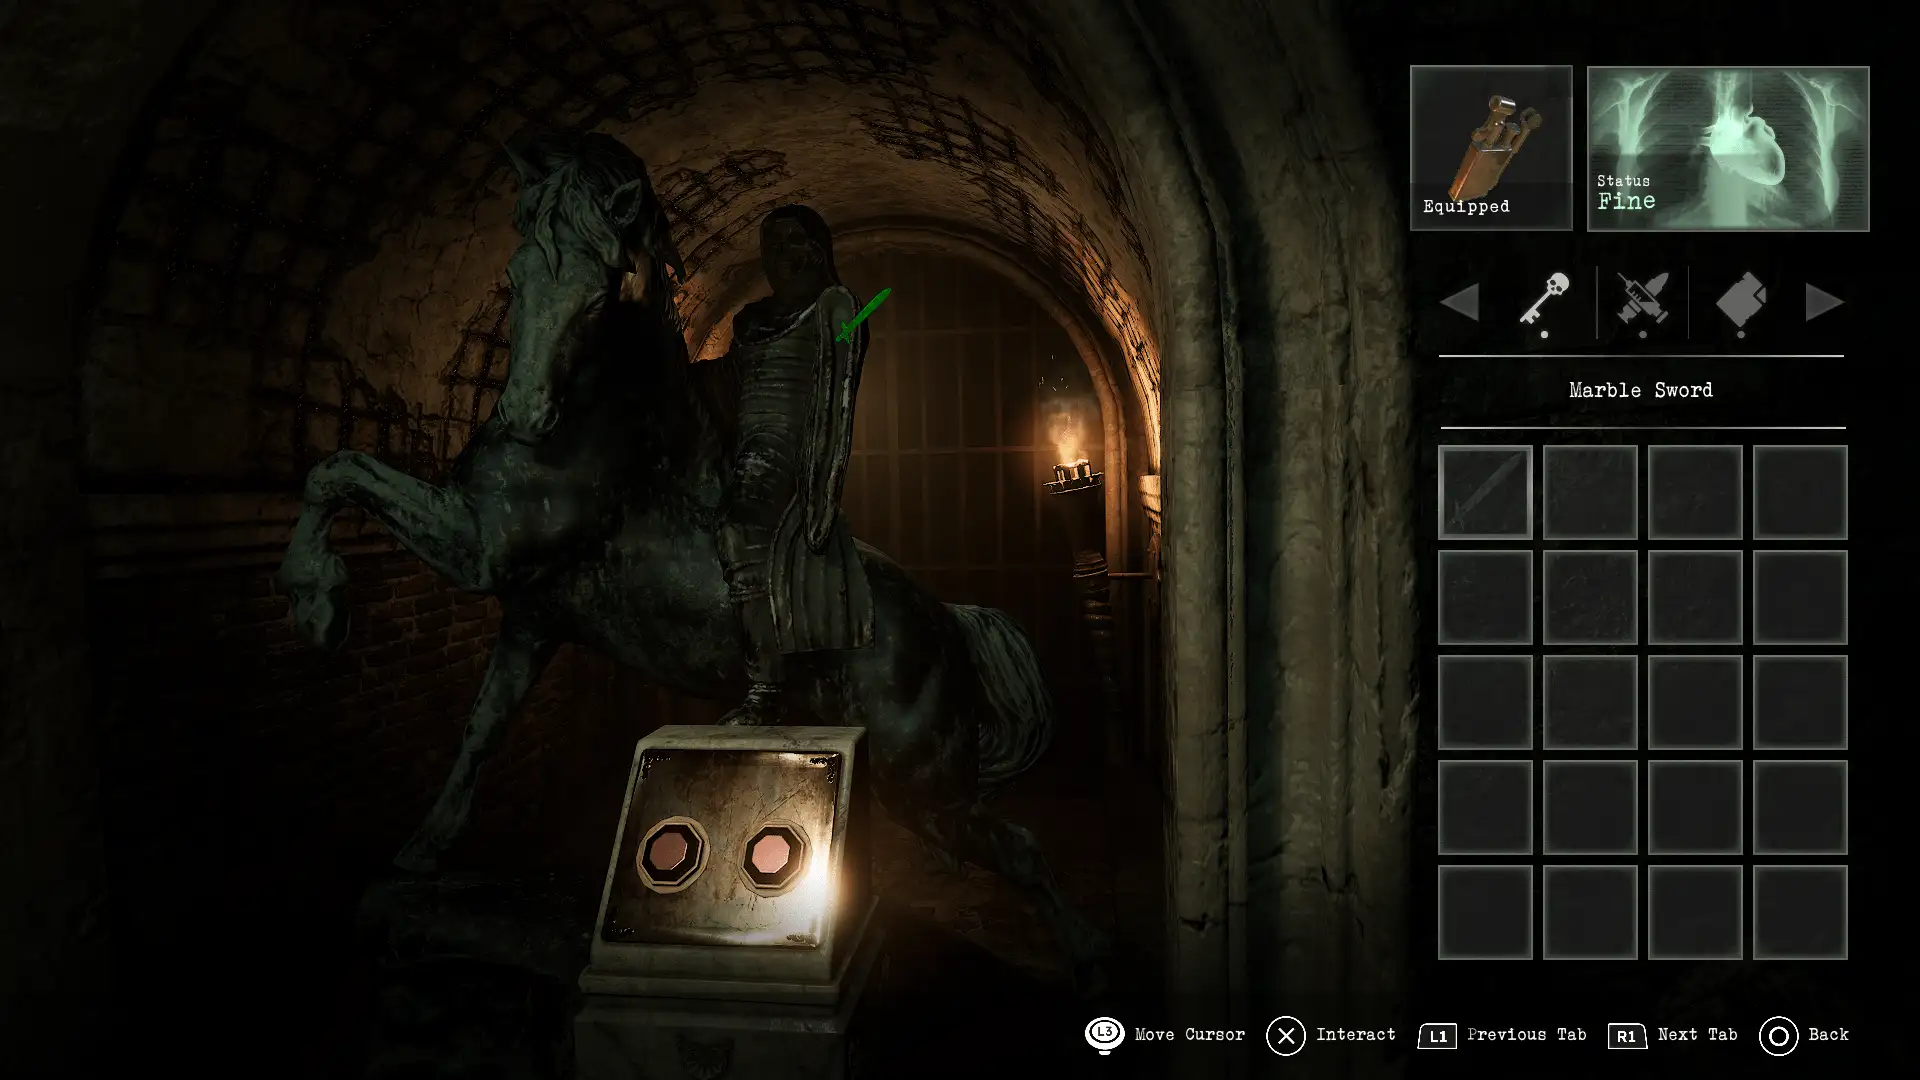
The Four Horsemen
Location: Cemetery – Burial Chamber
Items needed: Marble sword – Salvation ring
Solution: Go around to the back of the balcony and locate the portrait of the four horseman; select it to read the description. Use this as a hint for rotating the swords on the statues. Use the ladder to go down to the lower level and give the sword to the statue with one missing. Press the buttons in front of each statue to turn the swords in the correct direction as hinted in the painting’s description:
VICTORY: 12 O’CLOCK
WAR: 6 O’CLOCK
DEATH: 11 O’CLOCK
FAMINE: 3 O’CLOCK
Notes: The sword is found in the catacombs in a tomb down a long set of stairs.
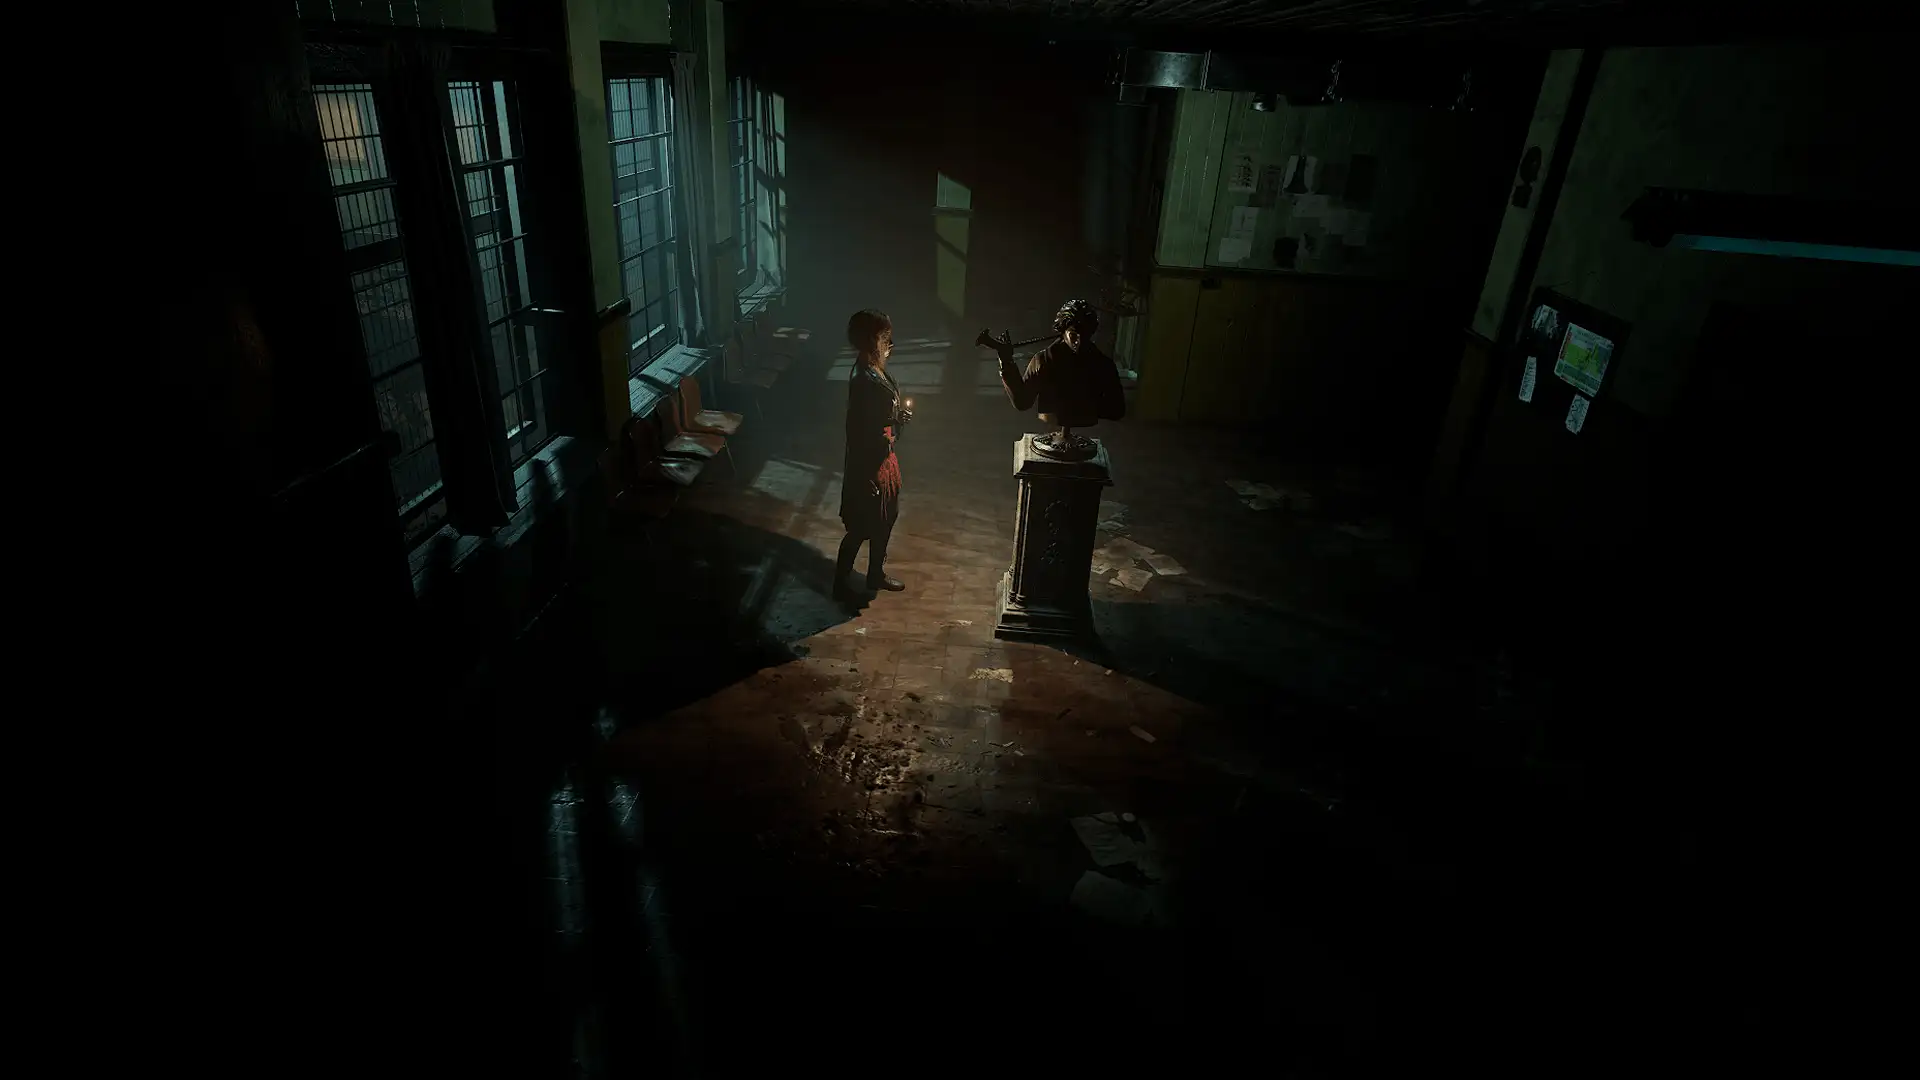
Xylophone / Beethoven statue
Location: School – East Corridor B
Items needed: Spoon – Xylophone – Music Sheet
Solution: Use the metal spoon on the xylophone and play the notes ‘FACEDEAD’ to the side of the Beethoven statue where he holds the ear horn to get the 7A fuse
Notes: The xylophone is found in the Kindergarten classroom, the metal spoon is found in the schoolyard and the puzzle hint is found in the Art & Music Room (sheet music & xylophone poster). The statue is in East Corridor B
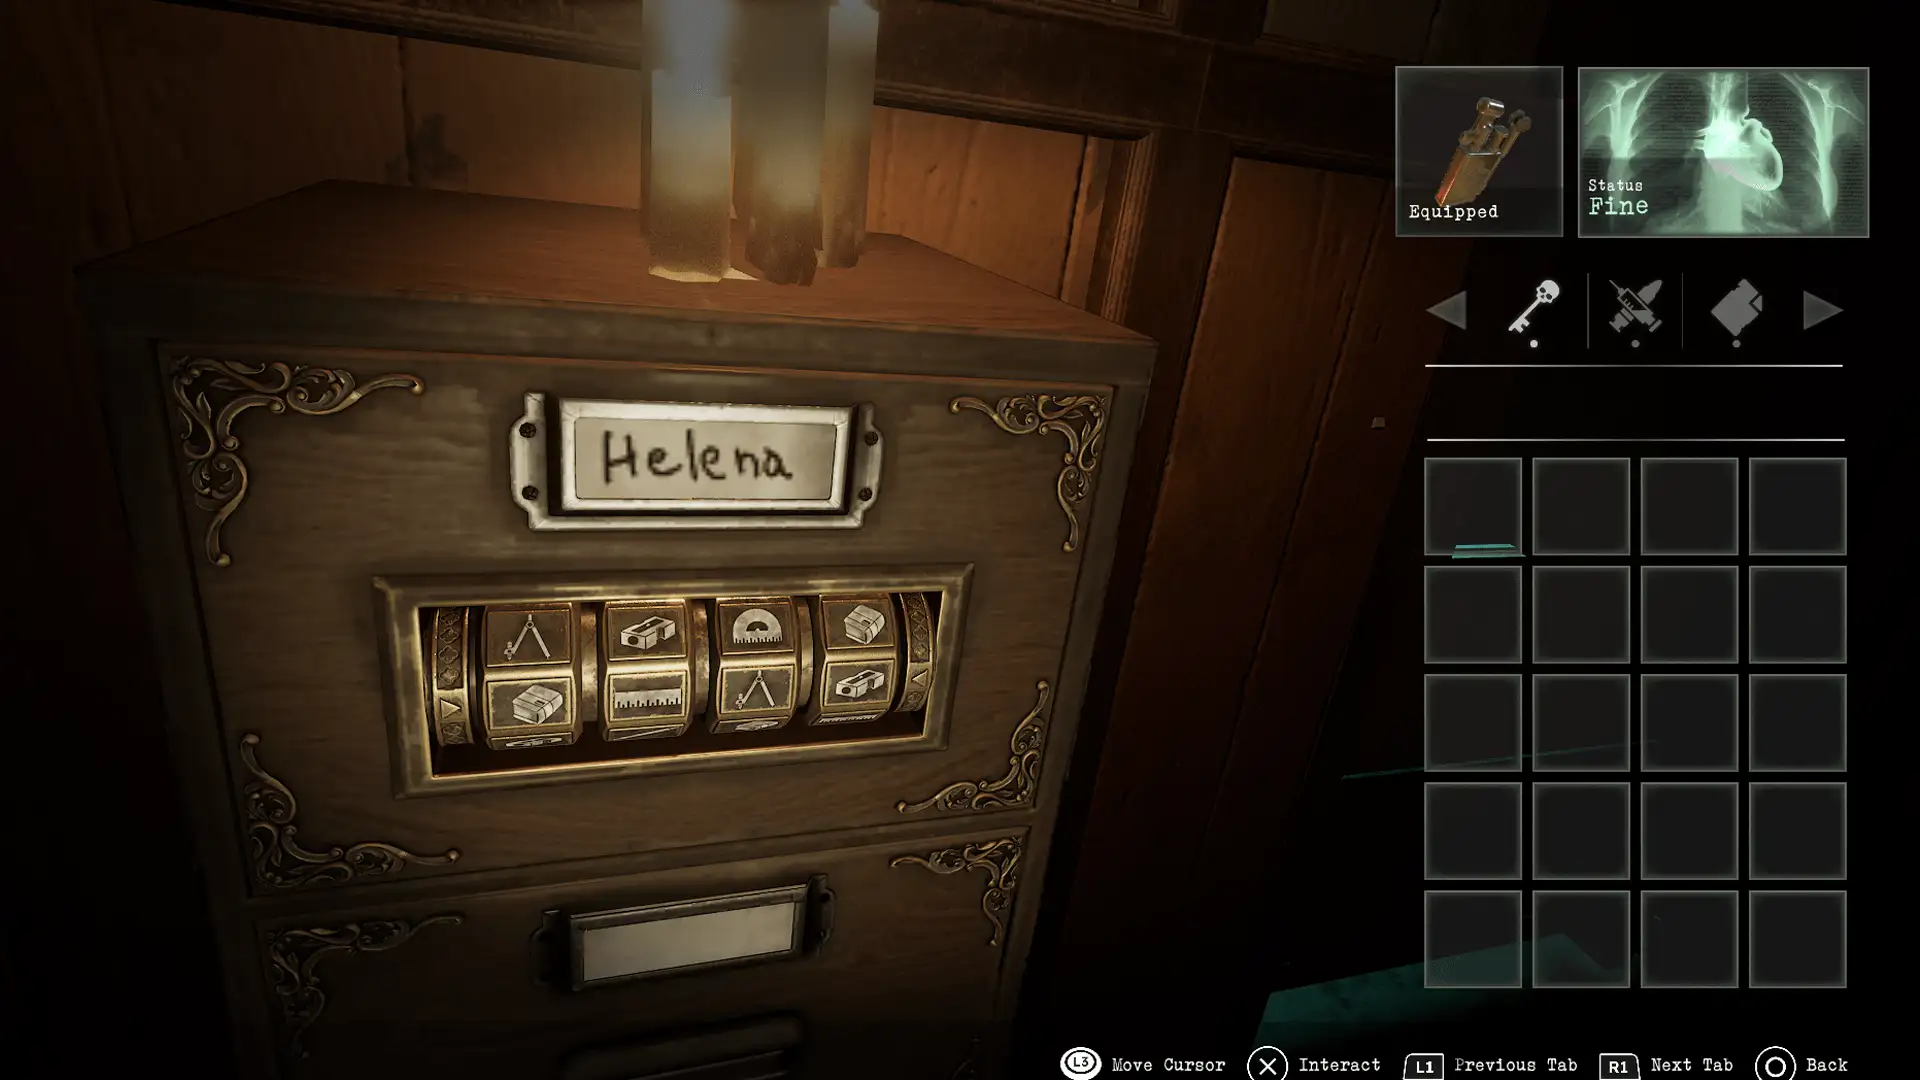
Helena cabinet
Location: School – Classroom 102
Items needed: Helena’s note
Solution: Rotate the dials in the order of Book, Ruler, Compass, Sharpner and obtain the second fuse
Notes: The hint for this can be found in Helena’s note, in Classroom 101
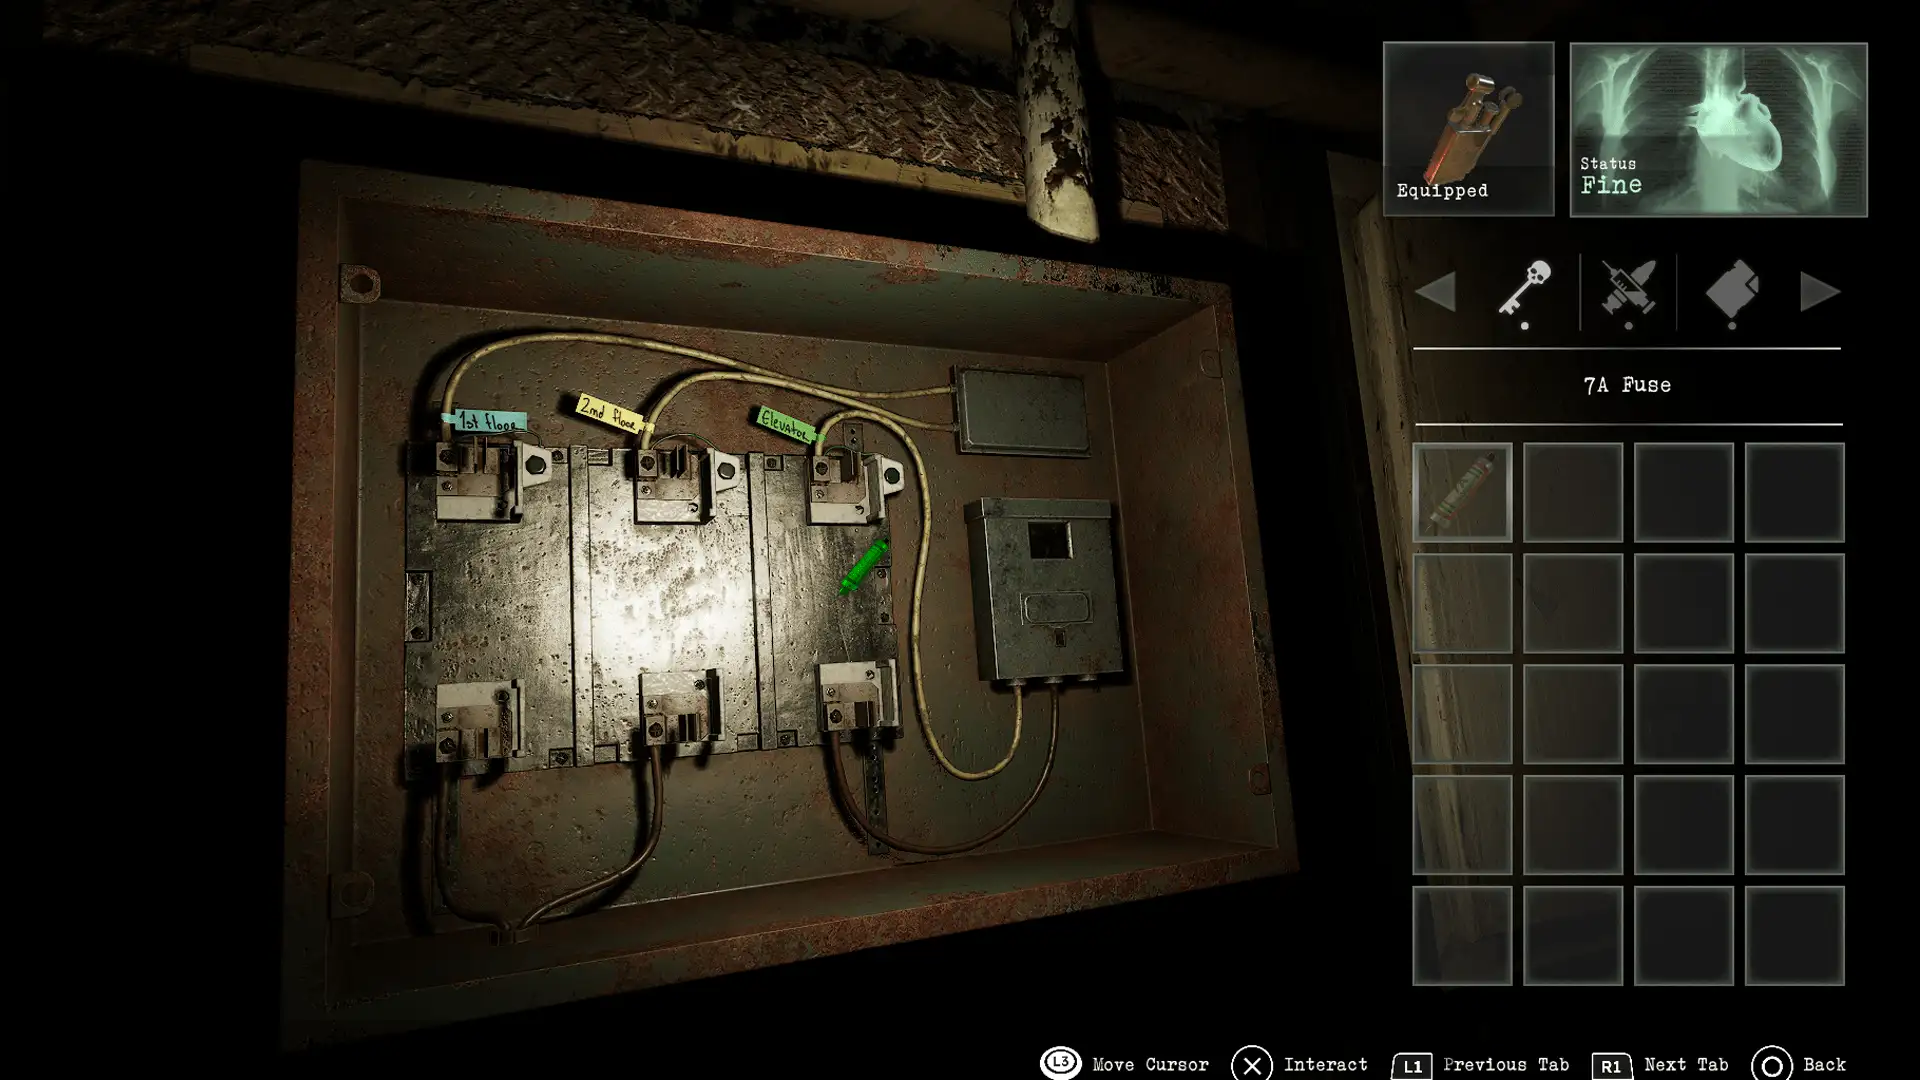
Fuse board
Location: School – Generator Room
Items needed: Fuse 7A
Solution: 2 separate fuses are found throughout the school to power doors and the elevator. You must change them around to access each area
Notes: The first fuse is obtained by completing the xylophone / Beethoven puzzle in the art & music room and the second is obtained by completing the Helena cryptex cabinet
Computer Lab key
Location: School – School’s Basement
Items needed: Bear Gift – Salvation ring
Solution: The key is obtained in the Textiles Classroom
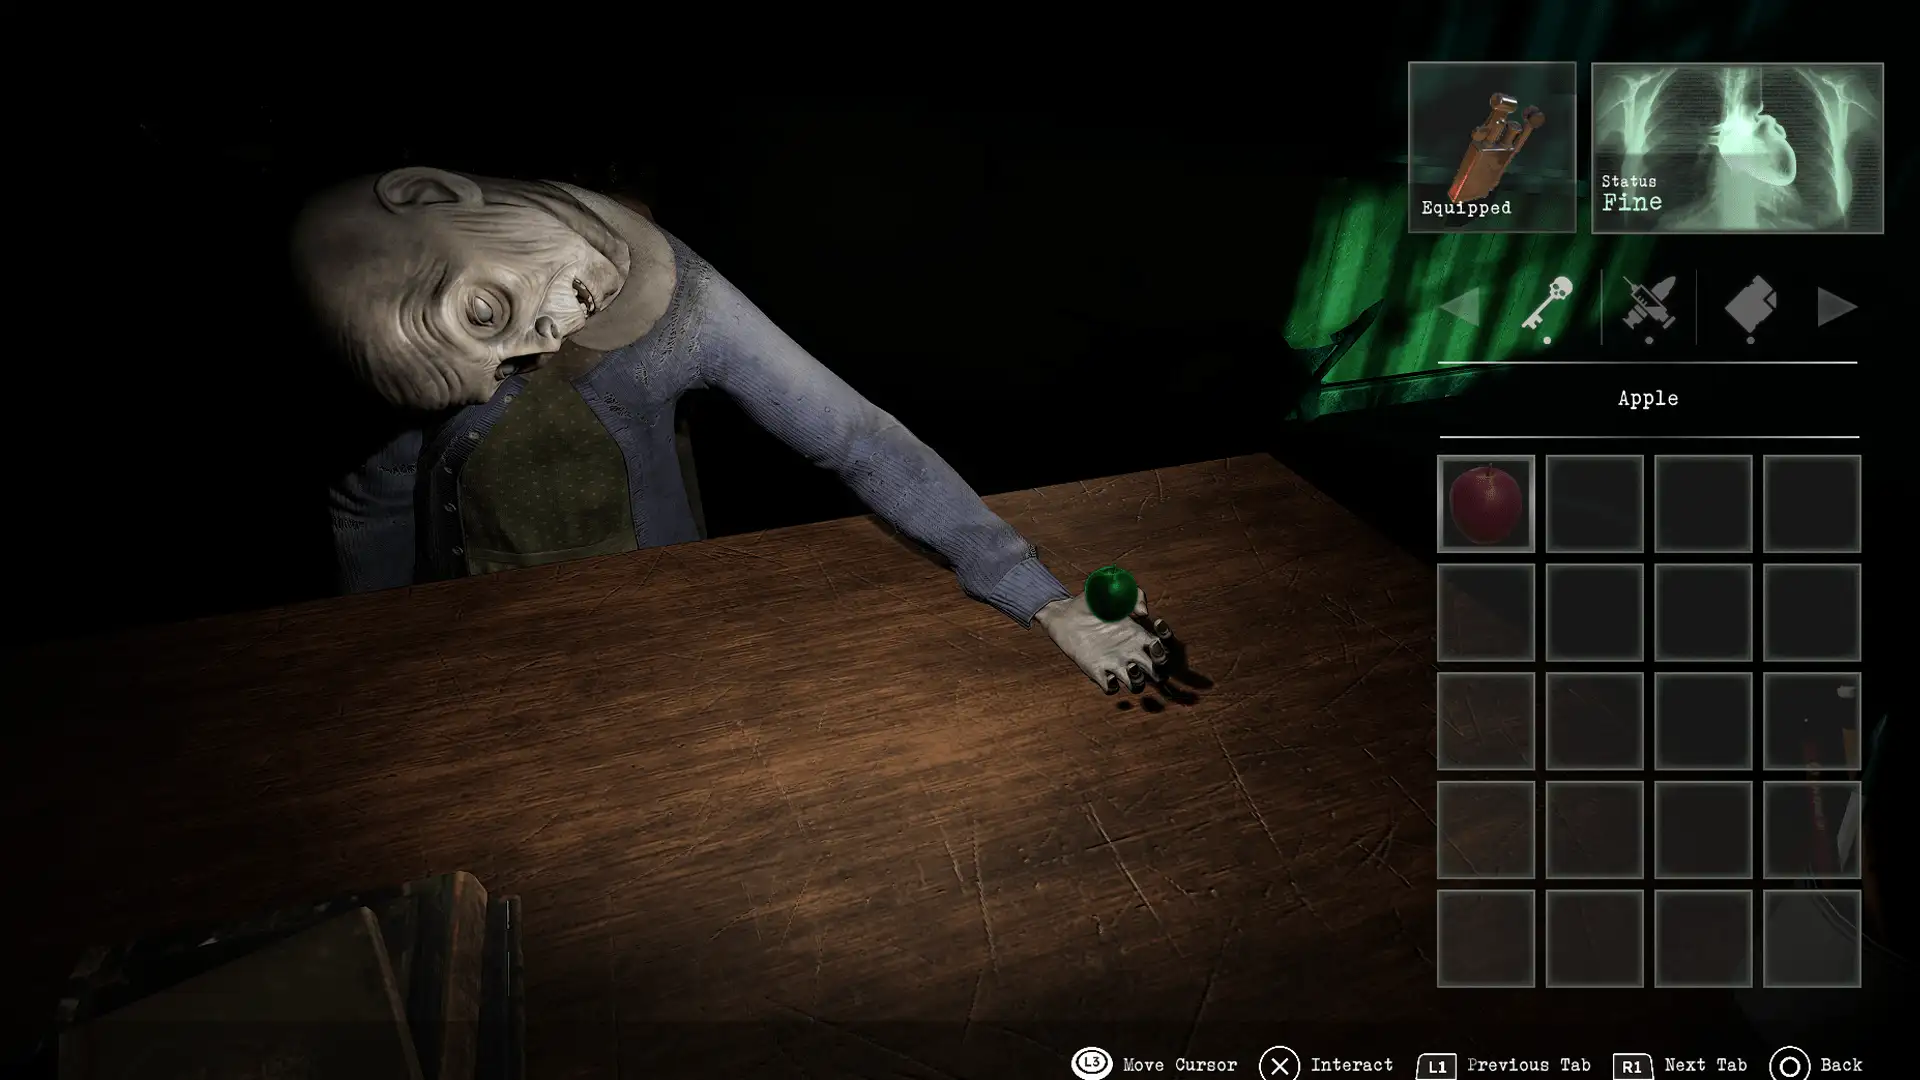
Teacher’s request – Snake figurine
Location: School – Classroom 103
Items needed: Apple seeds – Apple – VHS tape – playground
Solution: Take the seeds and use the playground VHS tape on the player to go into the past. Put the seeds in the pot, pull the table under the shower to water them, then return to the playgrond in the present and obtain the apple. Give the apple to the teacher
Notes: The seeds are on the desk of the teacher in Classroom 204, the VHS tape is found in Classroom 104, the VHS player is found in the Art and Music Room
Mirror to other side
Location: School – Girl’s Restoom
Items needed: Lighter
Solution: Use the hint on the 3 mirrors opposite to work out which candles need to be lit:
0X0
X 0
X00
Notes: The mirrors have a mathematical operation that leads to the solution.
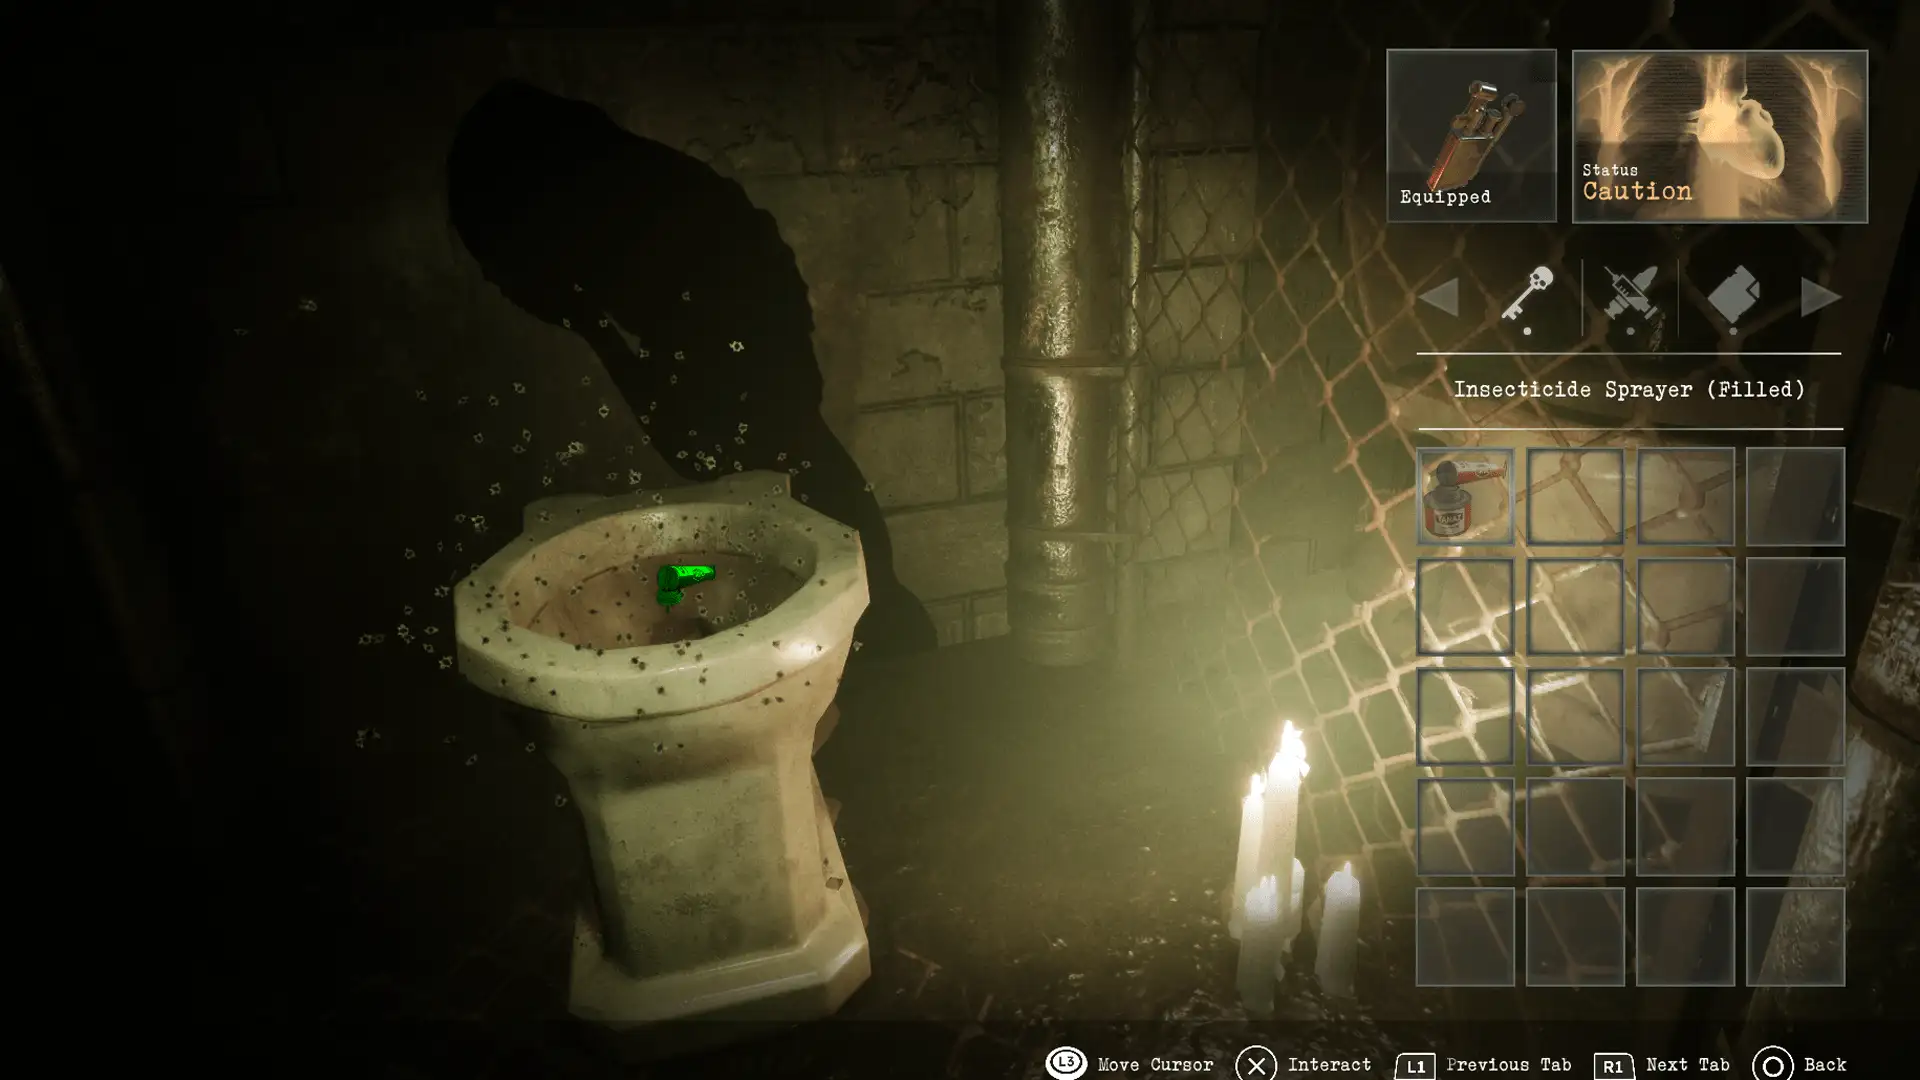
Girl’s bathroom fly figurine
Location: School – Girl’s Restoom
Items needed: Insecticide can – Insecticide sprayer
Solution: Combine the insecticide sprayer and insecticide can to create a filled sprayer. Go to the women’s toilet ‘other side’ and use on the flies around the toilet to acquire the fly figurine in the real world
Notes: The sprayer can be found in Director’s Office (Other Side) and the insecticide can be found in Storage Room 201 in a cupboard
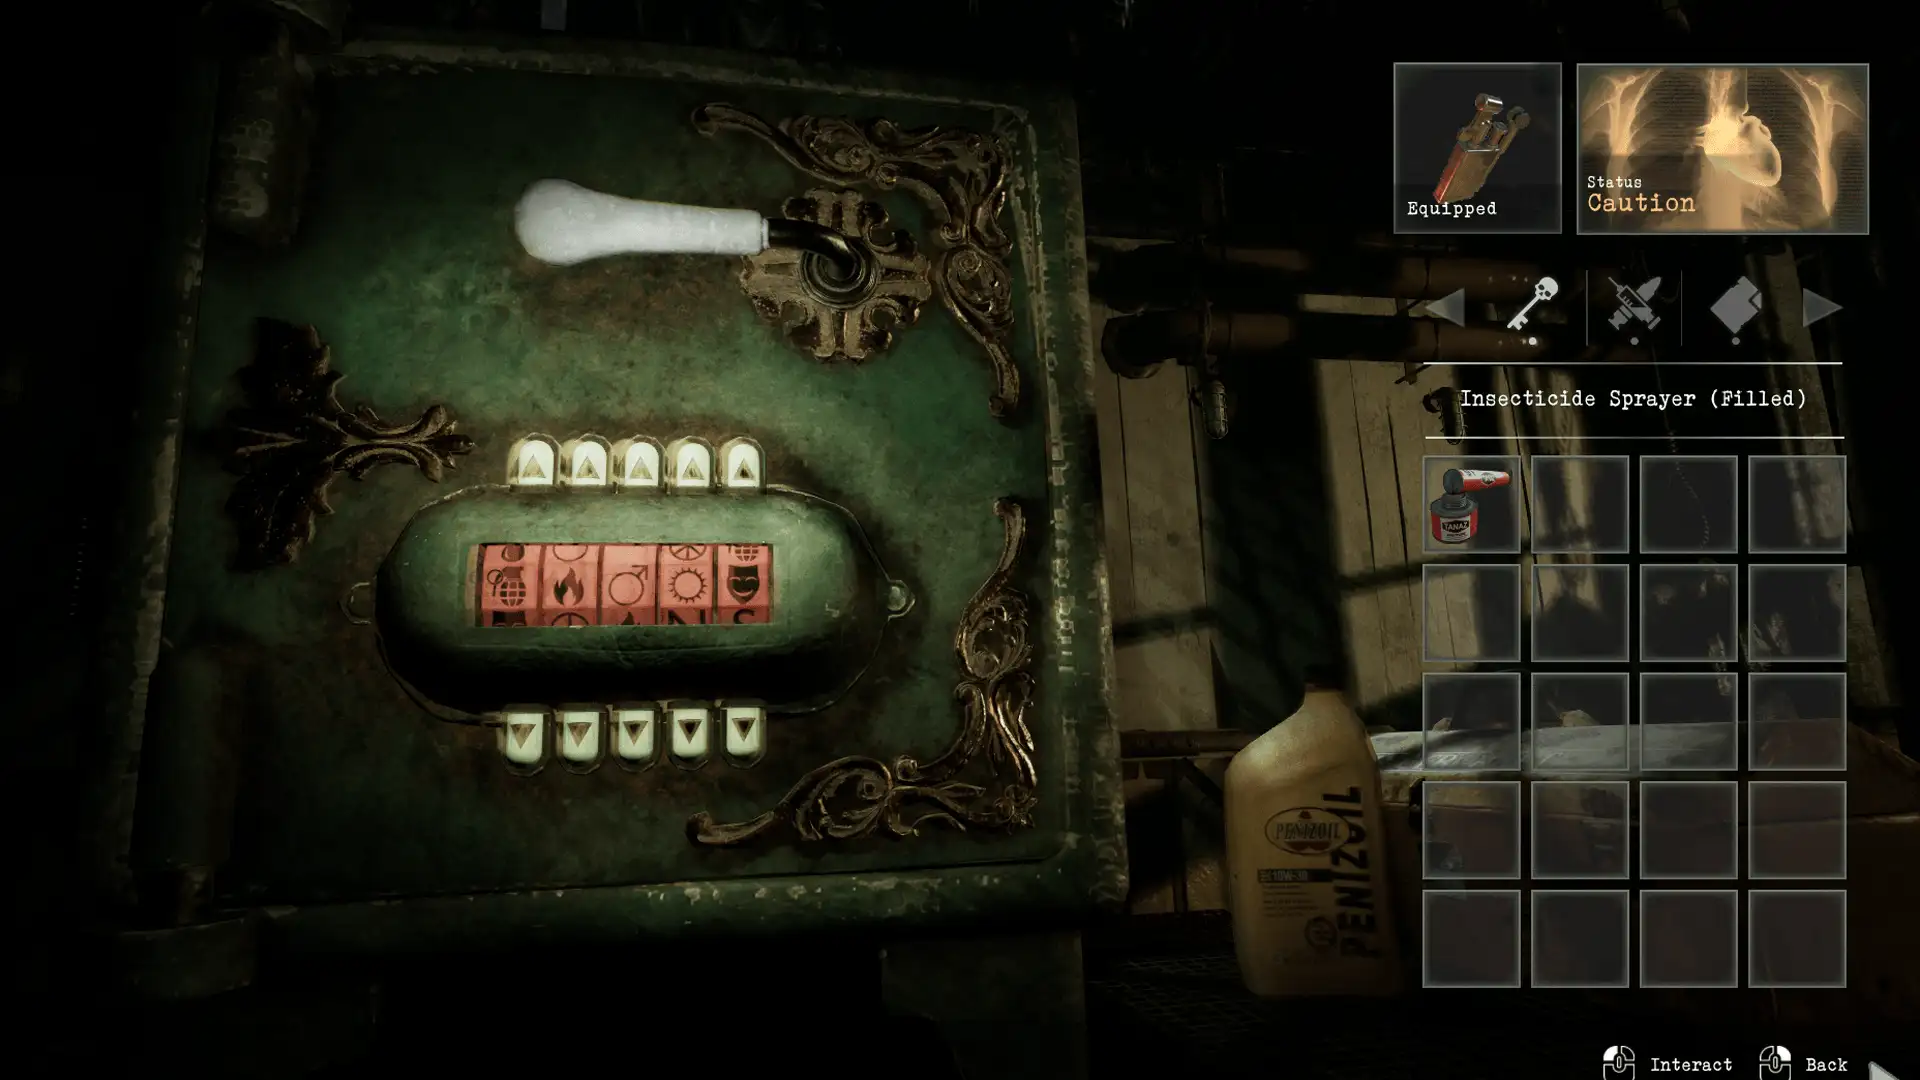
Birdcage & other side safe
Location: School – Classroom 202 (other side)
Solution: First locate the puzzle in Classroom 202 and make note of the symbols on the far-left drawing on the wall behind. Travel to the other side version of the classroom to turn the dials in the correct order to unlock the cage. Go back to the normal classroom to obtain the figurine:
Grenade, Fire, Male symbol, Sun, Happy mask
Notes: The symbols are the opposite of what is seen in the normal 202 classroom i.e. peace = war (grenade). The drawings on the other side hint that things are the opposite i.e. snail is now hare (slow to fast)
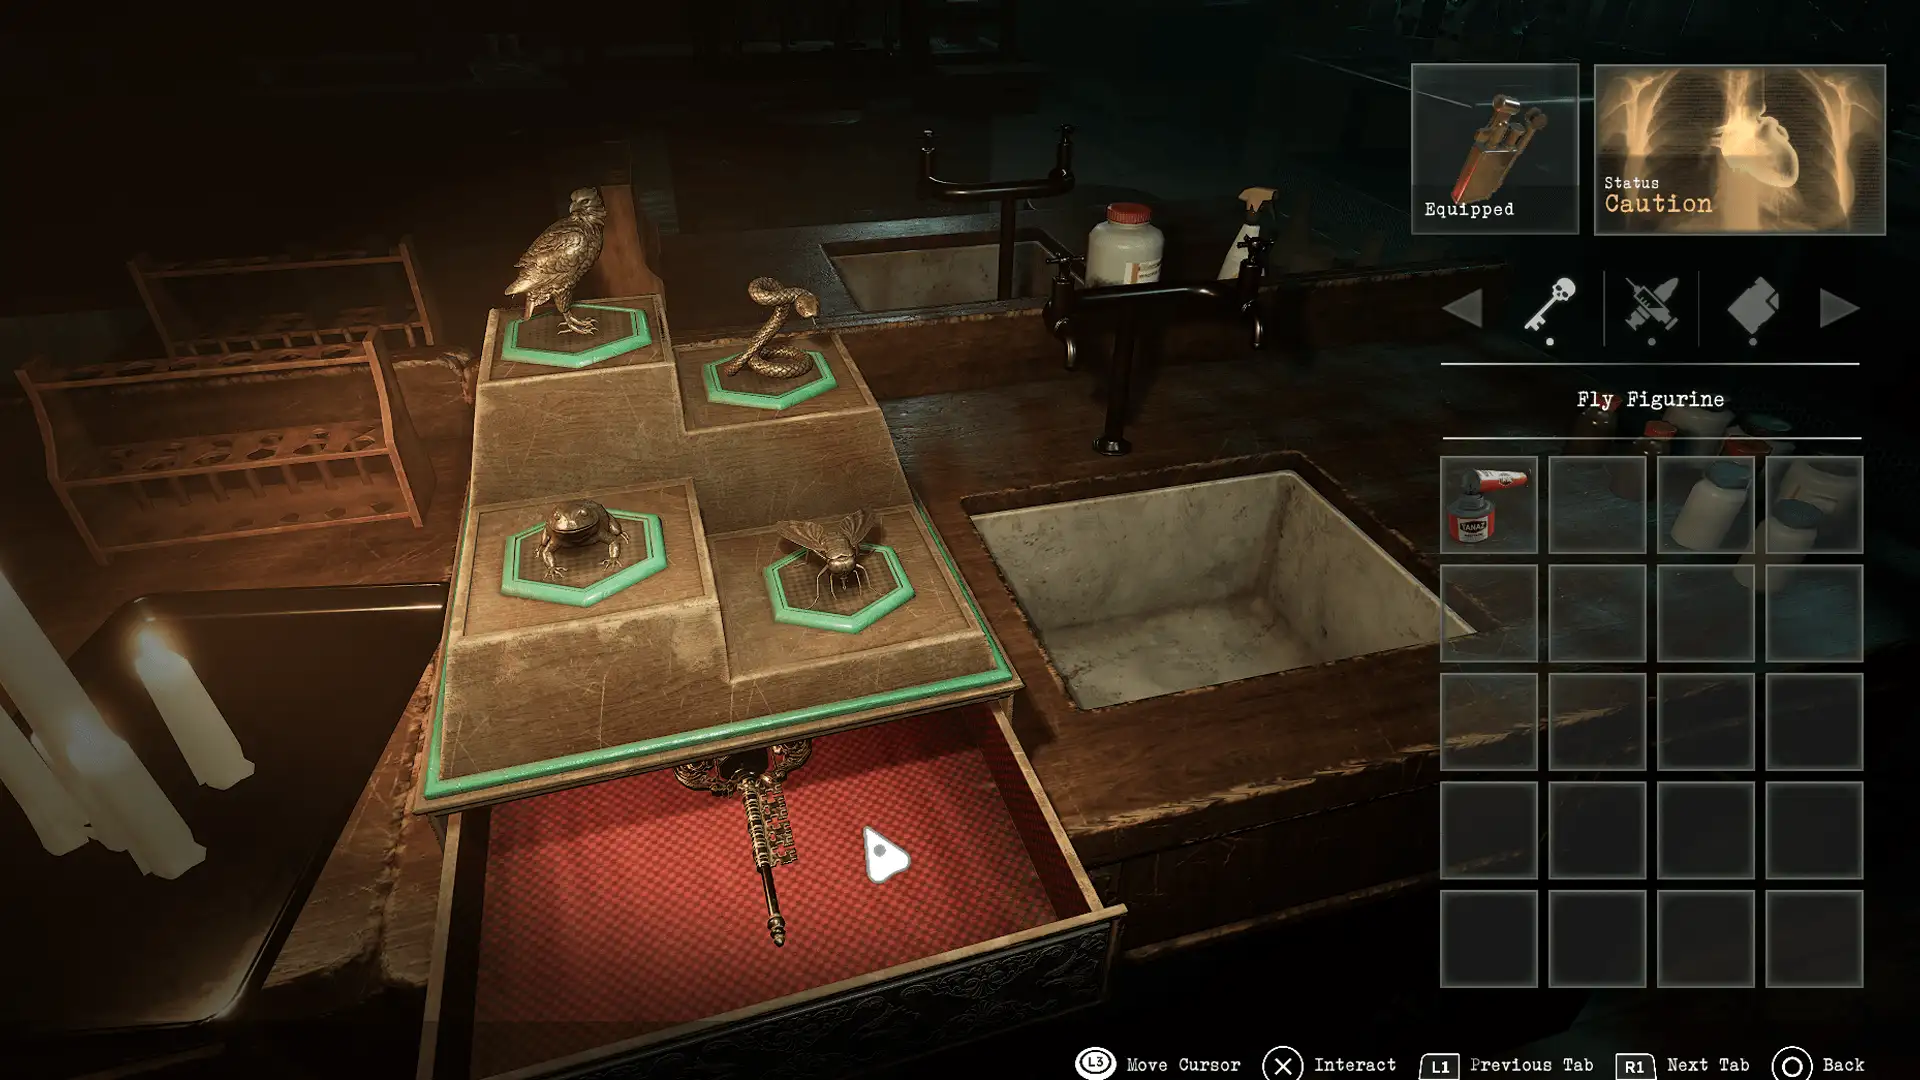
Animal figurines
Location: School – Science Lab
Items needed: Fly figurine – Hawk figurine – Toad figurine – Snake figurine
Solution: Obtain the 4 animal figurines and place them onto the 4 slots on the wooden stand in order to obtain the master key:
Hawk, Snake, Toad, Fly
Notes: The hint is on the blackboard behind ‘the strong eat the weak’. The figurines are found:
Fly: Girl’s Restroom
Toad: Classroom 203 (other side)
Snake: Classroom 103
Hawk: Classroom 202
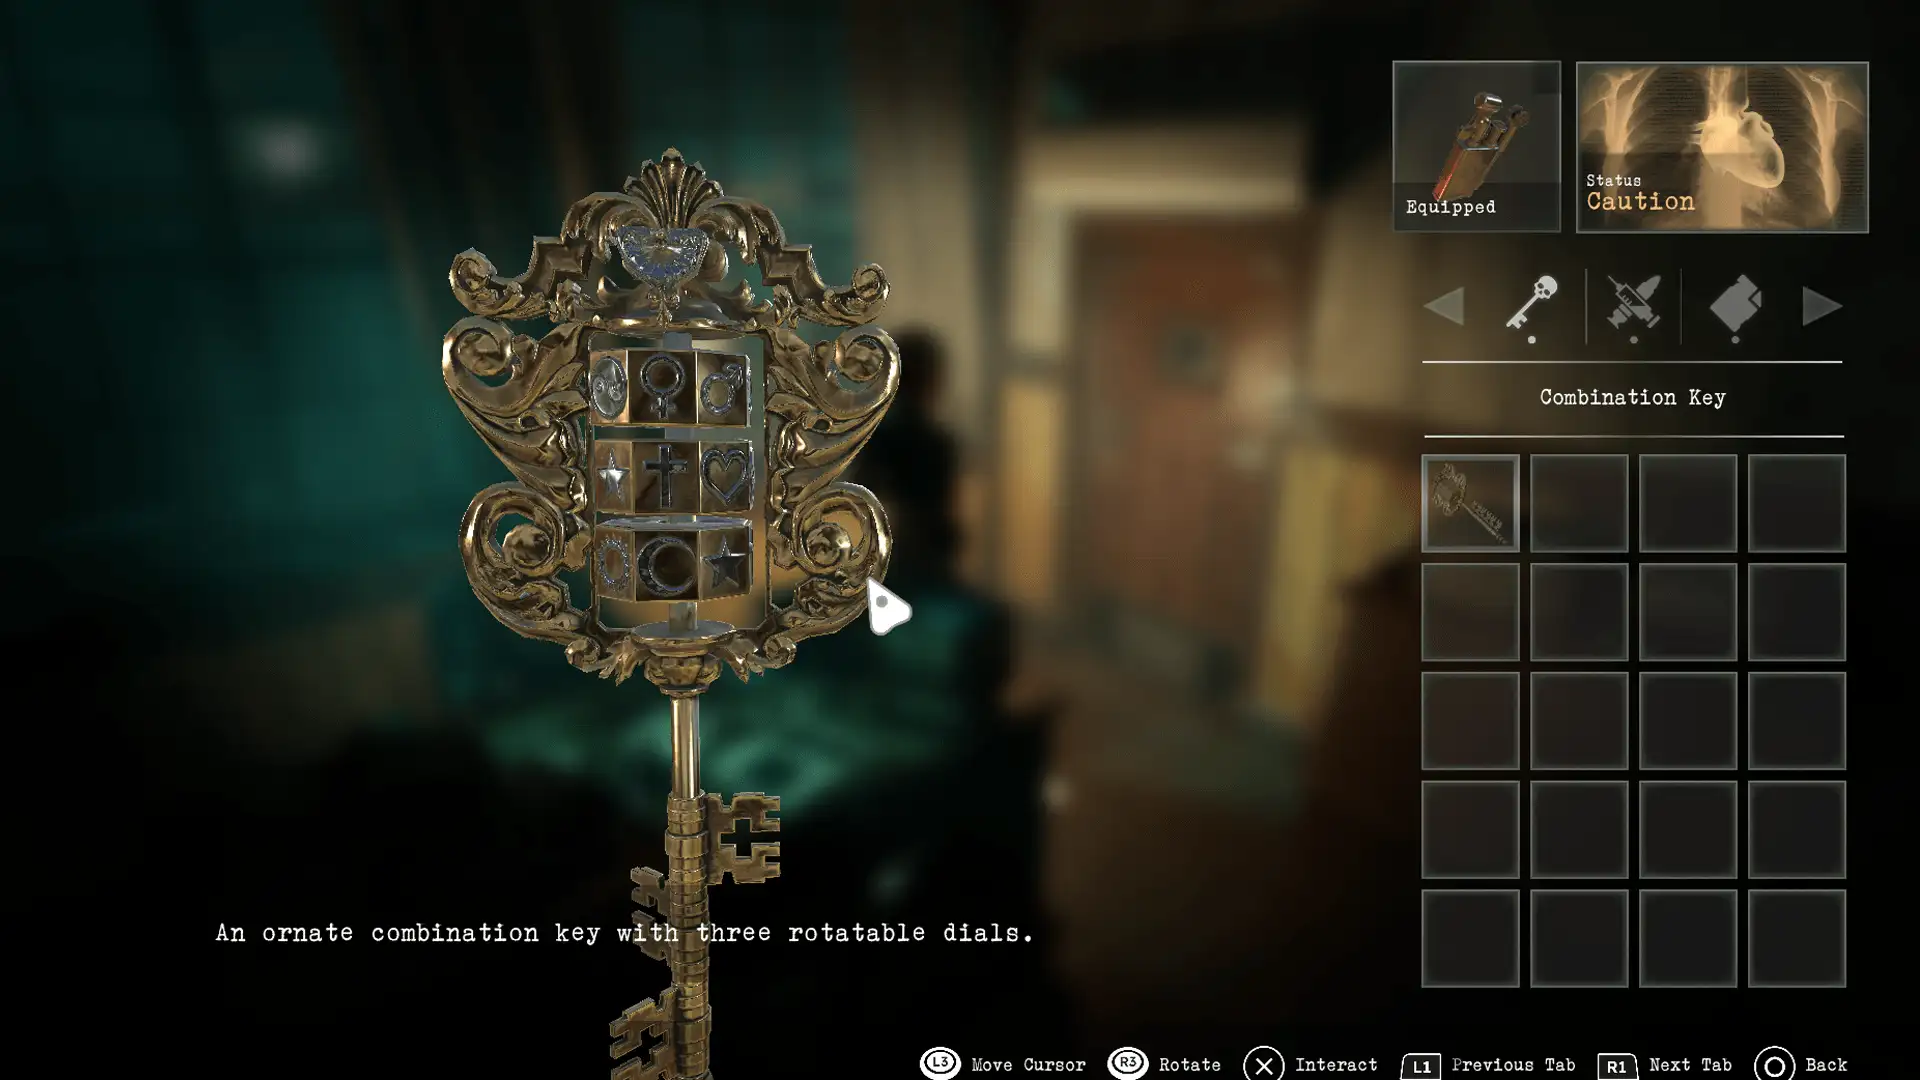
Master lock 1
Location: School – Director’s Office
Items needed: Master key
Solution: Obtain the Master Key by completing the animal figurine puzzle in Classroom 201, then use the hint on the chalkboard opposite the door and turn the dials on the key to match
Notes: Circles, Crown of Thorns, Wolf = Female ♀, Cross †, Moon ⏾
Master lock 2
Location: Processing School – Computer Lab
Items needed: Master key
Solution: The hint for the master key symbols is on a chalkboard near the locked cupboard:
Sun, Heart, Man. In here you will obtain the hand cannon upgrade: recoil spring
Notes: Sunflower, Roses, Mustache = Sun ☼, Heart ♡, Man ♂
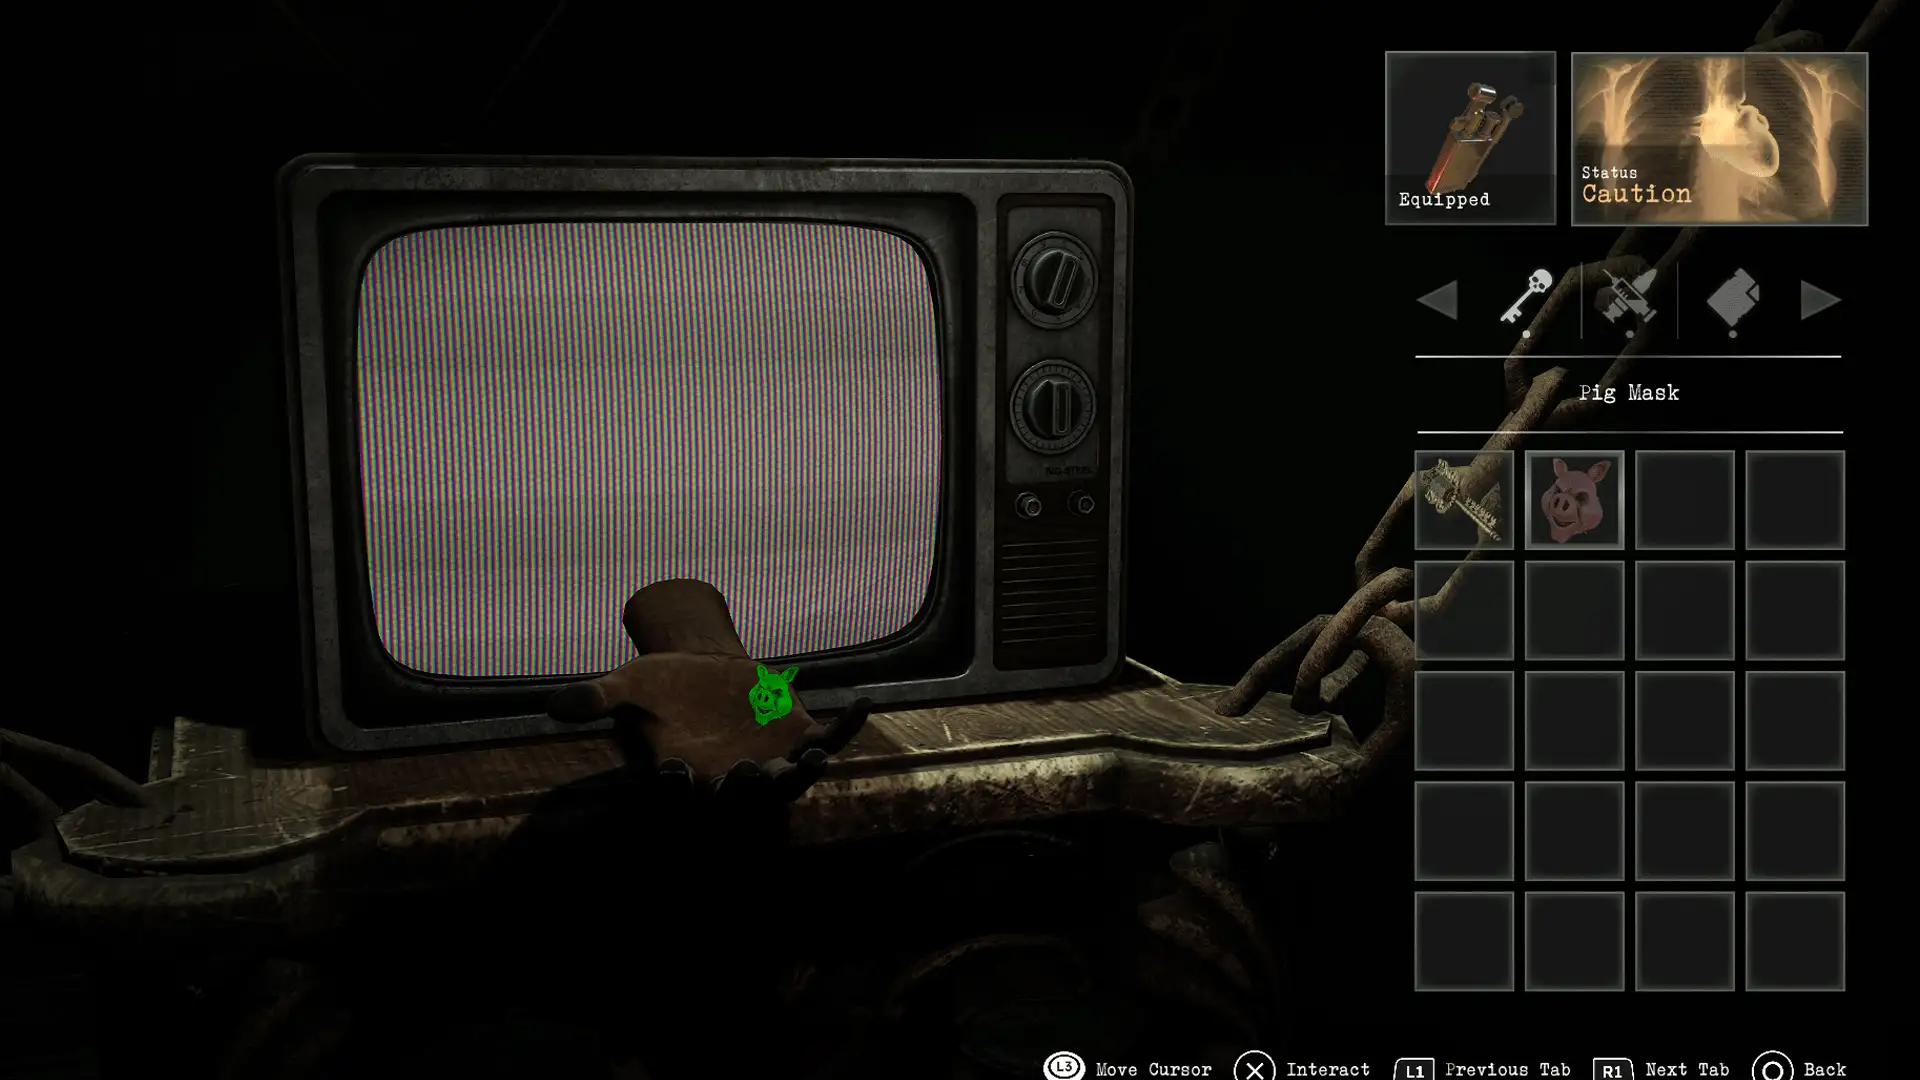
Cursed door / Janitor’s room TV
Location: School – Janitor’s Room
Items needed: Pig mask
Solution: To remove the curse on the School Lobby door, defeat the pig cook boss to obtain his mask. Give this mask to the hand reaching out from the TV in the Janitor’s Room
Notes: The pig boss battle takes place in the hidden room accessed via the Janitor’s Room
Refectory cracked wall (optional – GOOD ENDING)
Location: Convent – Refectory
Items needed: Sledge hammer
Solution: Once you return to the Convent after the Lucia tells you to meet her in the underground bunker, return to the refectory and use the Sledge Hammer on the broken wall
Notes: The sledge hammer is found in Joseph’s cave hdeout, connected to the rear commercial district
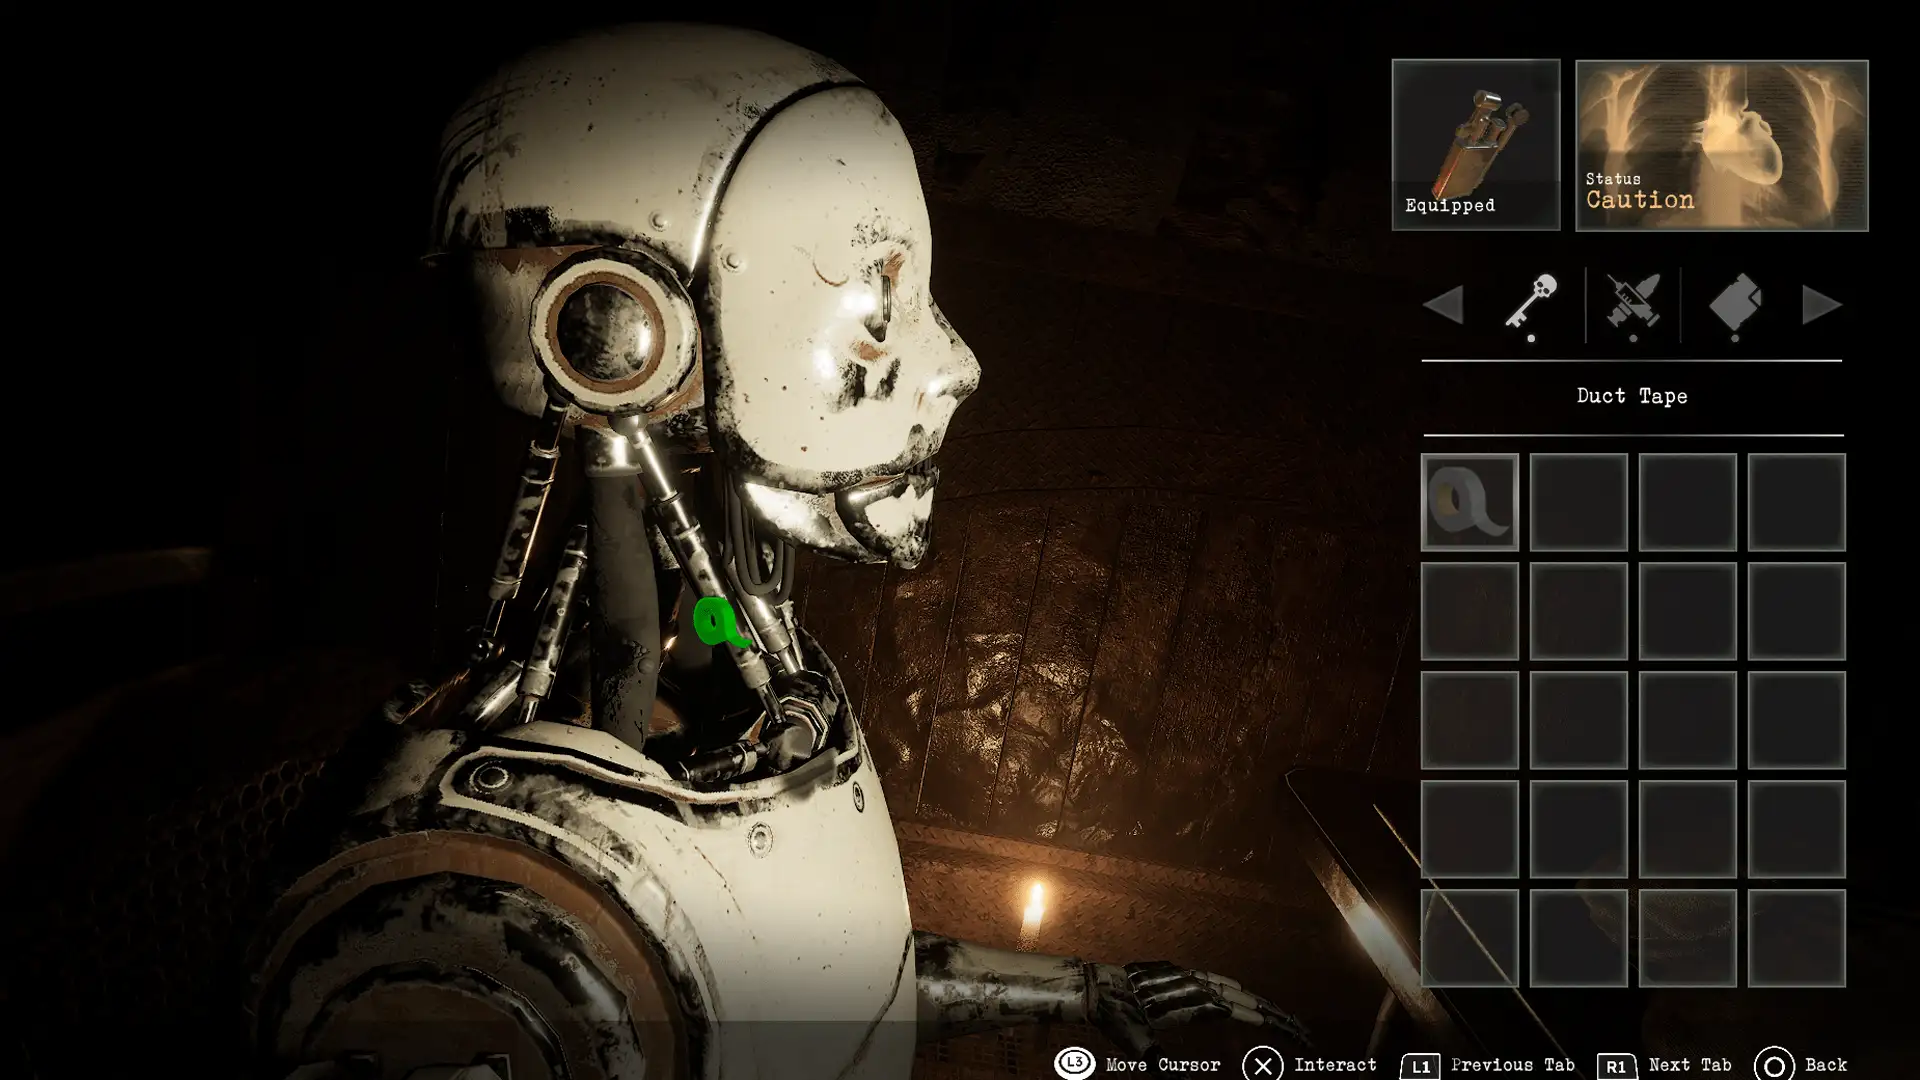
Save Miguel (optional – GOOD ENDING)
Location: School – Director’s Office (Other side)
Items needed: Sledge hammer – Duct tape
Solution: After obtaining the duct tape from the sleeping quarters in the Convent, go back to the other side director’s office and use the tape on the robot’s neck to save Miguel in the real world and unlock the game’s Good Ending
Notes: The duct tape is found towards the end of the game when you return to the convent, use the sledgehammer on the broken wall in the refectory and obtain the tape from the dormitories
Church entry gate
Location: Town – Commercial district
Items needed: Master key
Solution: Use the drawings on the floor near the gate as the hint for the key symbols:
Rose = Heart
Fighter = YinYang
3 wise men = Star

Elevator power
Location: Church – Church
Items needed: Rubber hose – Pliers
Solution: Use the rubber hose then the wire to connect the pipes. Use the pliers to tighten the wire and close the circuit

Mirror to other side
Location: Processing Church – Church
Items needed: Lighter
Solution: Use the paintings ‘Stations of the Cross’ found around the church that depict Jesus with the cross. Light all of the candles apart from candles that represent the paintings with the cross weighing him down:
0 X
X 0
0 X
X X
0 X
X X
X X
Eye door
Location: Church – Undercroft
Solution: Locate this area in the Other Side and turn off the candles. Stand infront of the eye and turn off the lighter / torch and stand in darkness until the eye lights up and the door opens to the bunker elevator
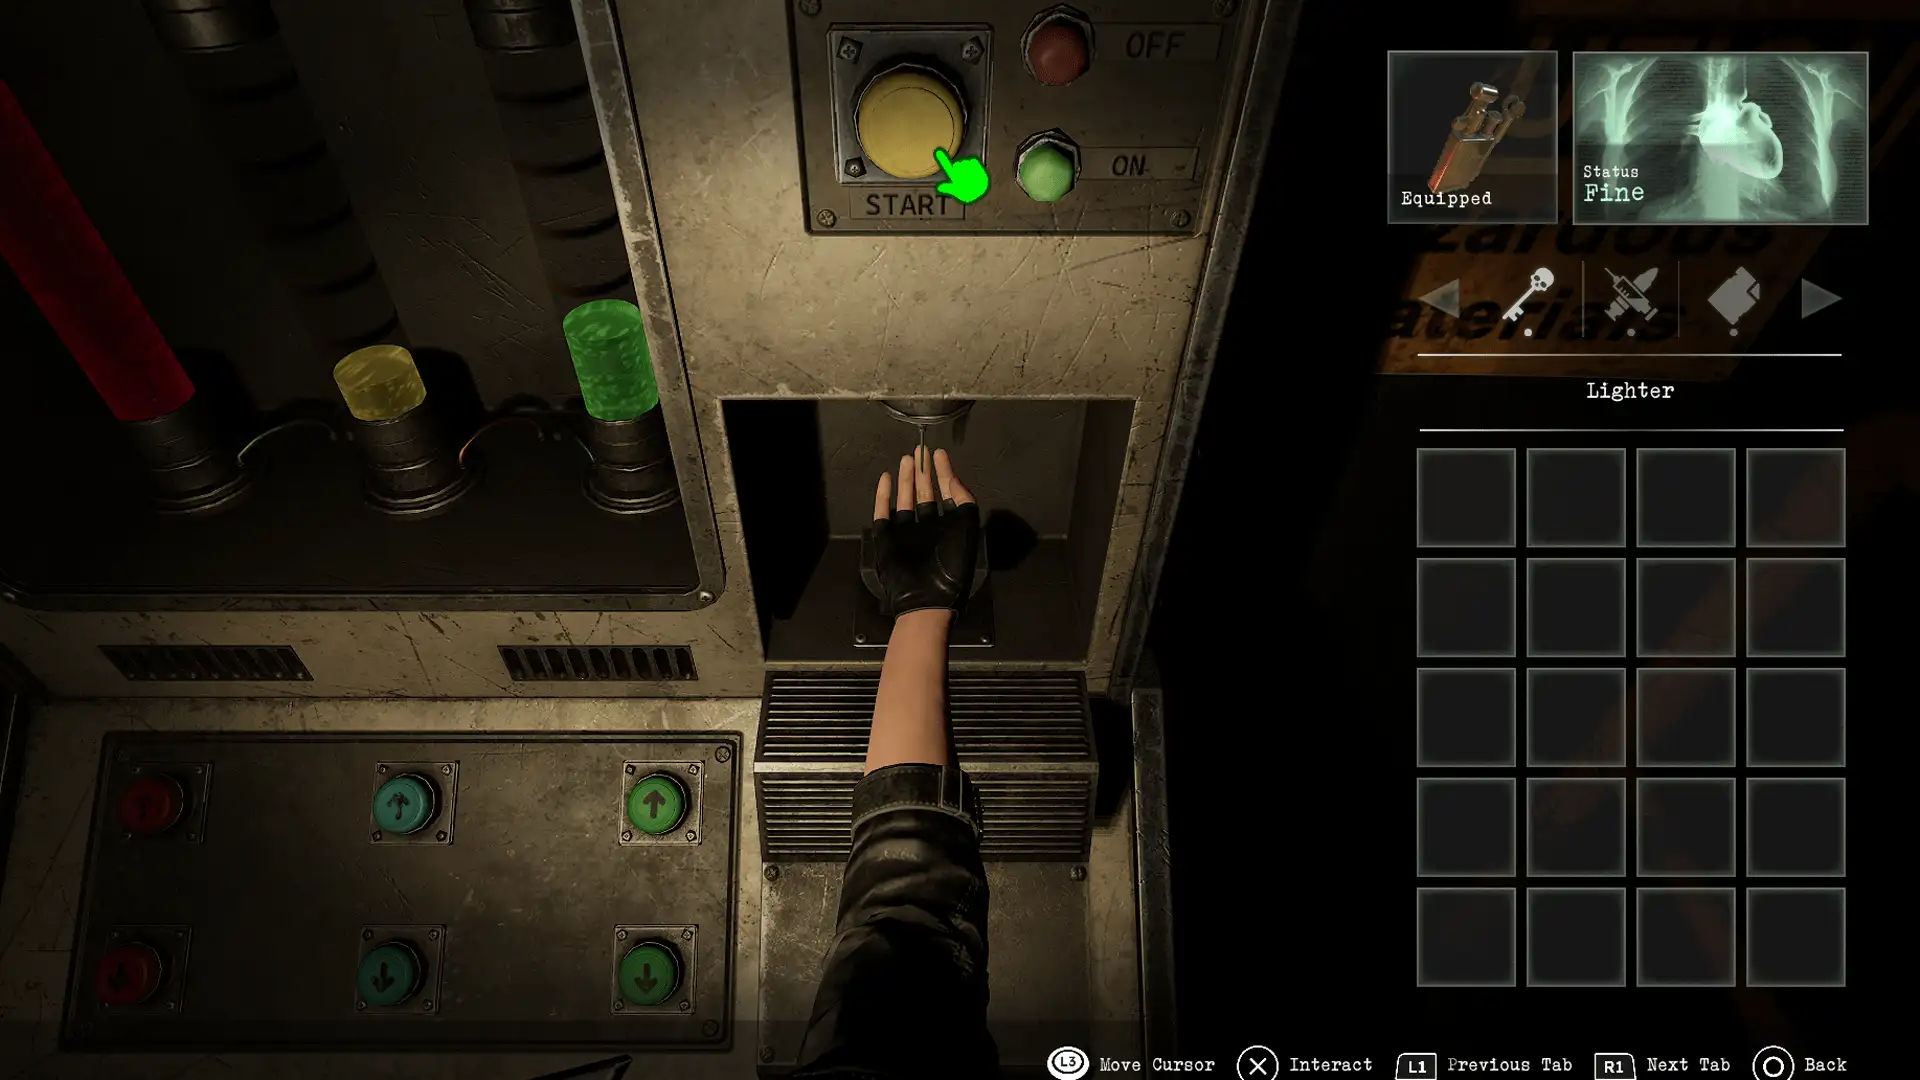
Puppet virus
Location: Bunker – Bunker Entrance
Solution: Add the necessary amounts of each tube to create the puppet virus and put Caroline’s hand under the needle to inject it
Red – 6
Yellow – 1
Green – 2
NOTE: Doing the wrong amount will cause an instant game over
Notes: The hint is found in Angelica’s notepad in the Bunker Office
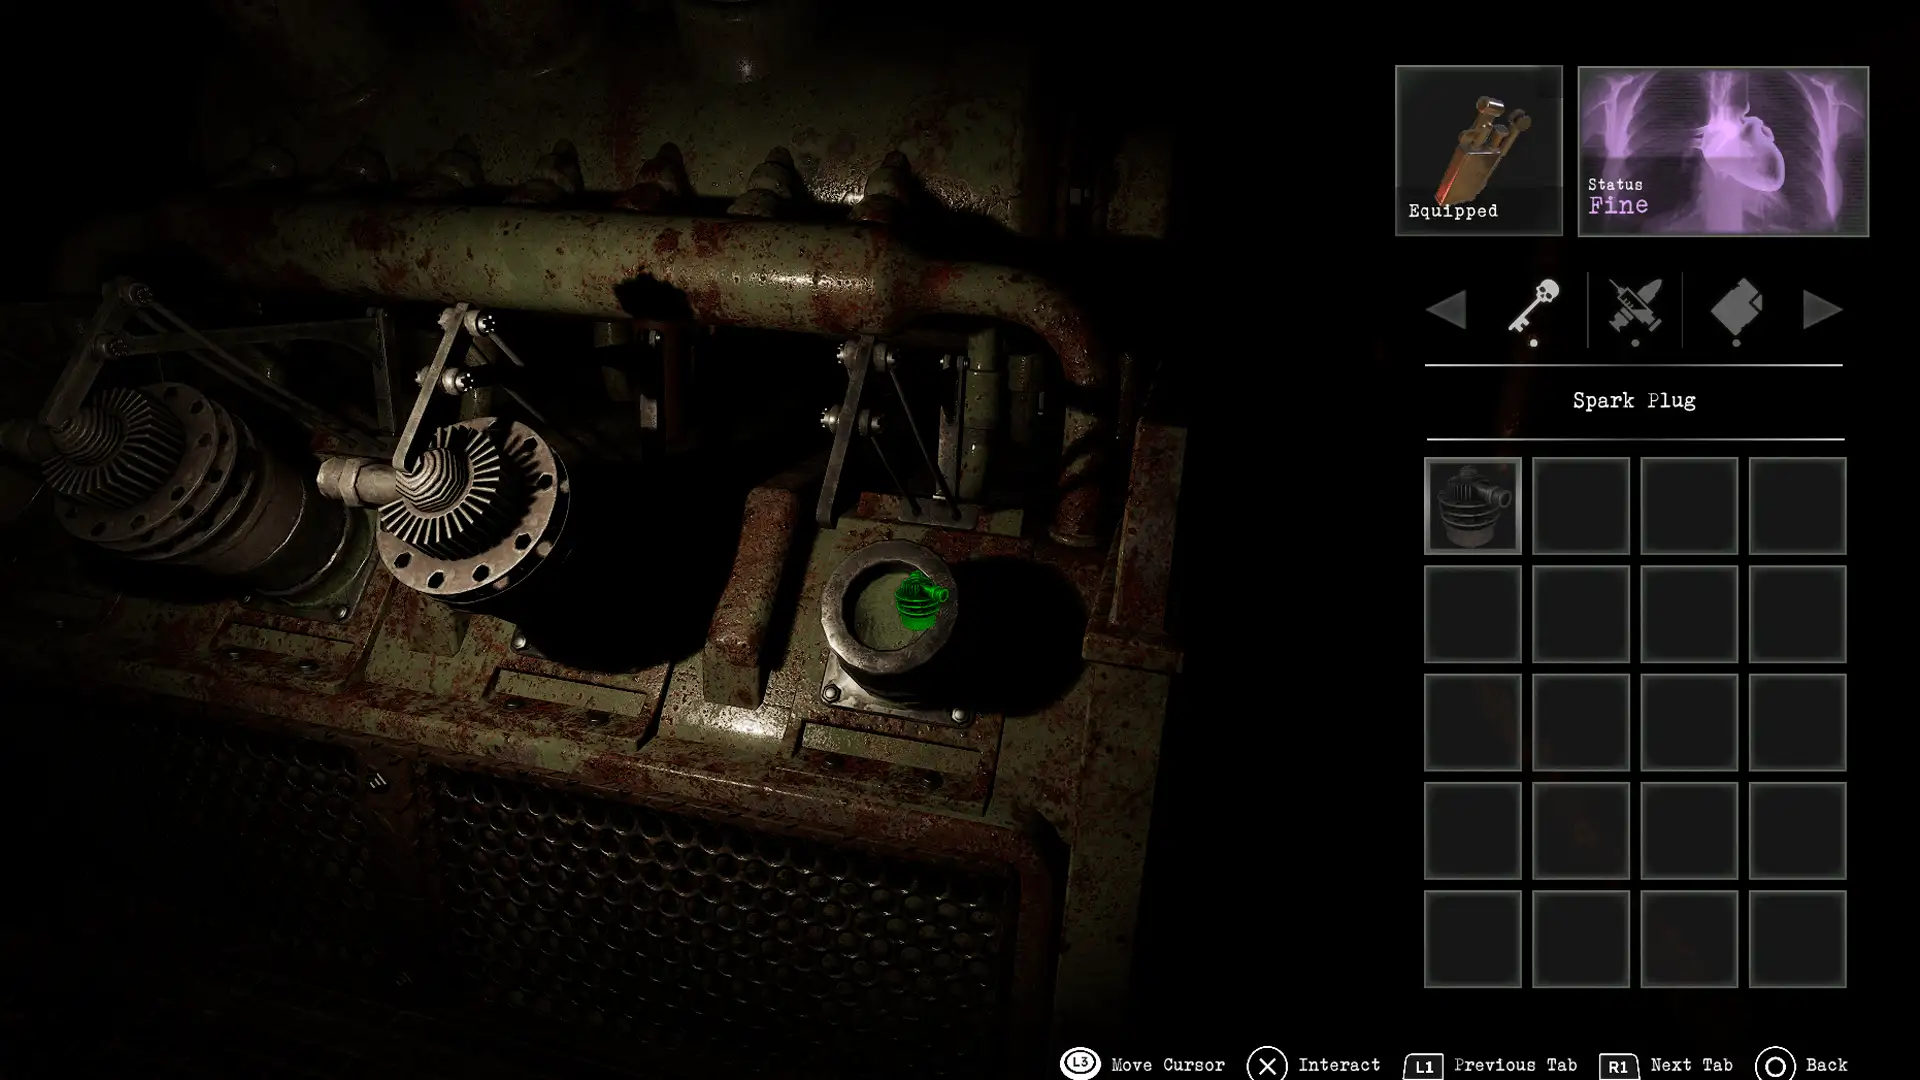
Generator power
Location: Bunker – Generator Room
Items needed: Spark plug
Solution: Insert the spark plug into the slot on the generator at the top of the ladder, go back down the ladder and flick the nearby switch, then use the lever last
Notes: The spark plug is found in the Bunker Elevator room.
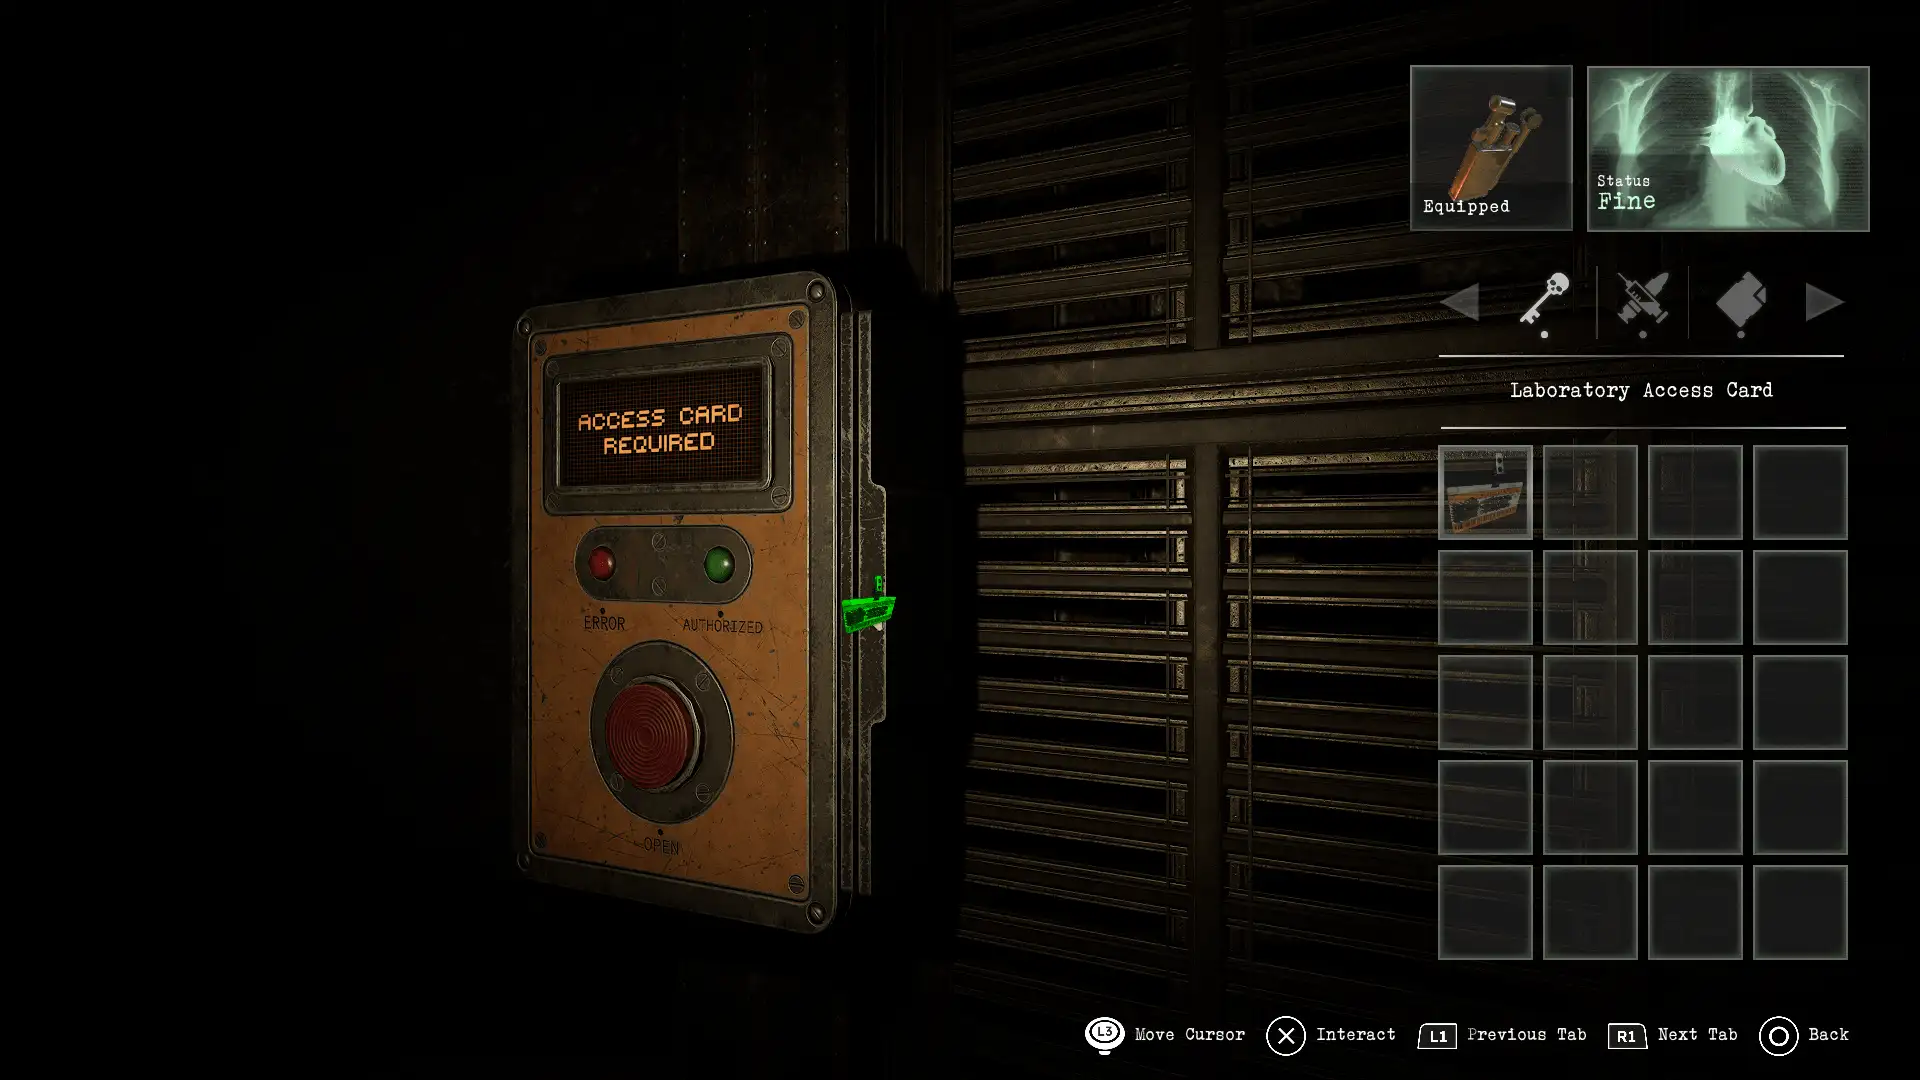
Keycard door
Location: Bunker – Rotunda Corridor
Items needed: Laboratory keycard
Solution: Go down to level B3 and find the keycard on a worker’s body in the Incinerator room
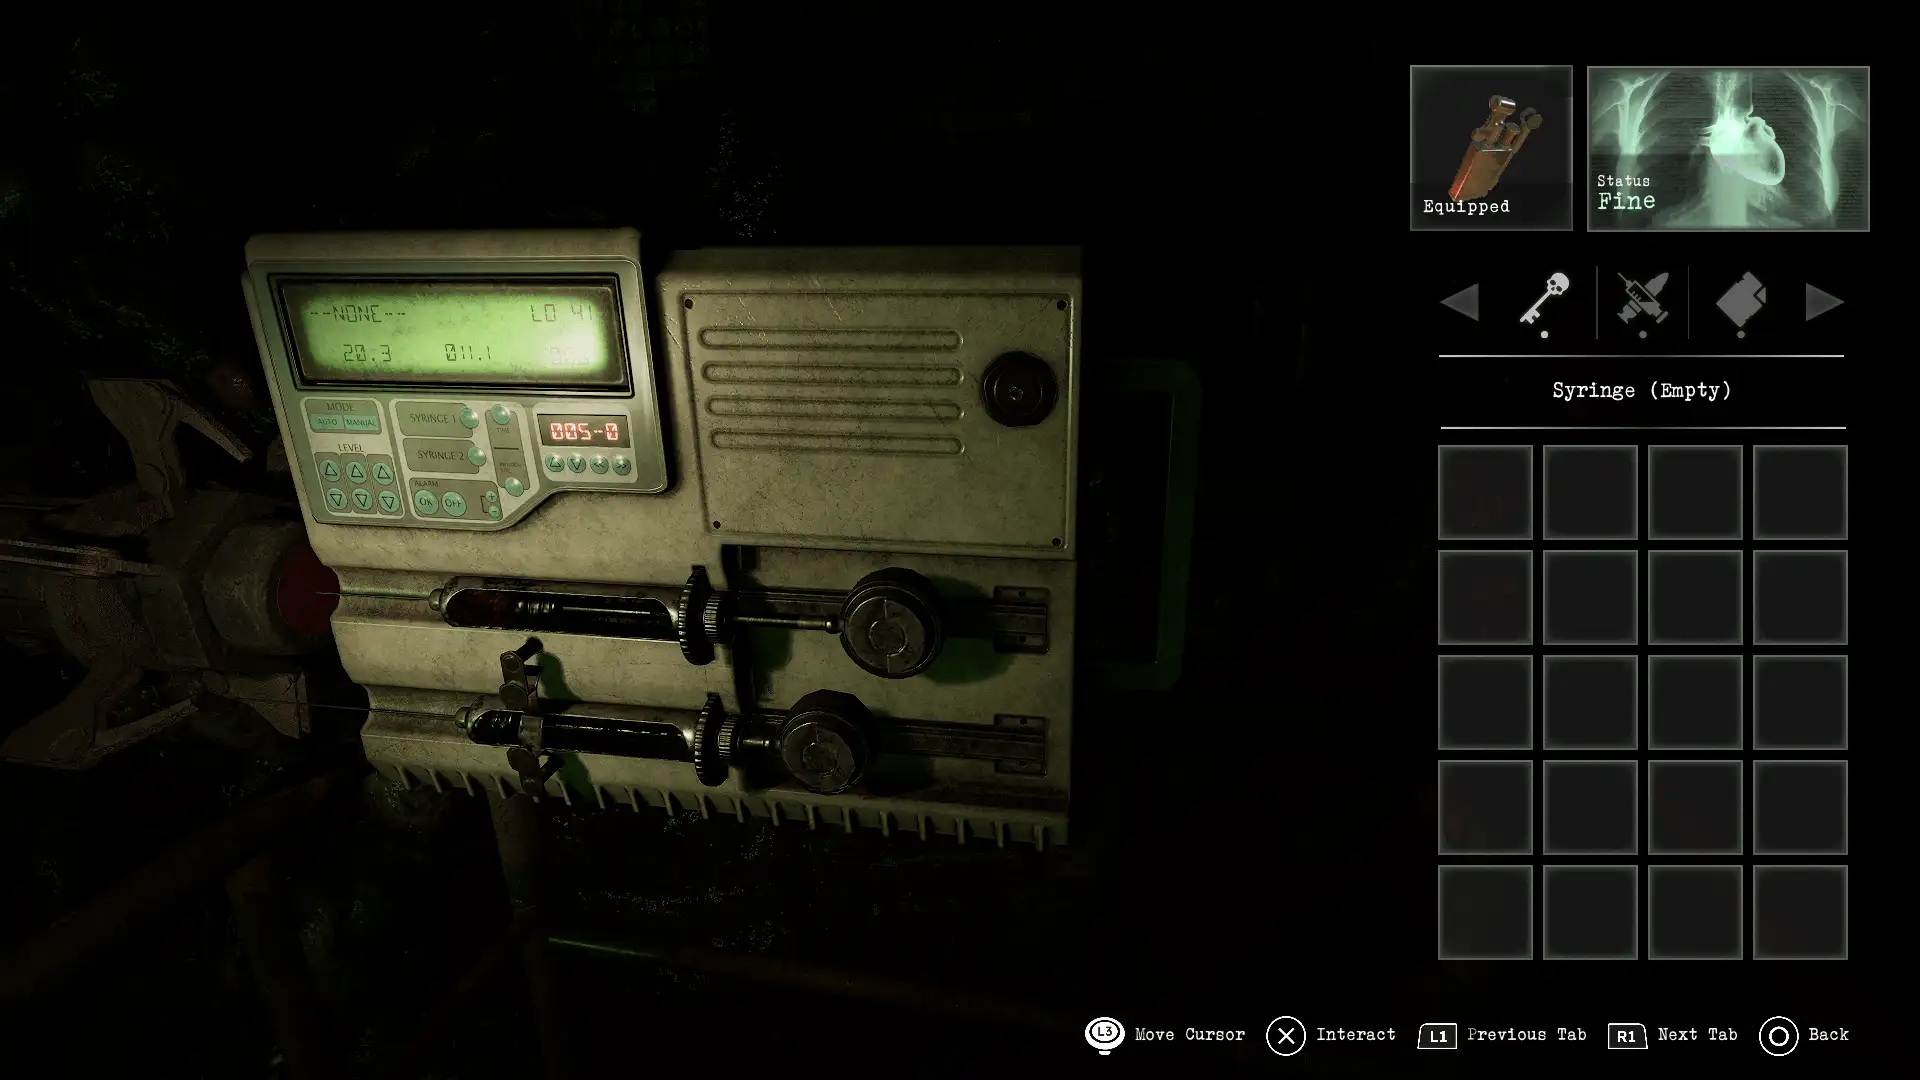
Filled syringe
Location: Bunker – Subject Containment
Items needed: Empty syringe
Solution: Obtain the syringe from the Containment Ward, then add it to the empty slot to the right of the mutation in the Subject Containment to fill it with liquid
Projector to Past
Location: Bunker – Containment Ward
Solution: Use the VHS tape in the projector to go into the past, then use the syringe on the bag next to Caroline’s body in the tank to reverse the puppet virus
Notes: The tape is found in the Laboratory on B2
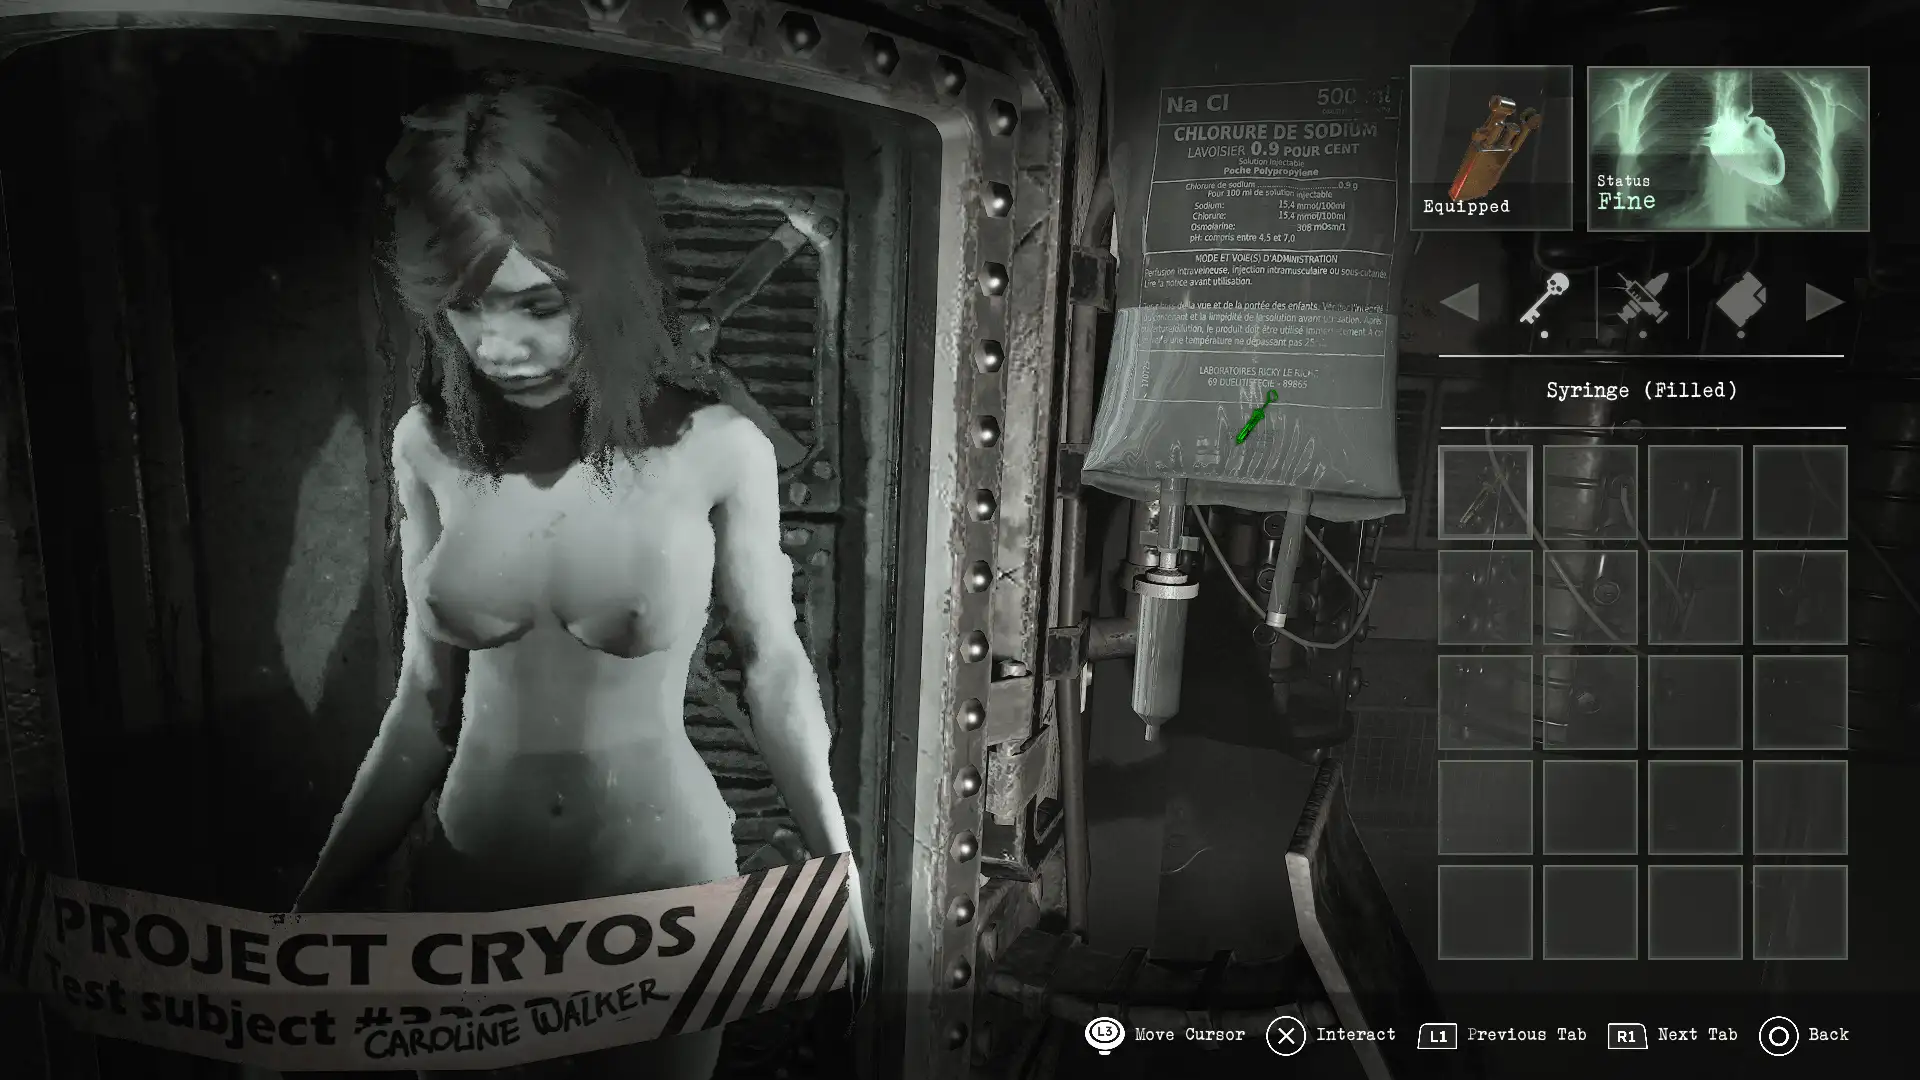
Curing the virus
Location: Bunker – Laboratory (Past)
Items needed: Filled syringe
Solution: Locate Caroline in the cryochamber and use the syringe on the IV bag next to her. This will cure Caroline’s puppet virus in the present
Thanks for reading!
If you are still stuck or just want to talk about Tormented Souls 2 or any survival horror game visit our Discord group: https://discord.gg/sYeGmnzSr5